# Pivot data

Business reporting and analysis often involve pivoting data and interchanging the order of row dimensions.

Under the 'Pivot' option, Plan allows you to **reorder, show, or hide specific row dimensions.** This option allows you to create aggregated tables or views within the planning sheet, with different combinations of row dimensions.

There is also a Pivot Explorer, which, when enabled, retains all your pivot views so you can easily switch between them for analysis.

## 1. Create a Pivot View

Creating pivot views inside your planning sheets is a simple, straightforward process outlined below:

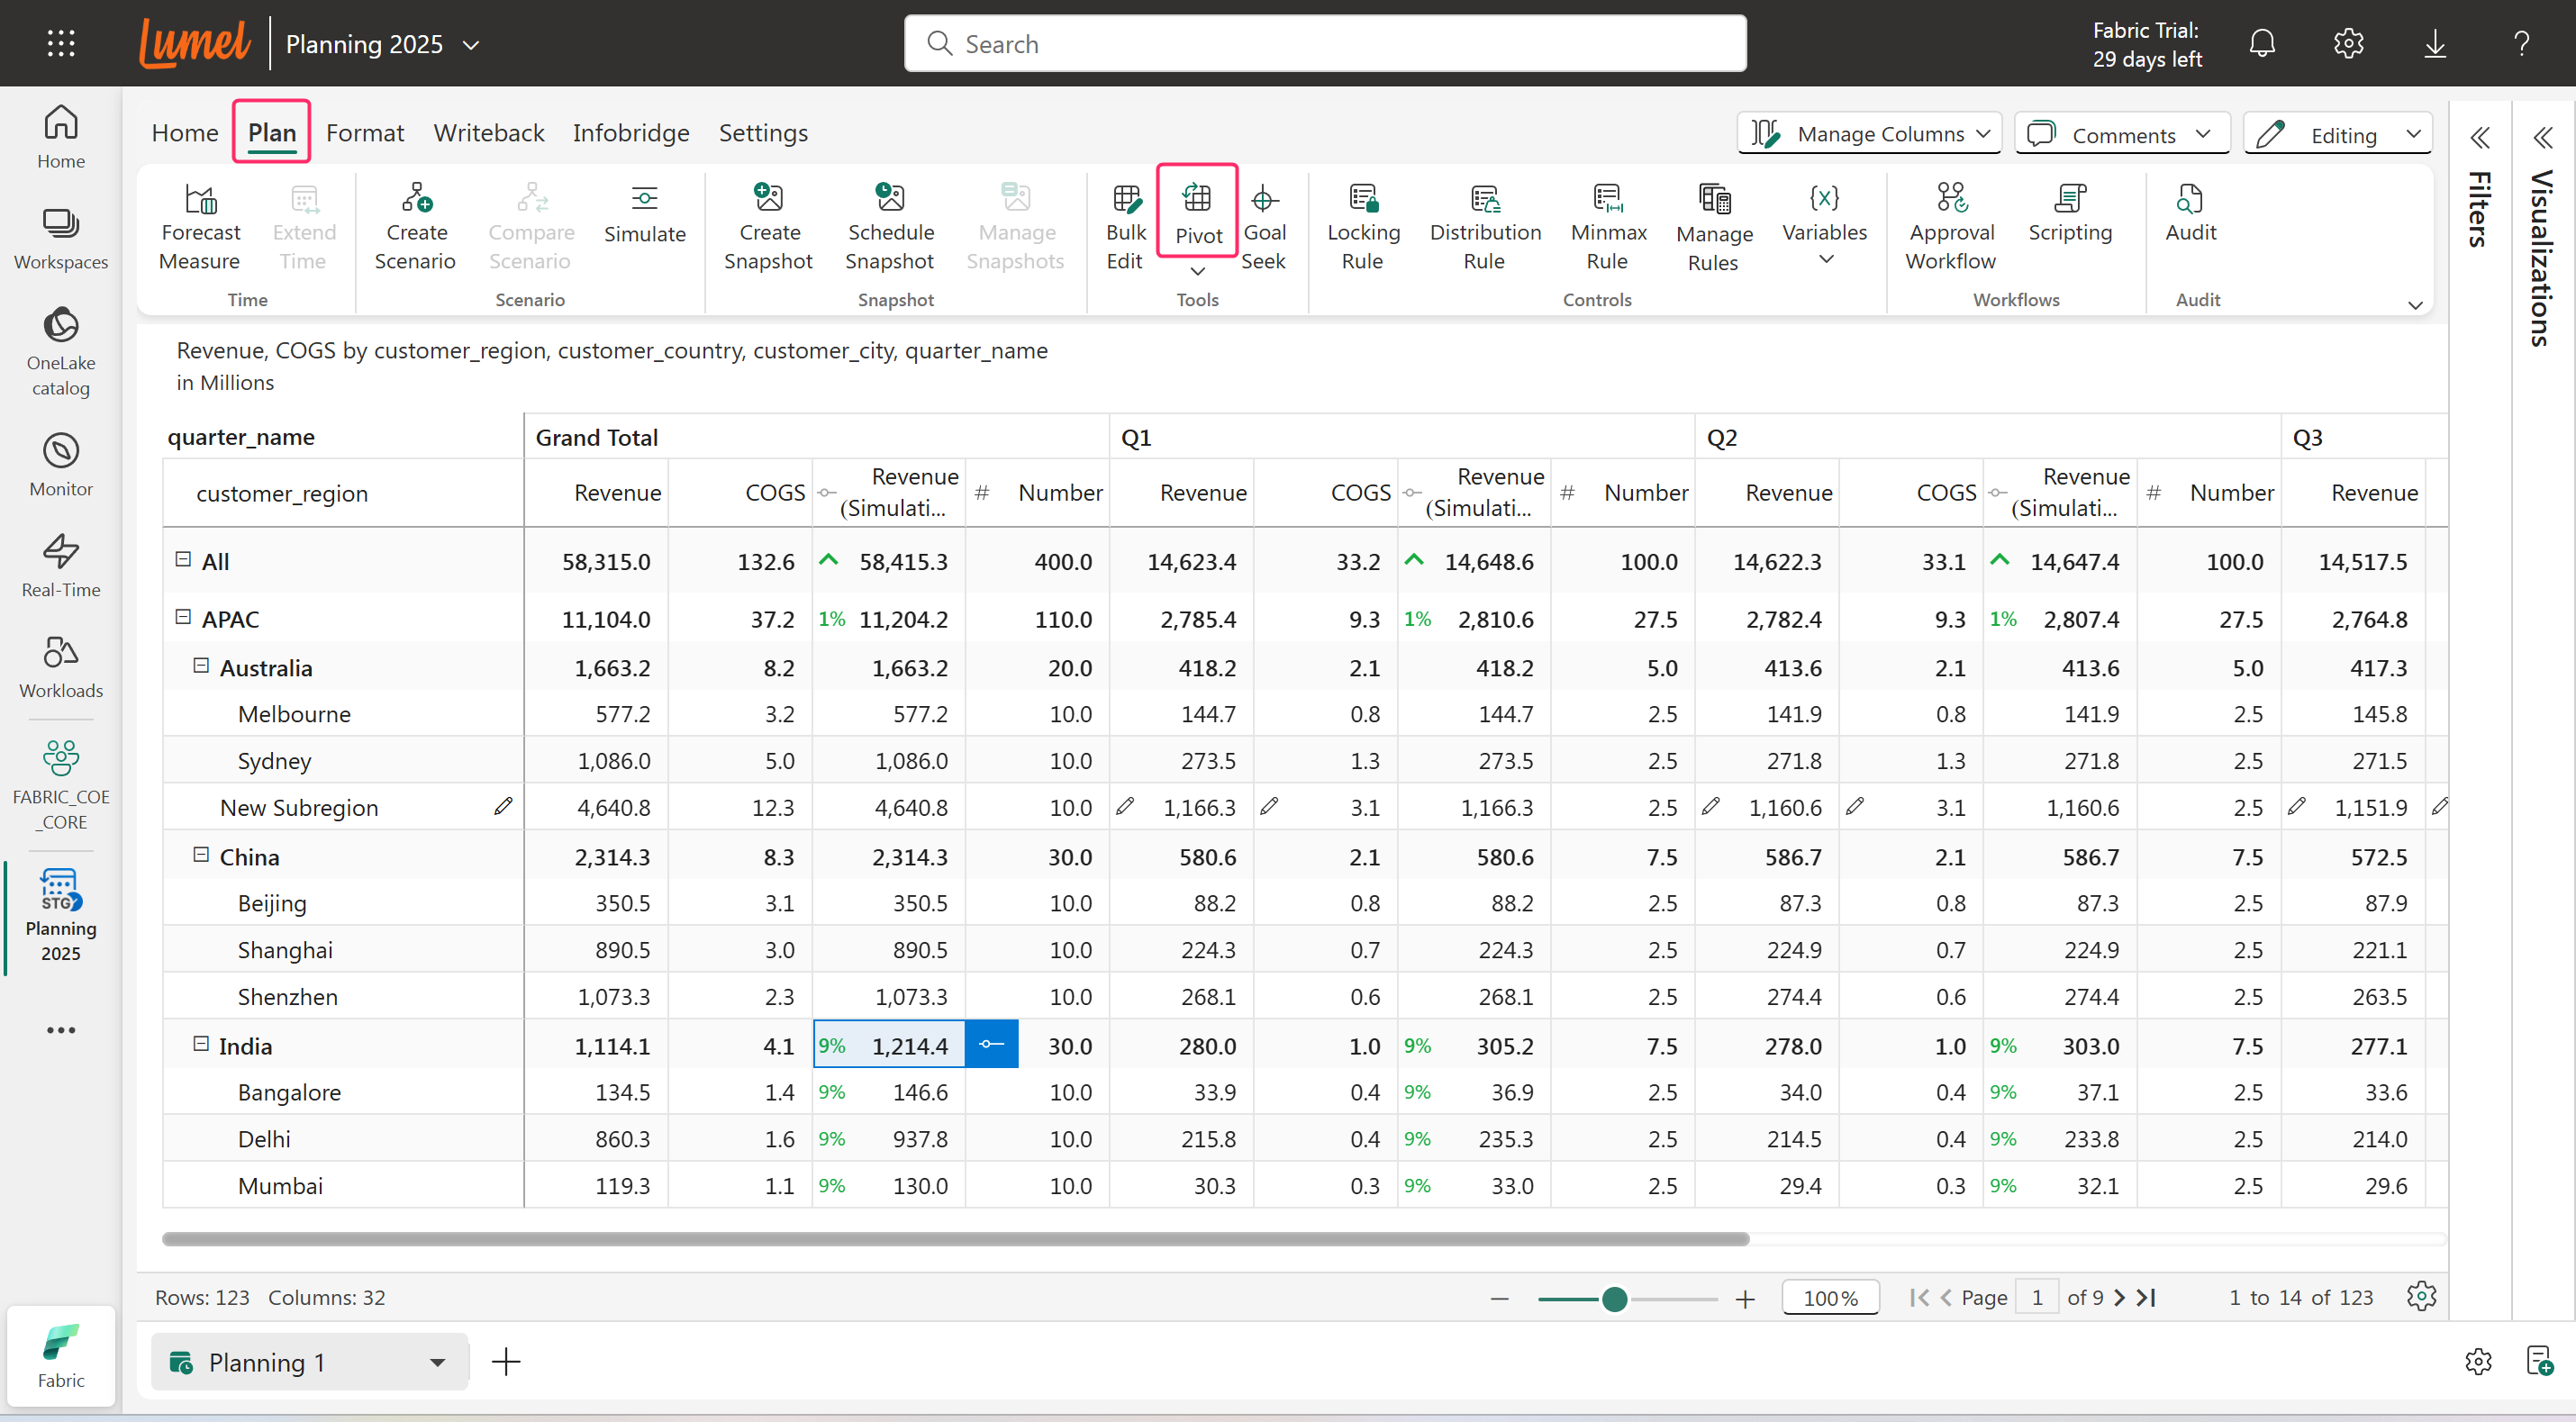
**STEP 1:** Click **Plan > Pivot.**

<figure><img src="/files/ynqC0bDB8Hg3n03PwJyX" alt=""><figcaption><p>Click on 'Pivot'</p></figcaption></figure>

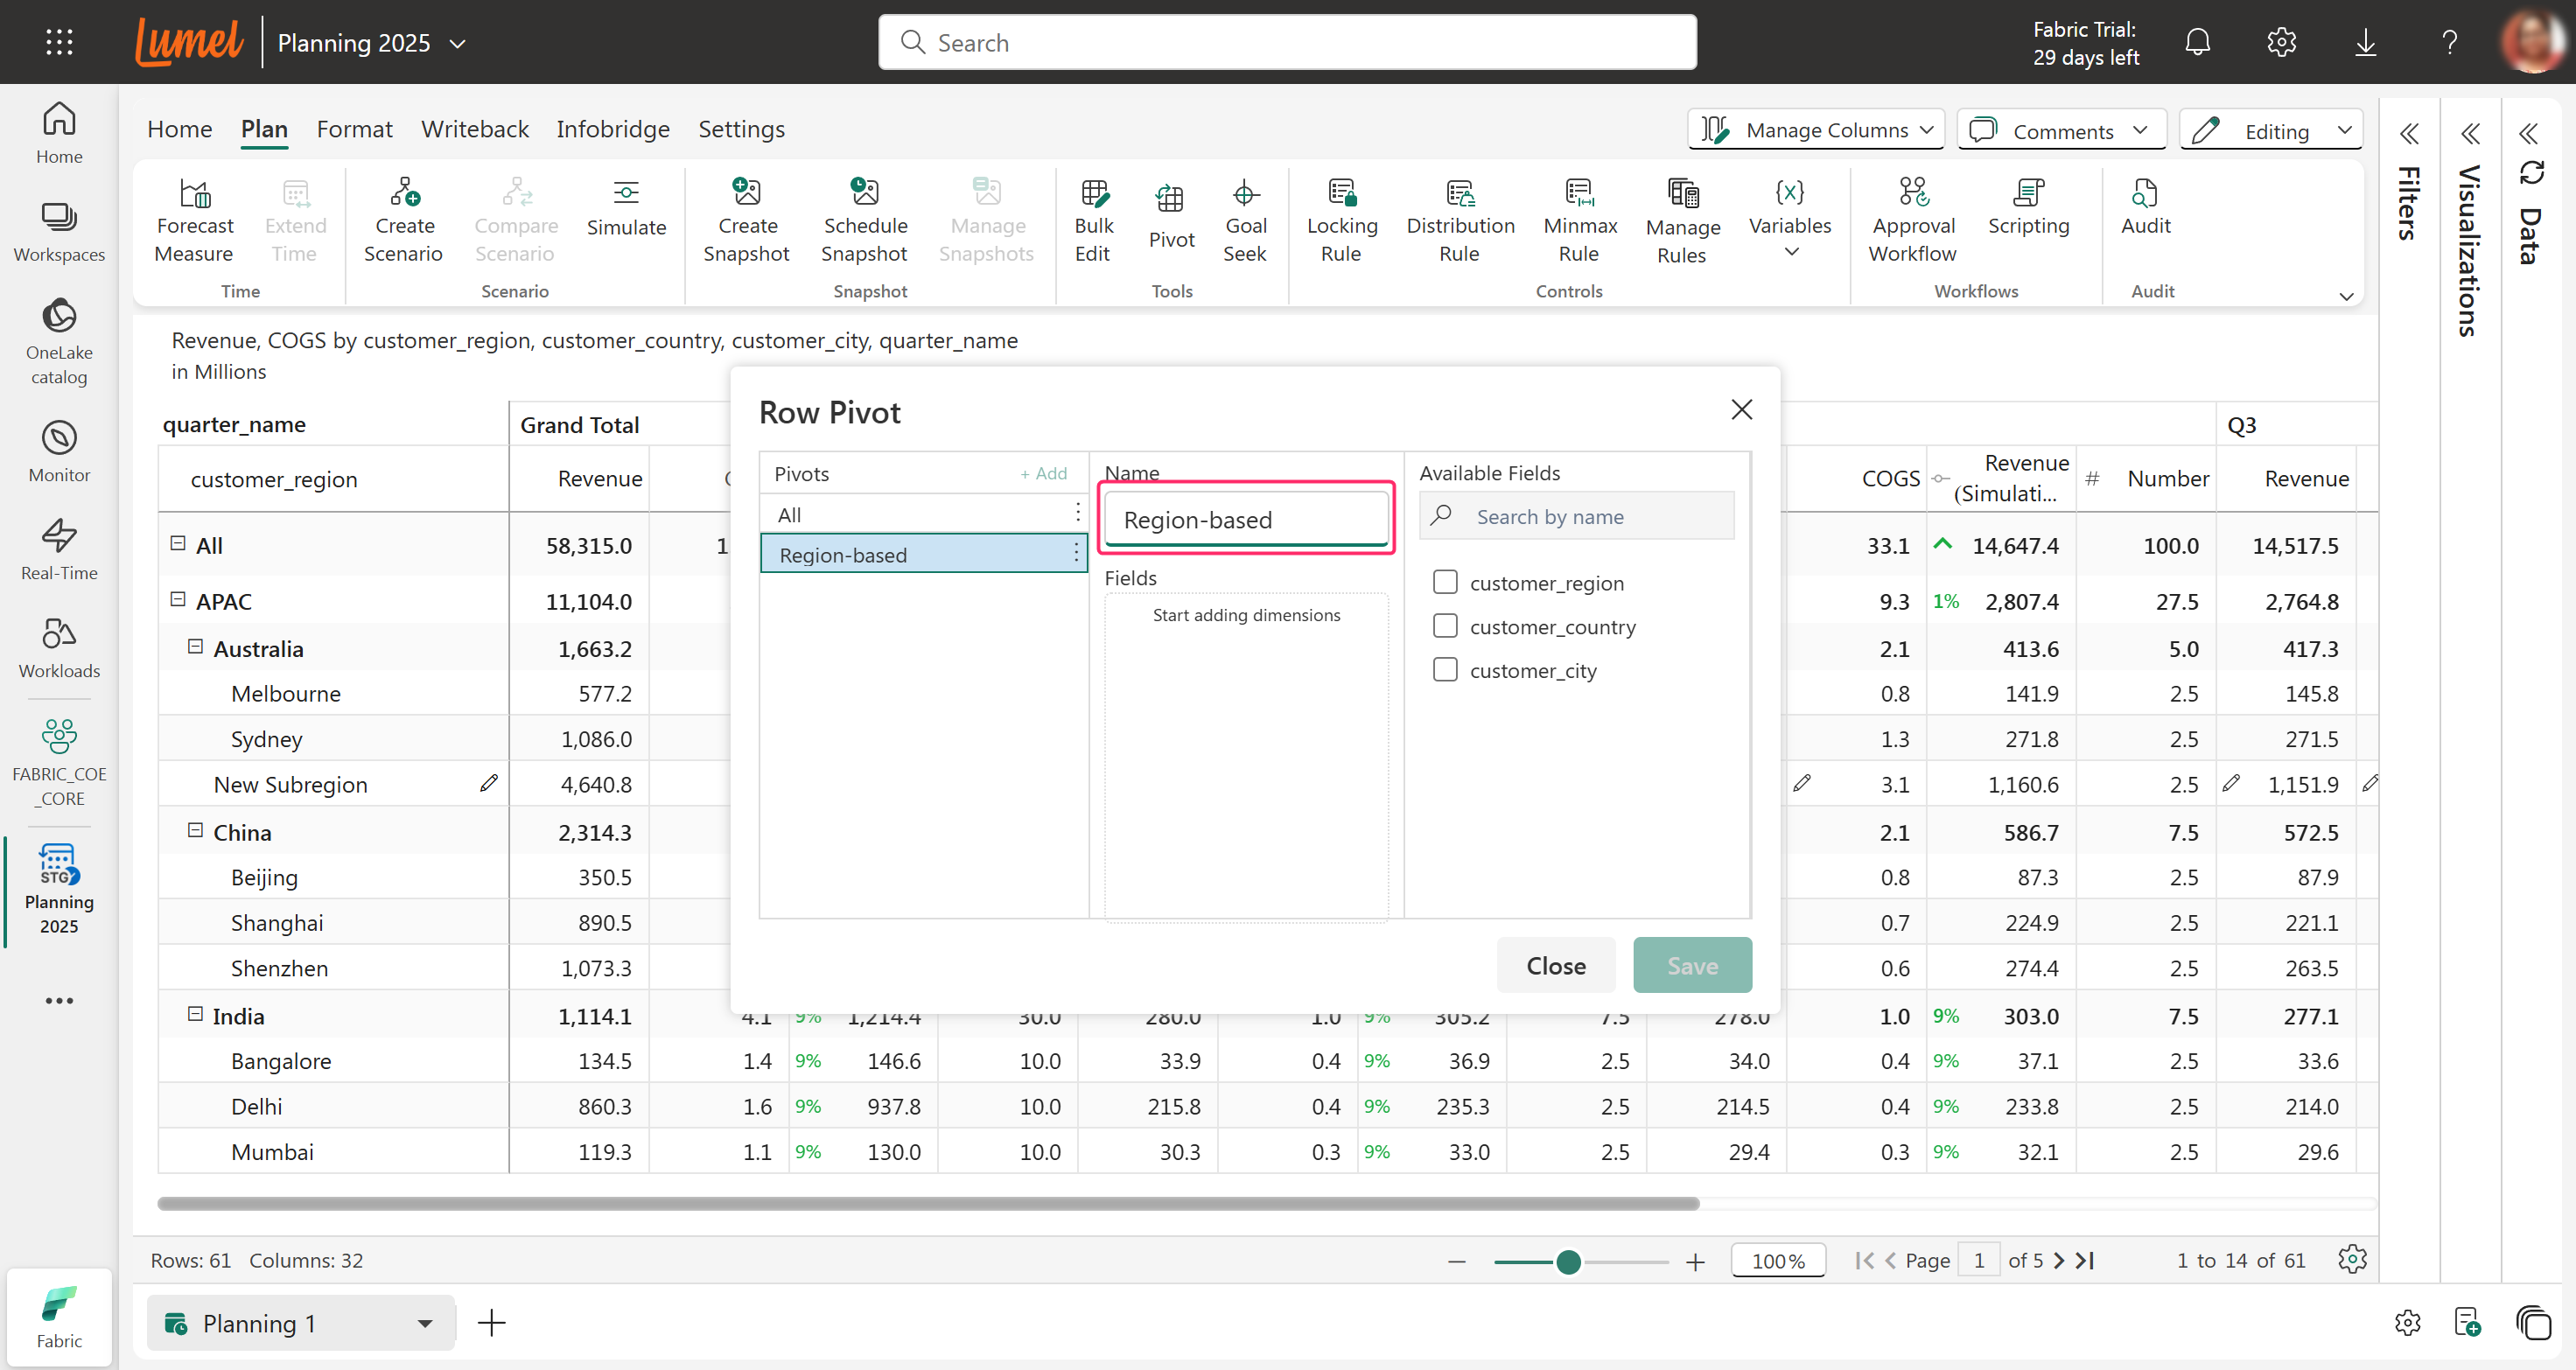
**STEP 2:** Enter a relevant name for the pivot view.

<figure><img src="/files/5iNhuVGeiL8prjR7Ju91" alt=""><figcaption><p>Pivot view name</p></figcaption></figure>

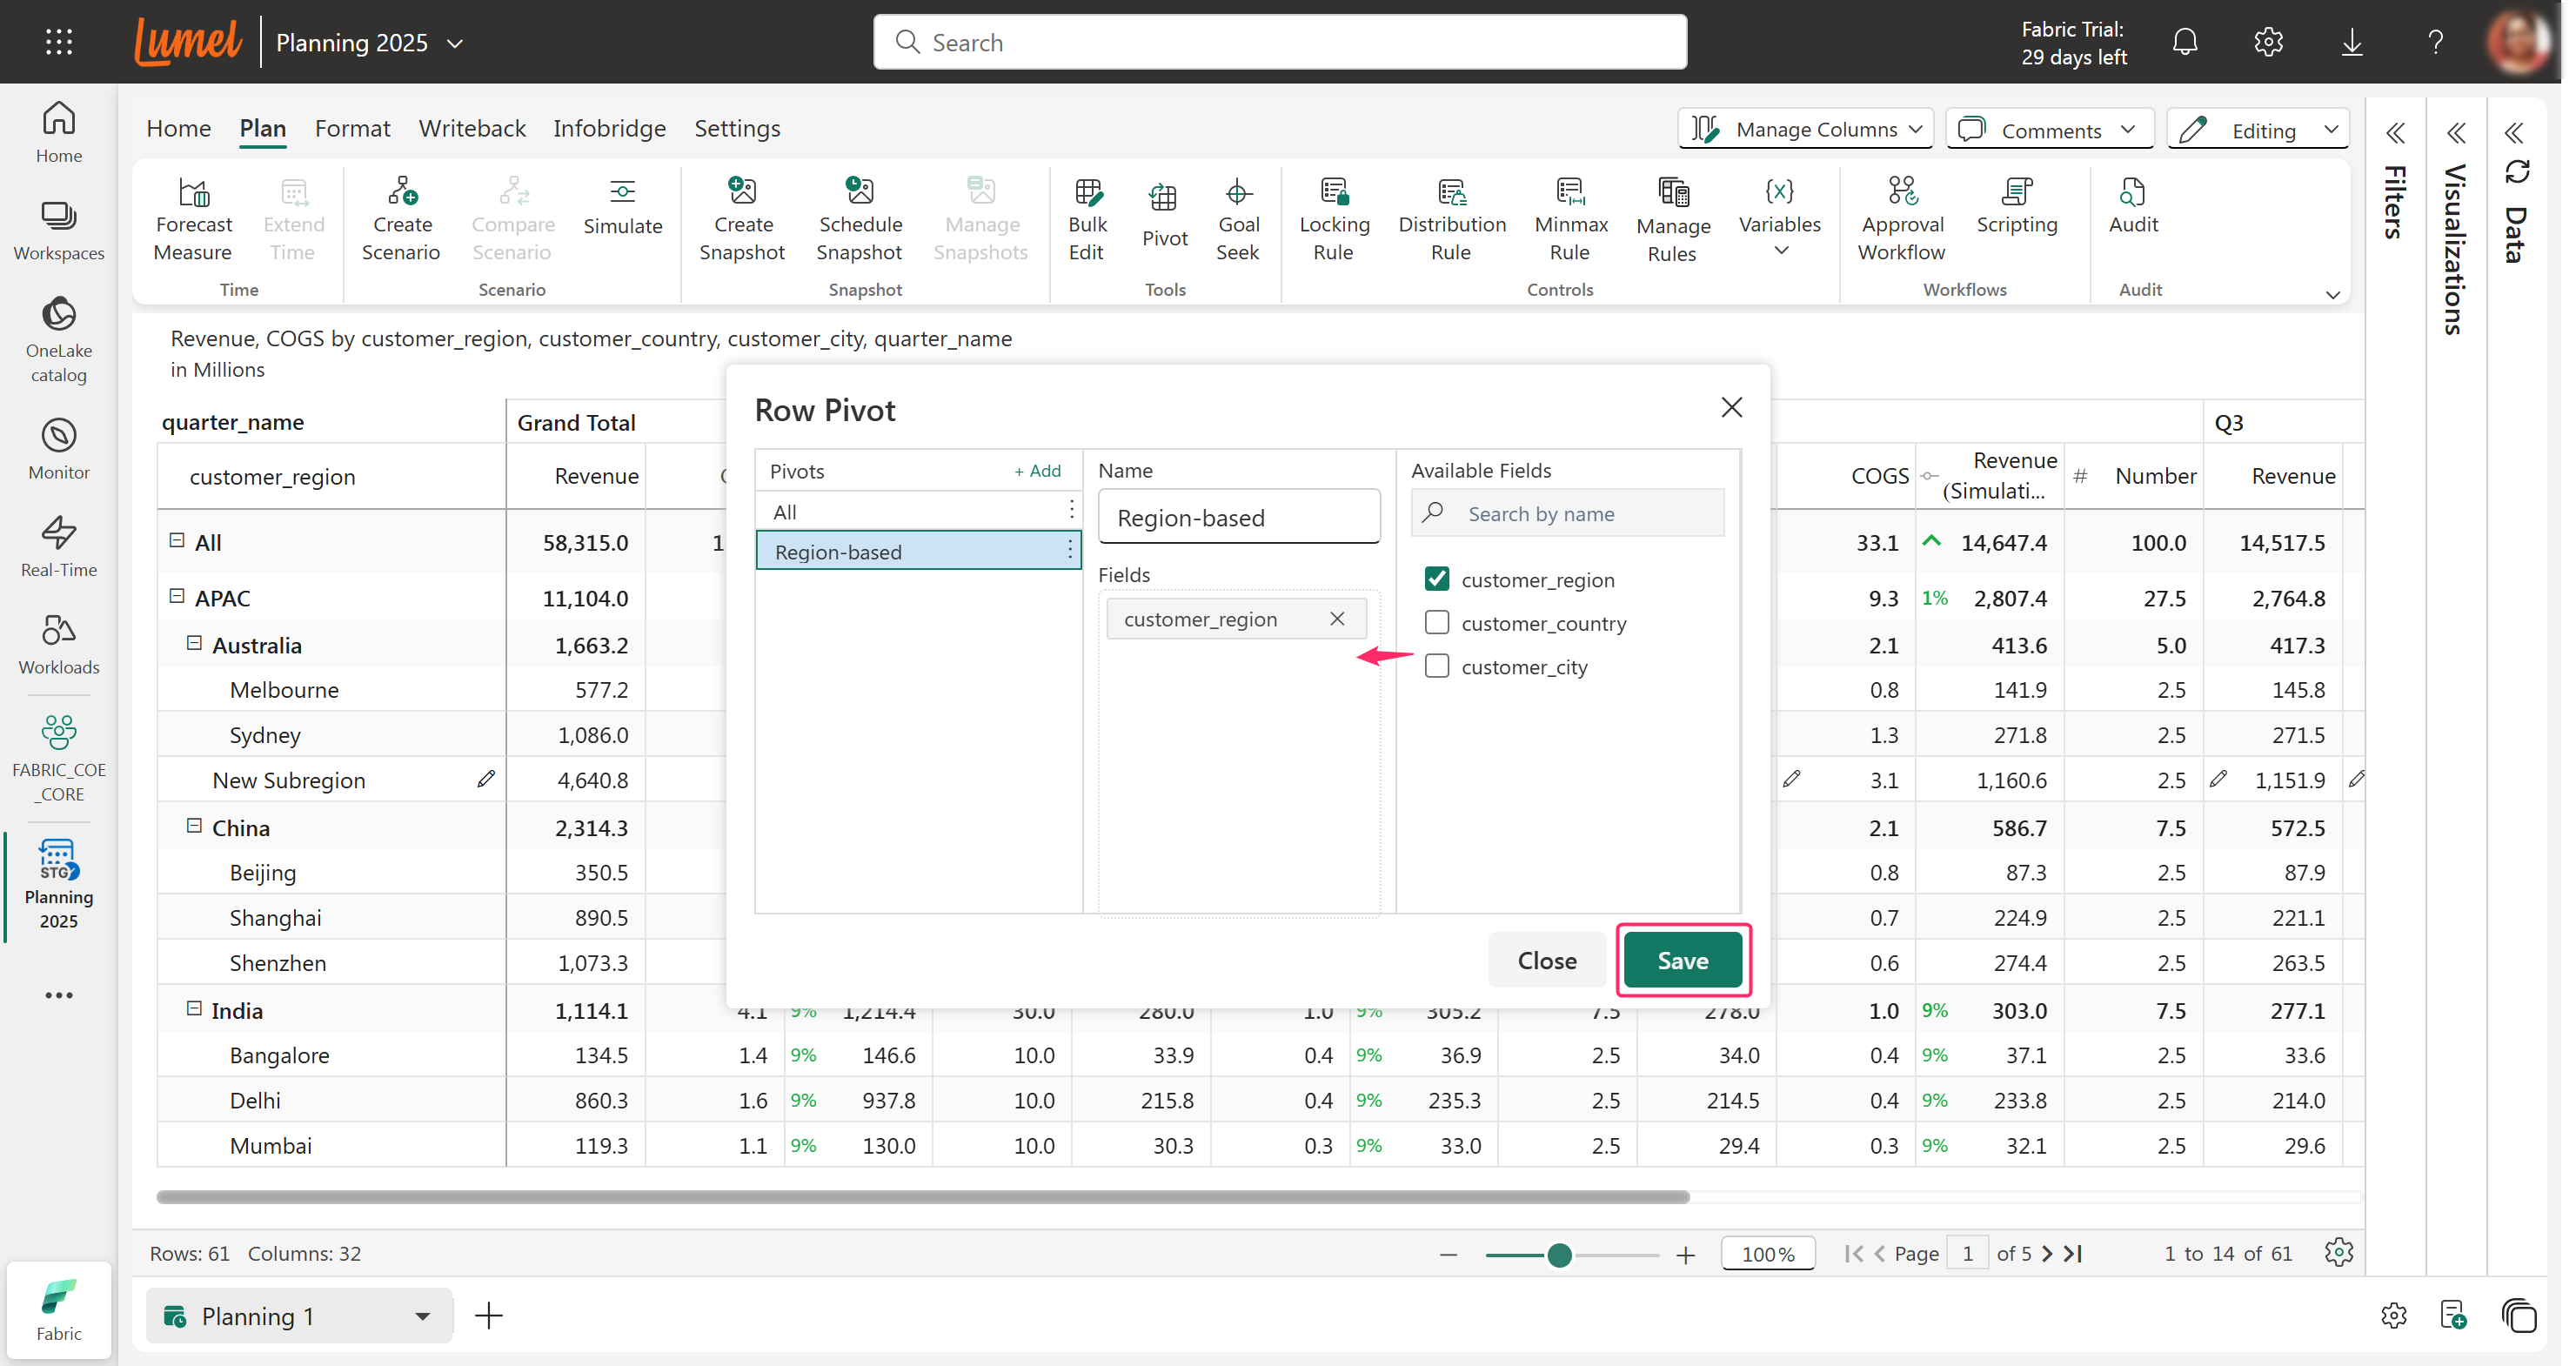
**STEP 3:** Add required row dimensions by selecting the checkboxes. Click **Save**.

<figure><img src="/files/YNWEMr7M7DKsx01ILO2S" alt=""><figcaption><p>Add row dimensions to pivot view</p></figcaption></figure>

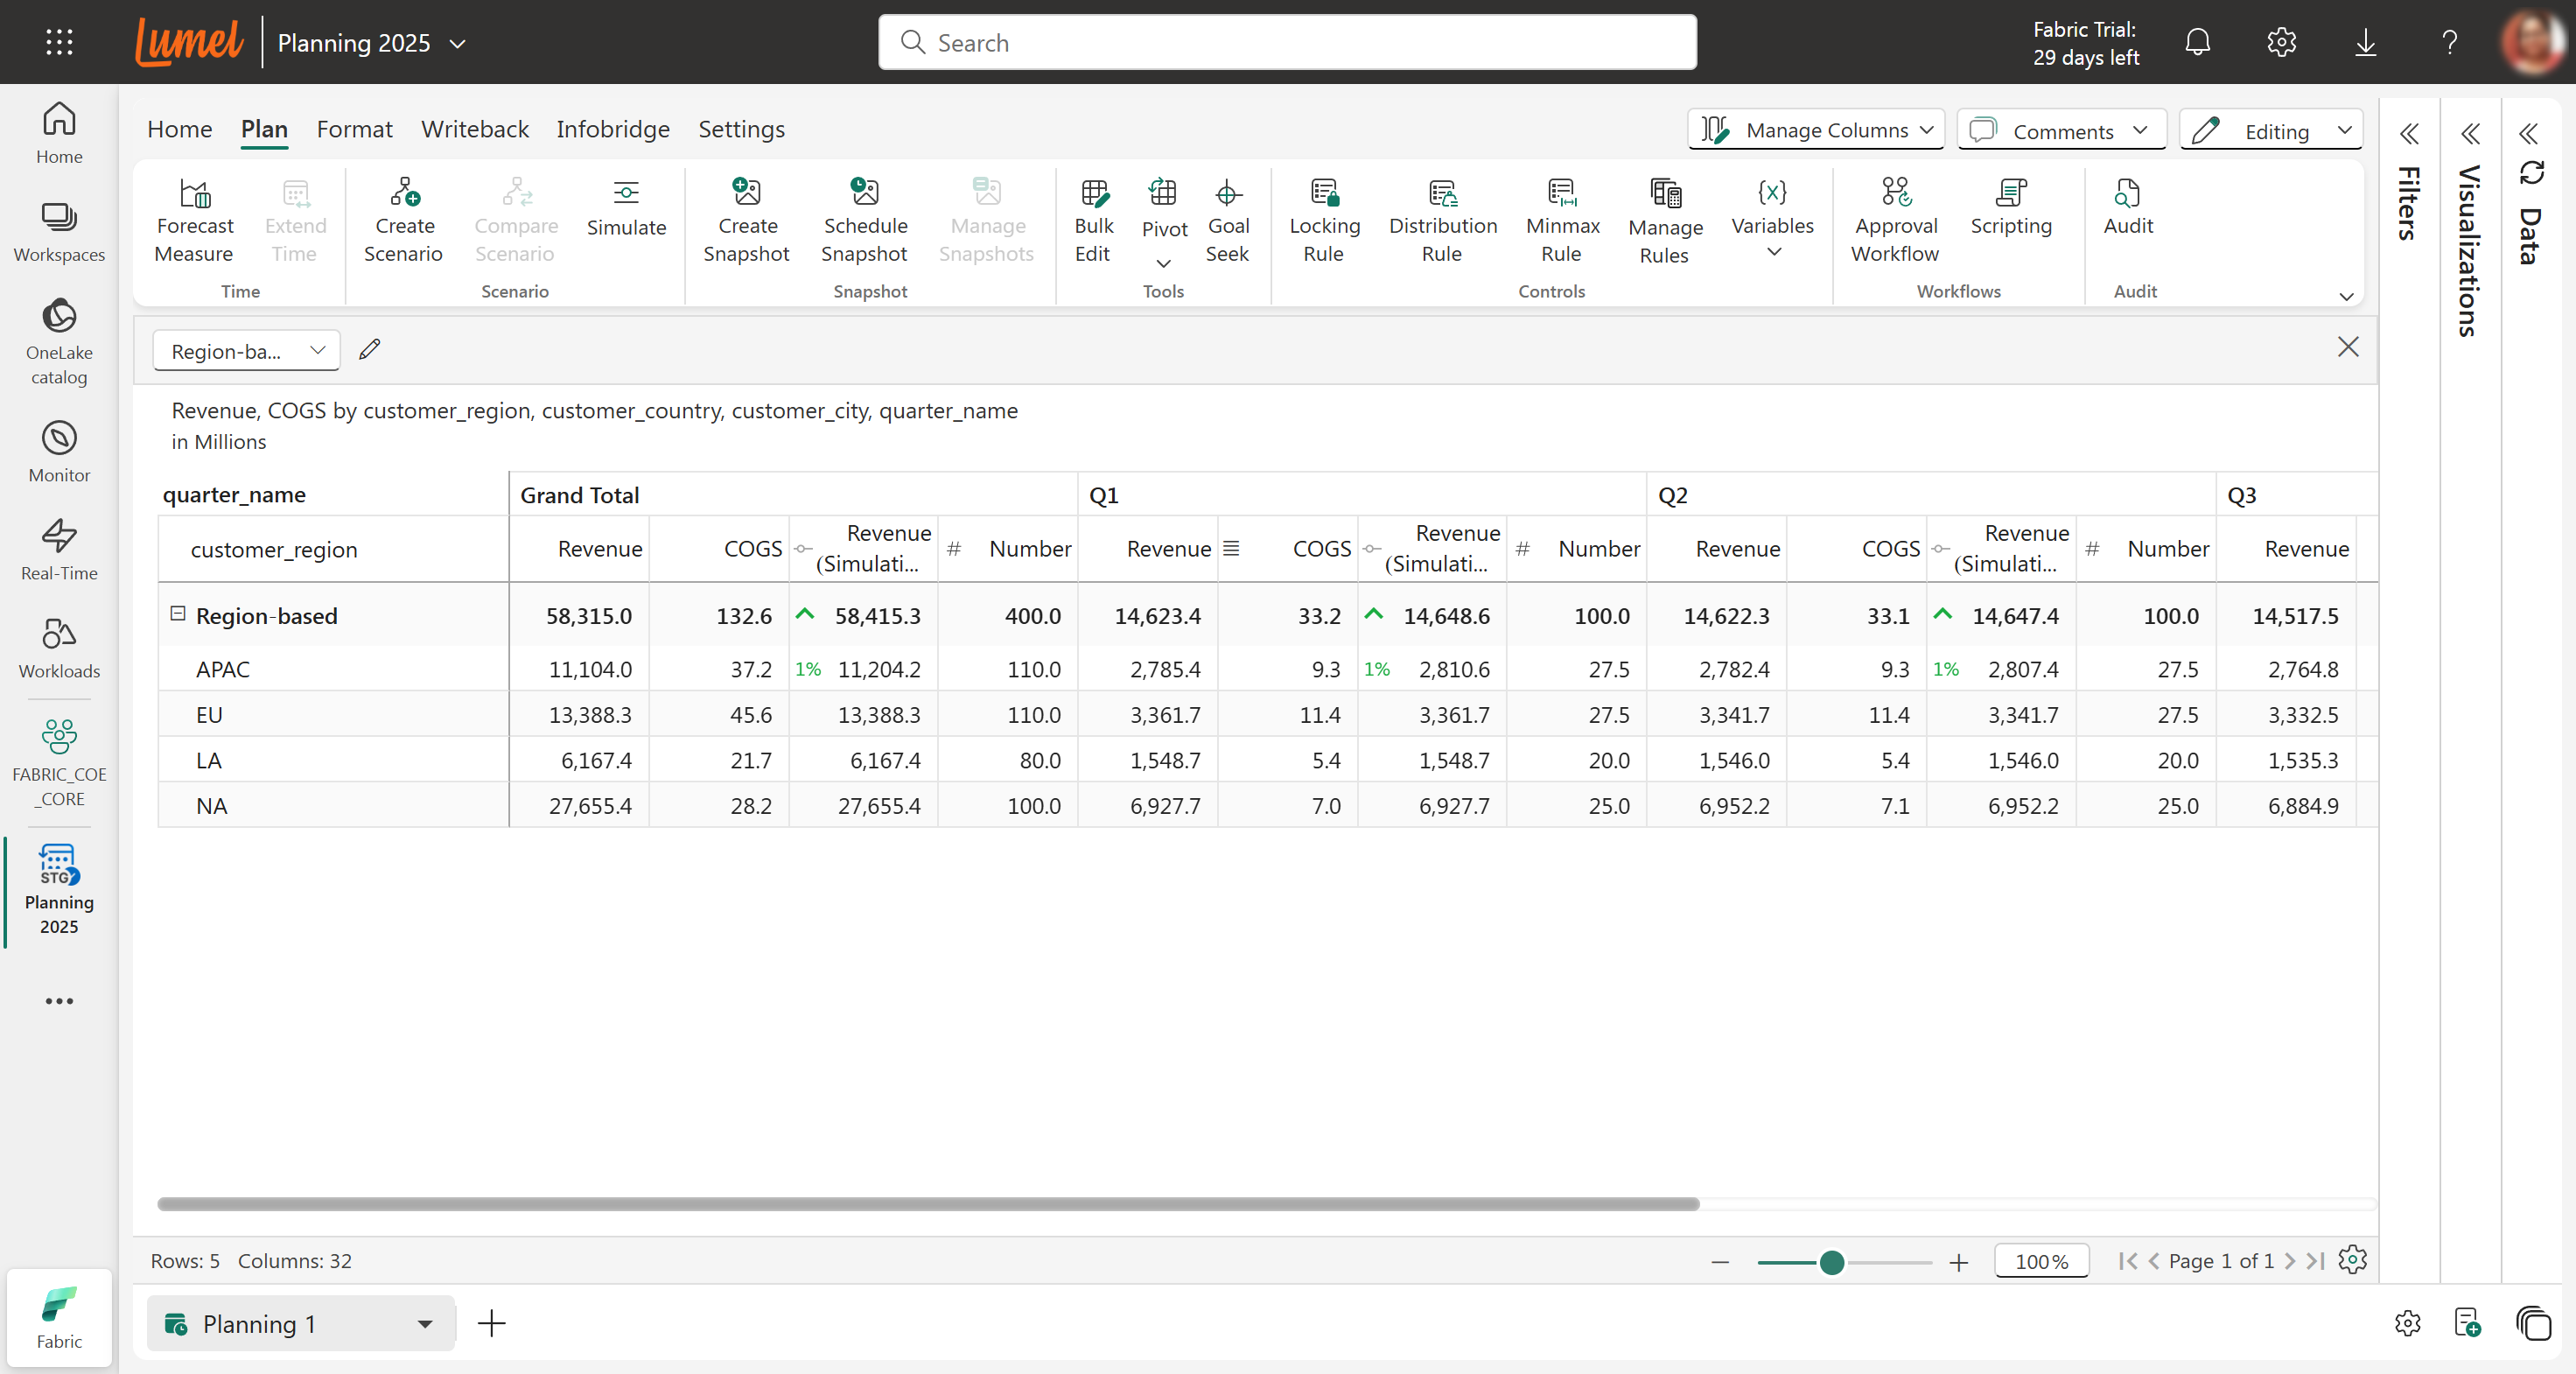
The required pivot view is created, as shown below, with all data aggregated by region.

<figure><img src="/files/lmo0wkNPMV2wQRDsvXif" alt=""><figcaption><p>Pivot view—region-wise</p></figcaption></figure>

## 2. Add more Pivot Views

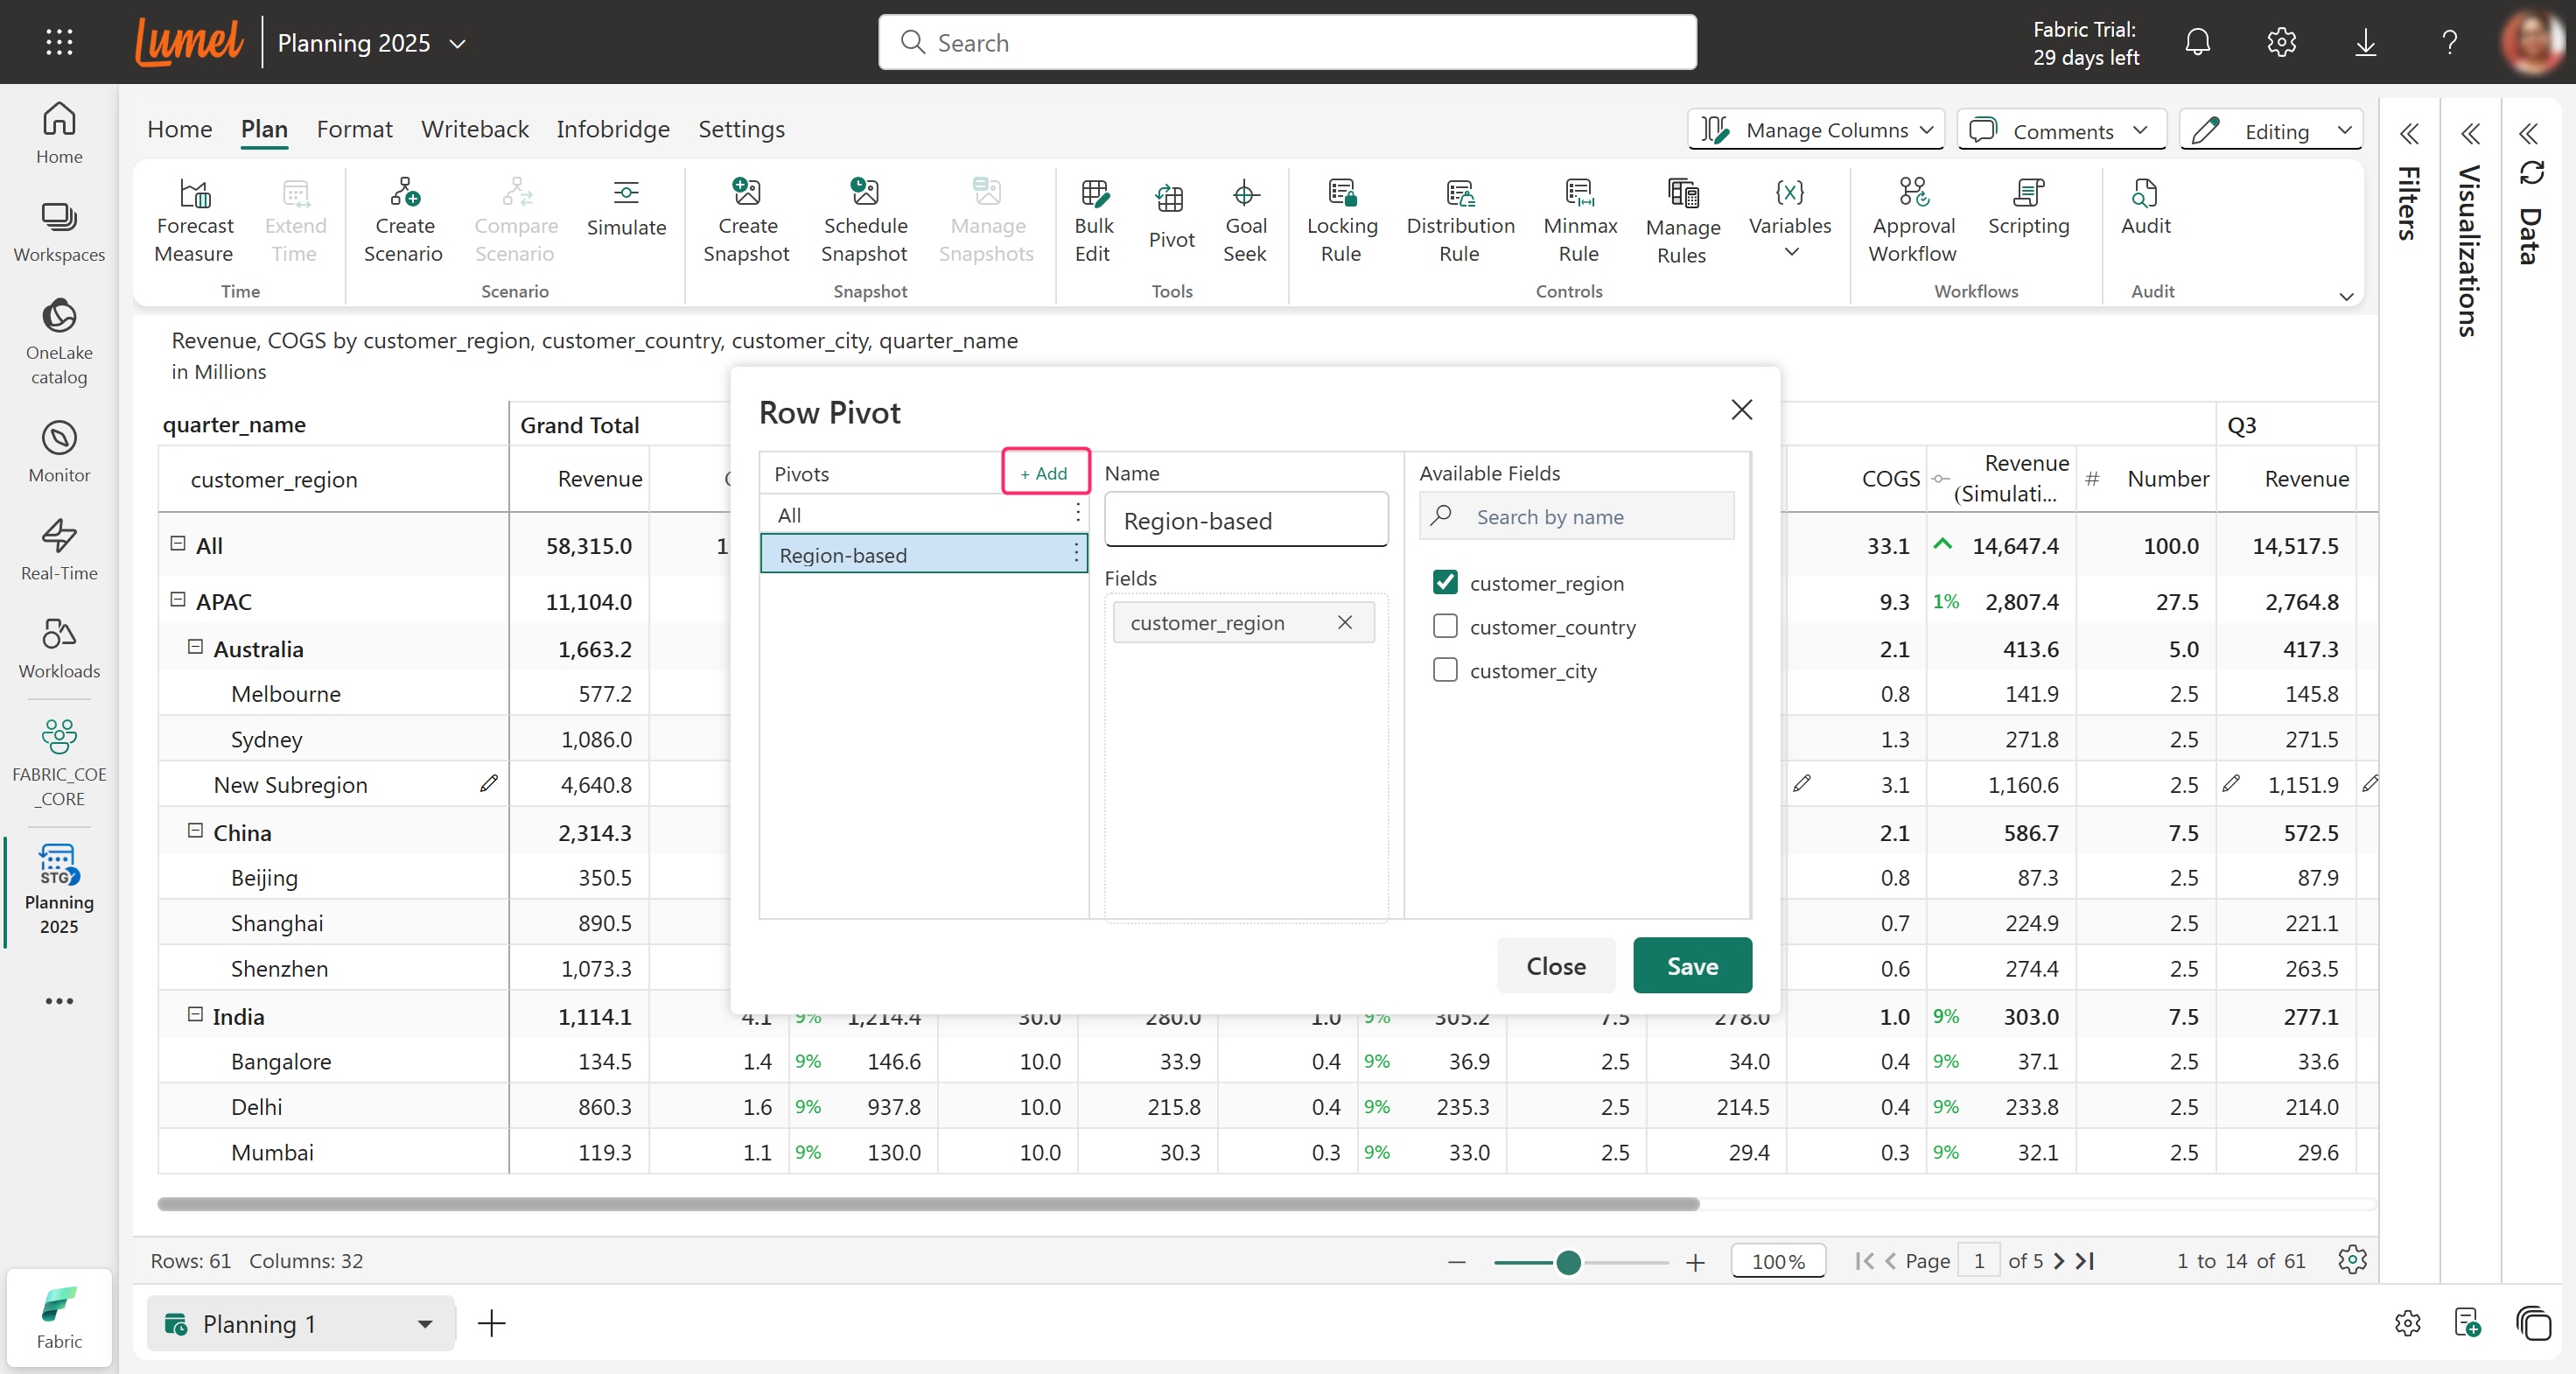
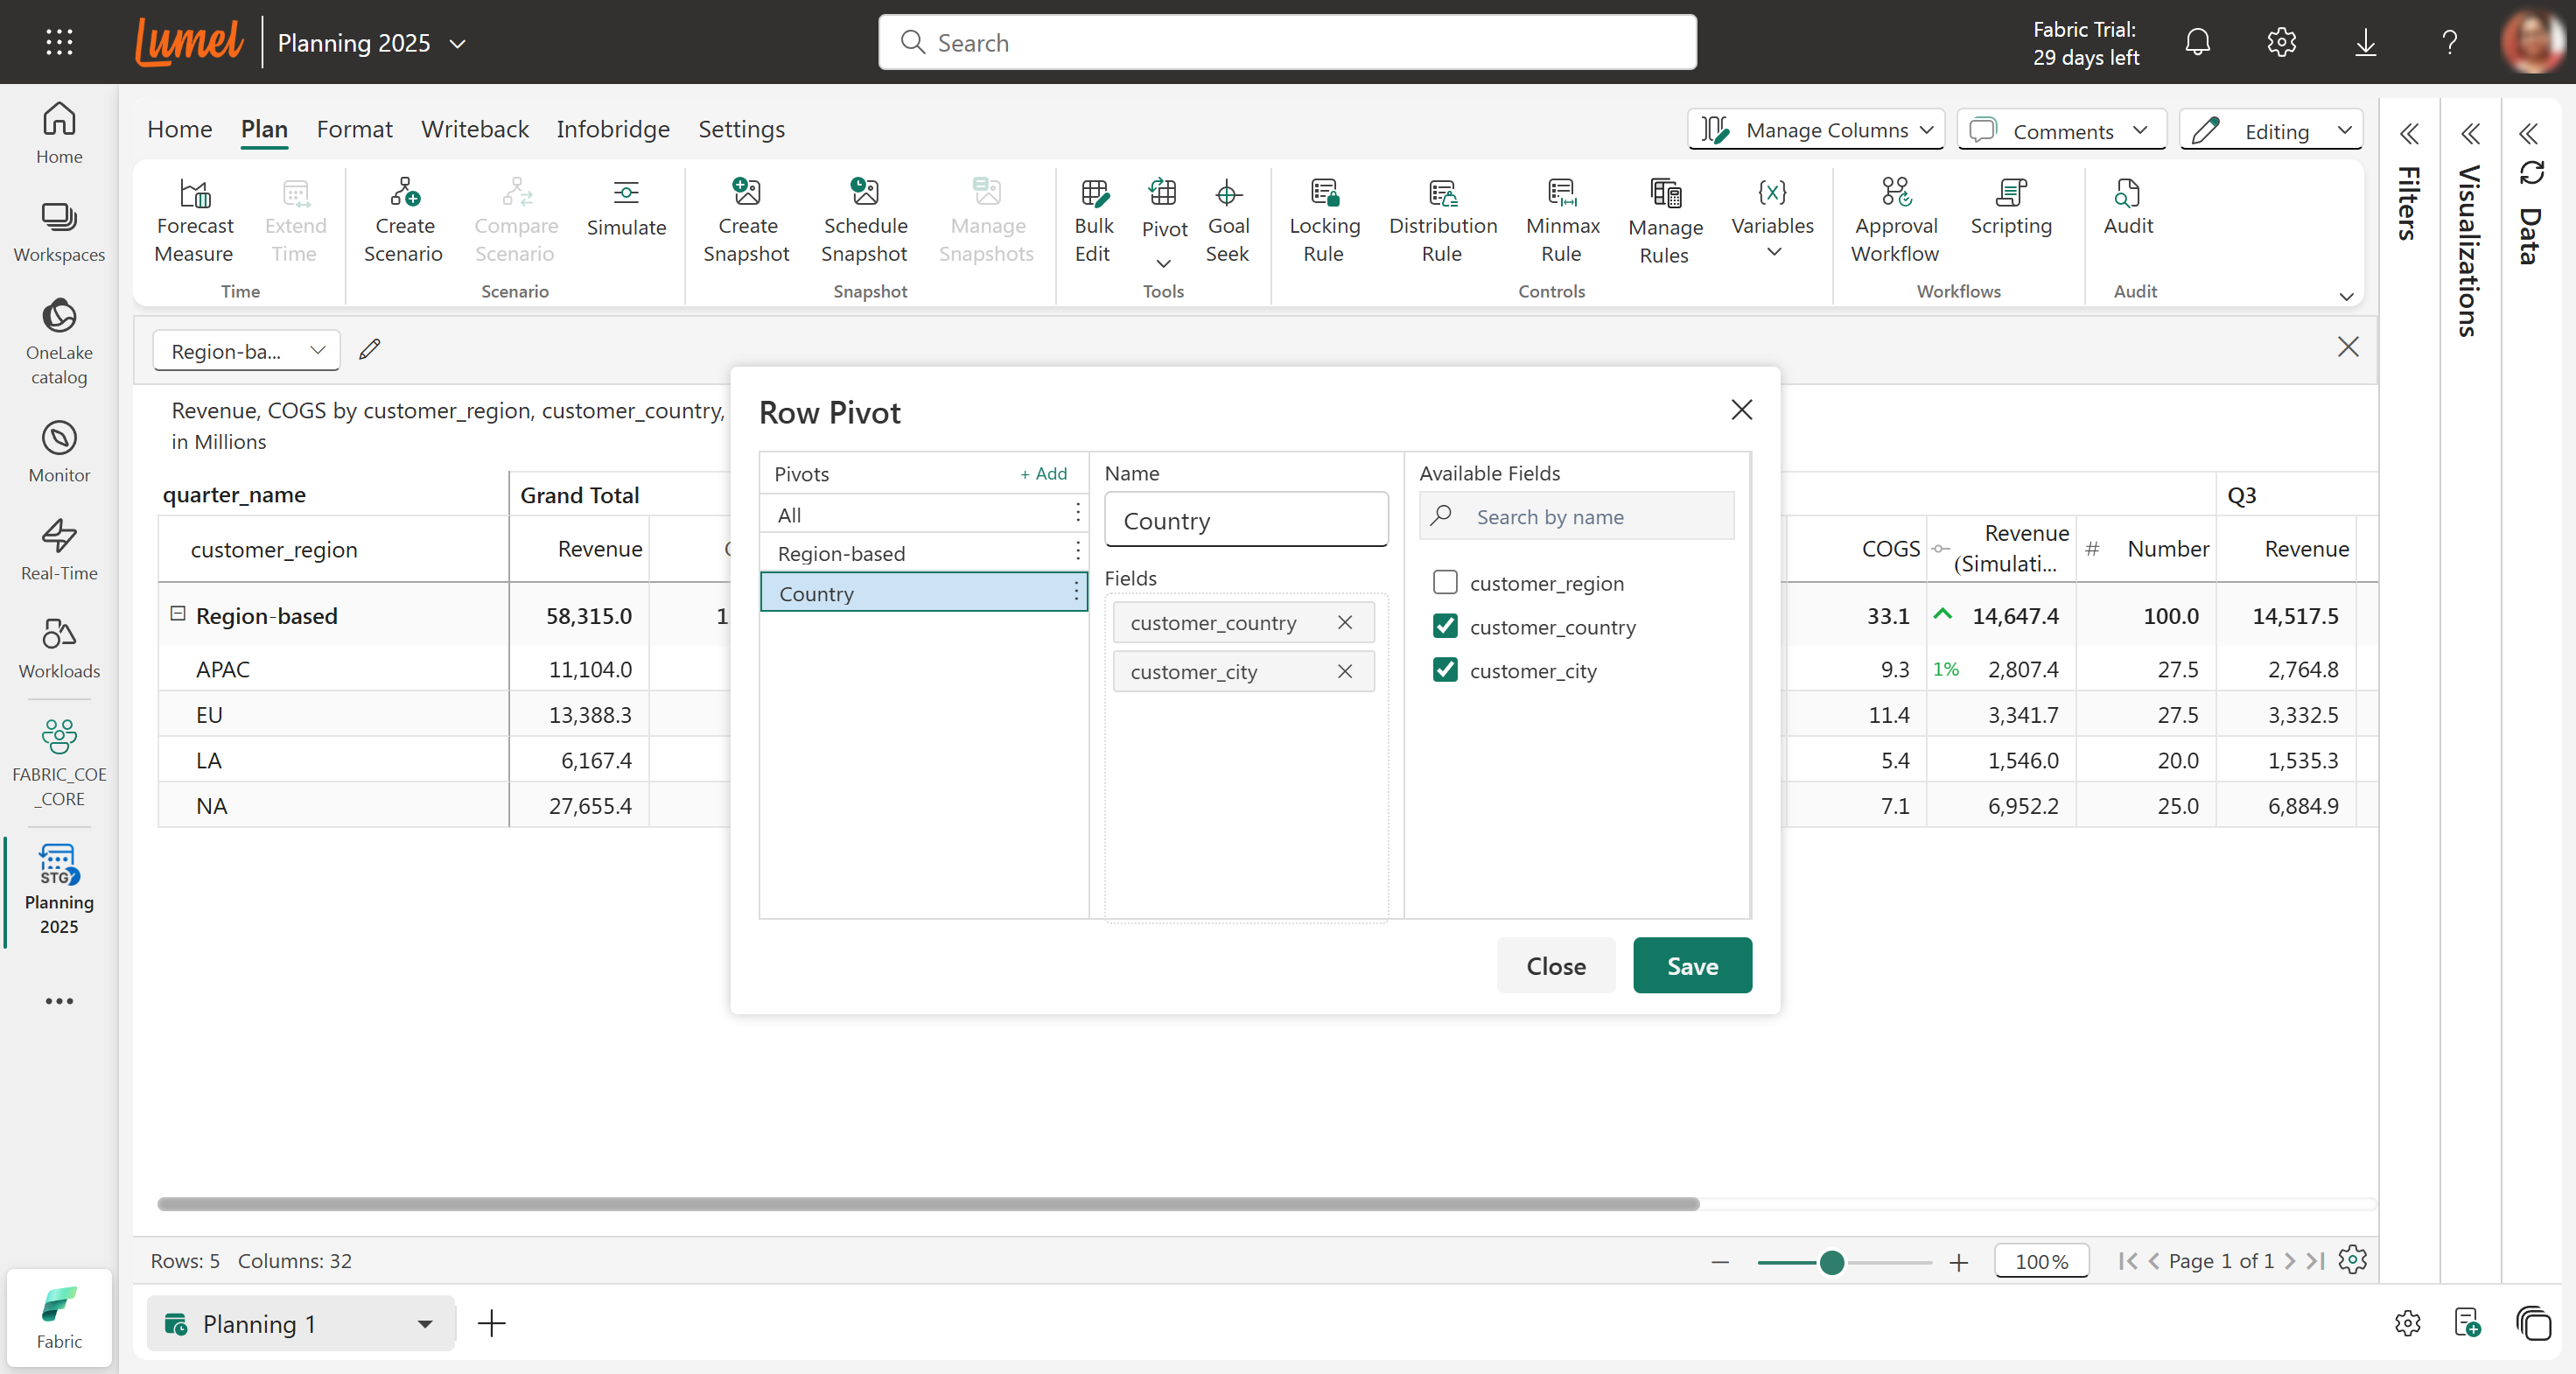
**STEP 1:** Click on the **Pivot** option again and click the **Add** link to create more pivot views.

<figure><img src="/files/rW24jsBQmwQtiNQsc6iM" alt=""><figcaption><p>Add new pivot view</p></figcaption></figure>

**STEP 2:** Name this view, add the required row dimensions, and click **Save** to add the new pivot view.

<figure><img src="/files/LaQDHSjVTCkytepsLKNo" alt=""><figcaption><p>New pivot view</p></figcaption></figure>

## 3. Pivot Explorer

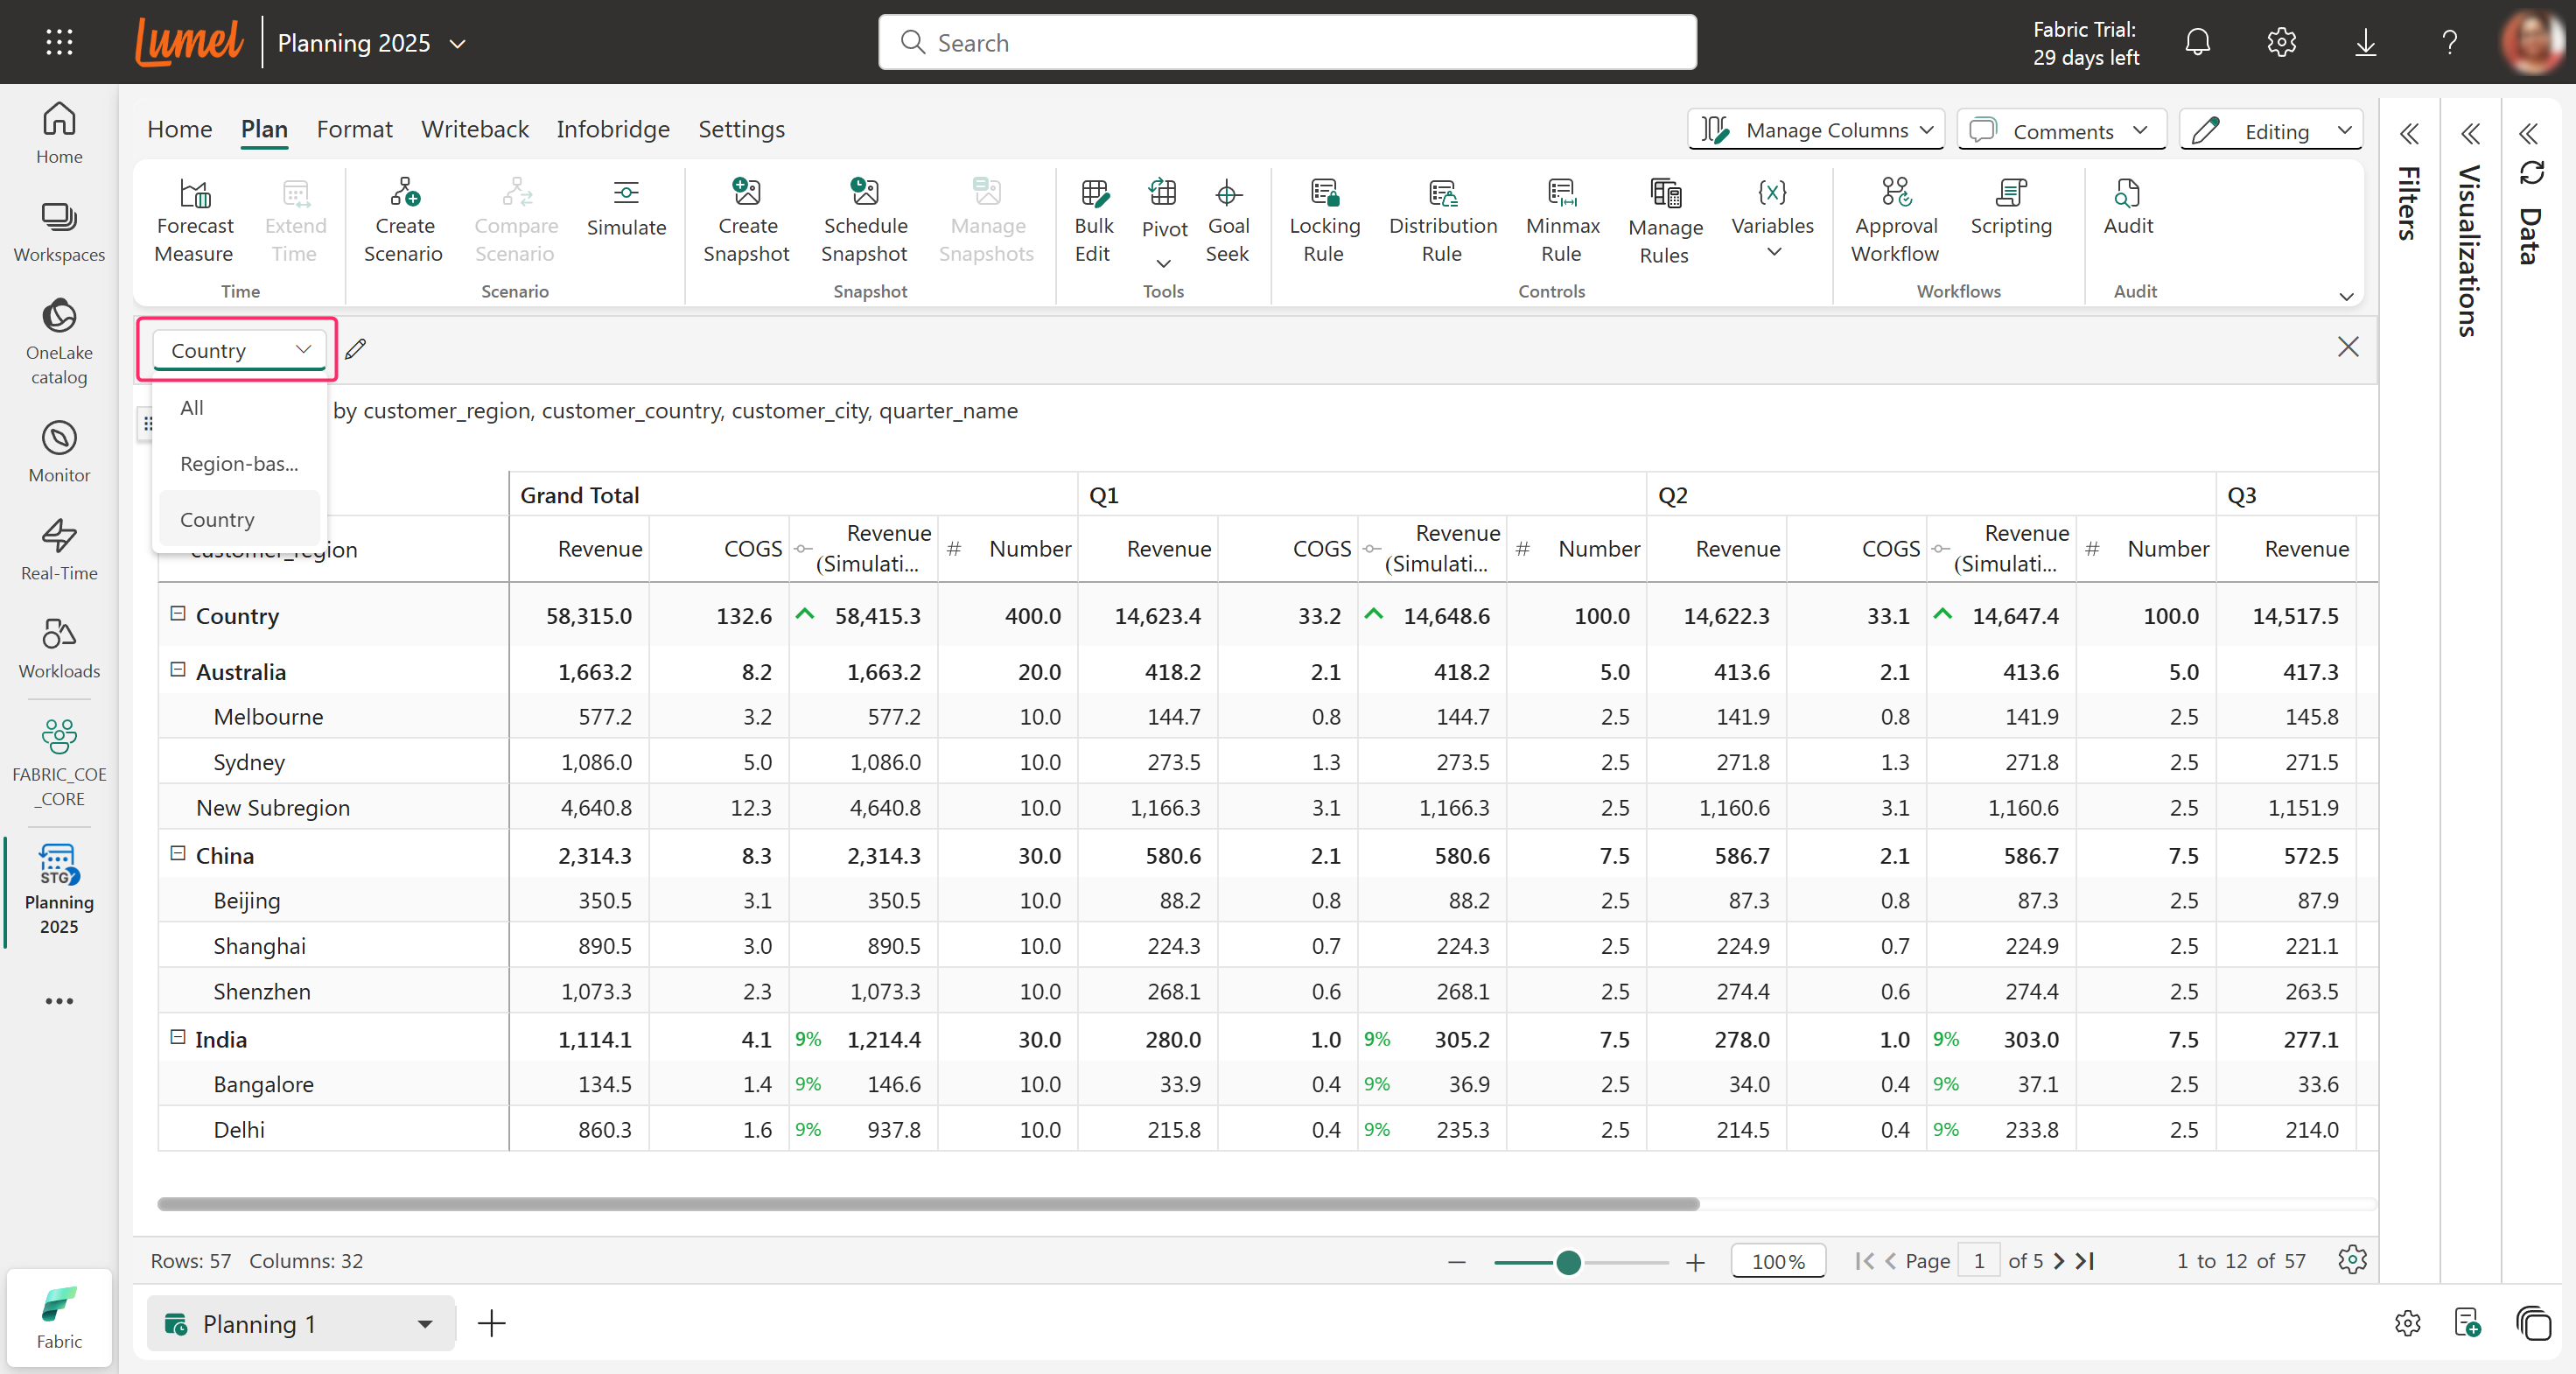
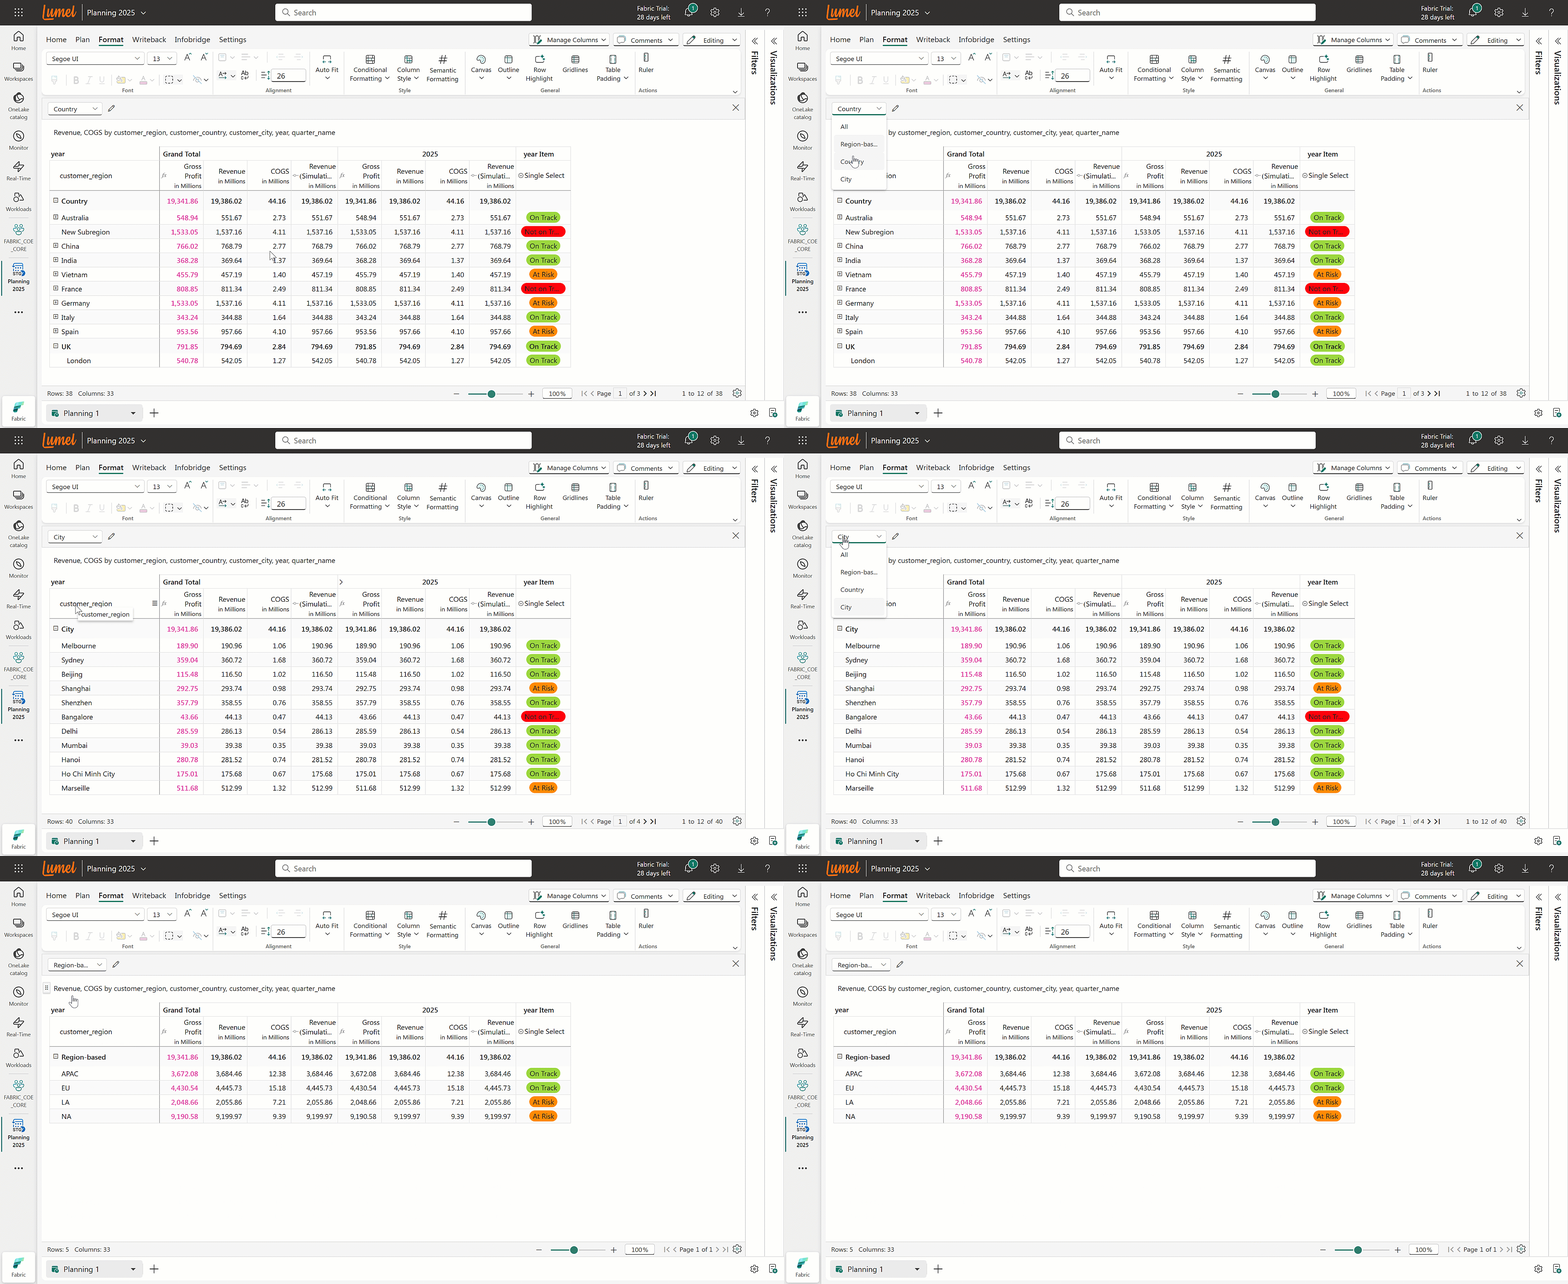
We have created two pivot views, and you can switch between them using the Pivot Explorer.

<figure><img src="/files/wjfOhPNV1qa2y05ISn6y" alt=""><figcaption><p>Pivot Explorer</p></figcaption></figure>

* Use the pencil icon in the pivot explorer to configure new views or edit existing views.
* You can close/disable this explorer by clicking on the 'x'.
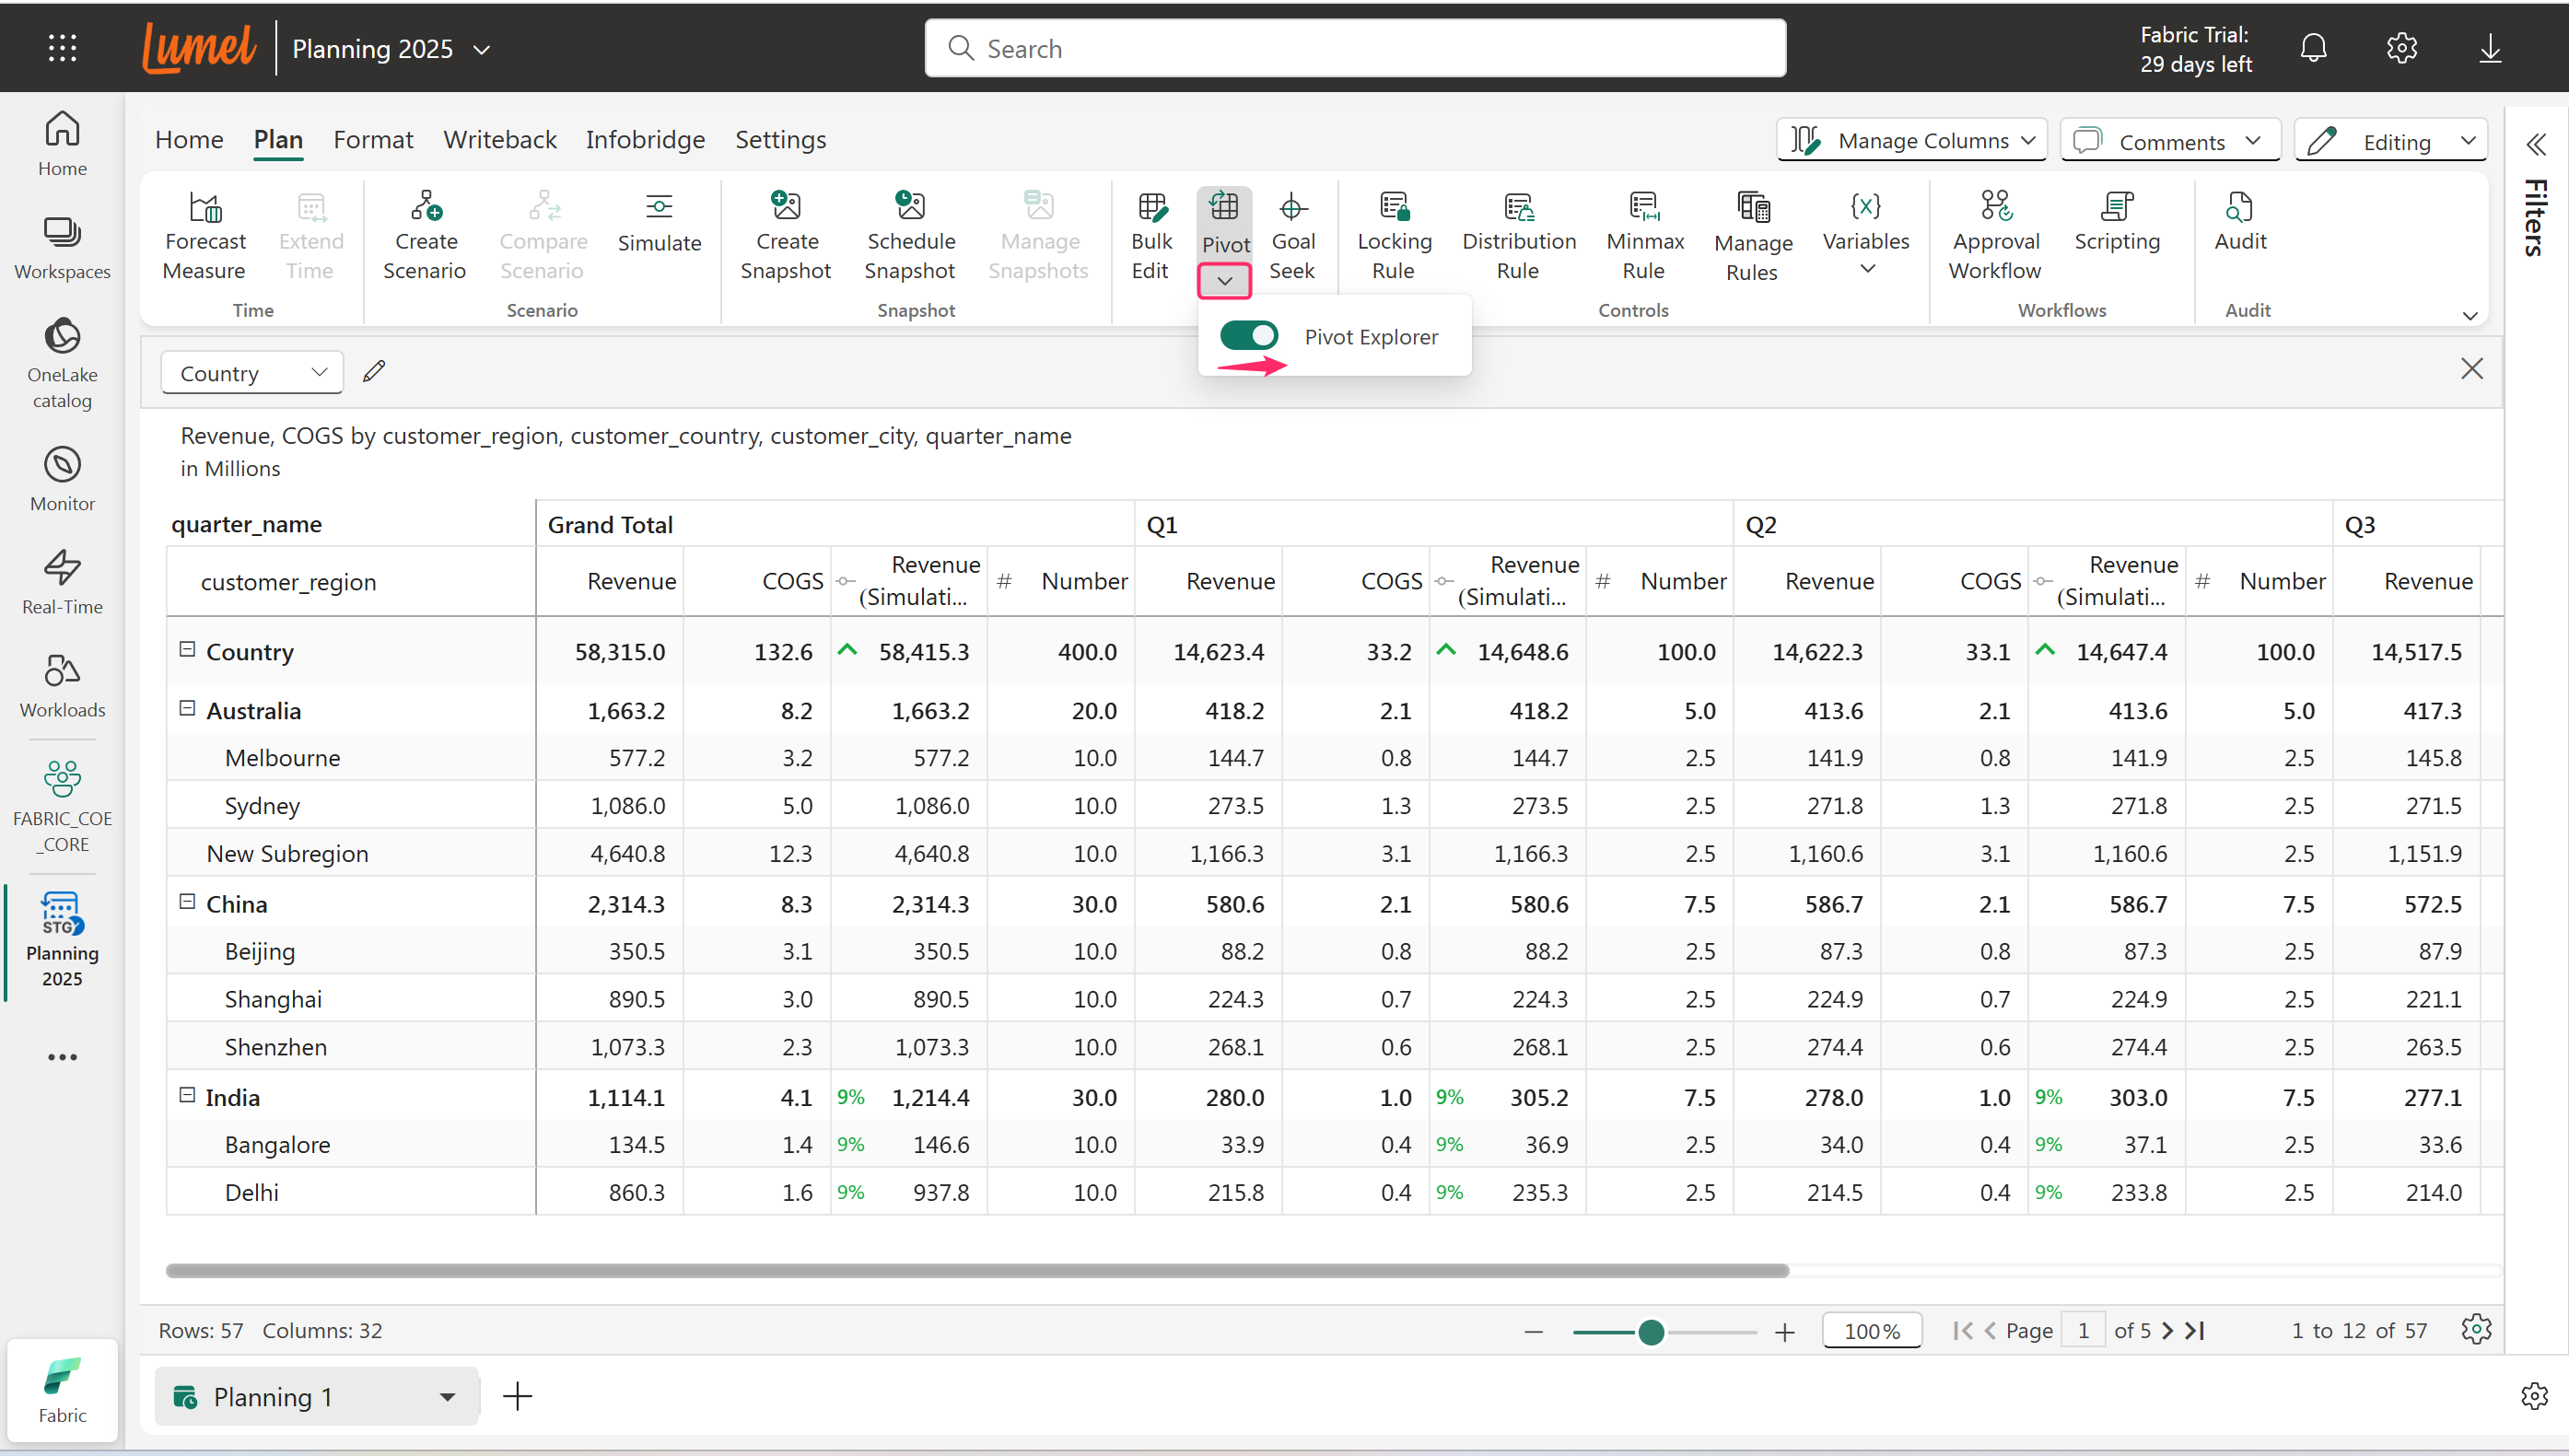
* To enable Pivot Explorer again, click the down arrow below the 'Pivot' option and toggle the button.

<figure><img src="/files/gsRBKV59VyE8KYxqaMCn" alt=""><figcaption><p>Enable/Disable option for Pivot Explorer</p></figcaption></figure>

## 4. Duplicate or Delete a Pivot View

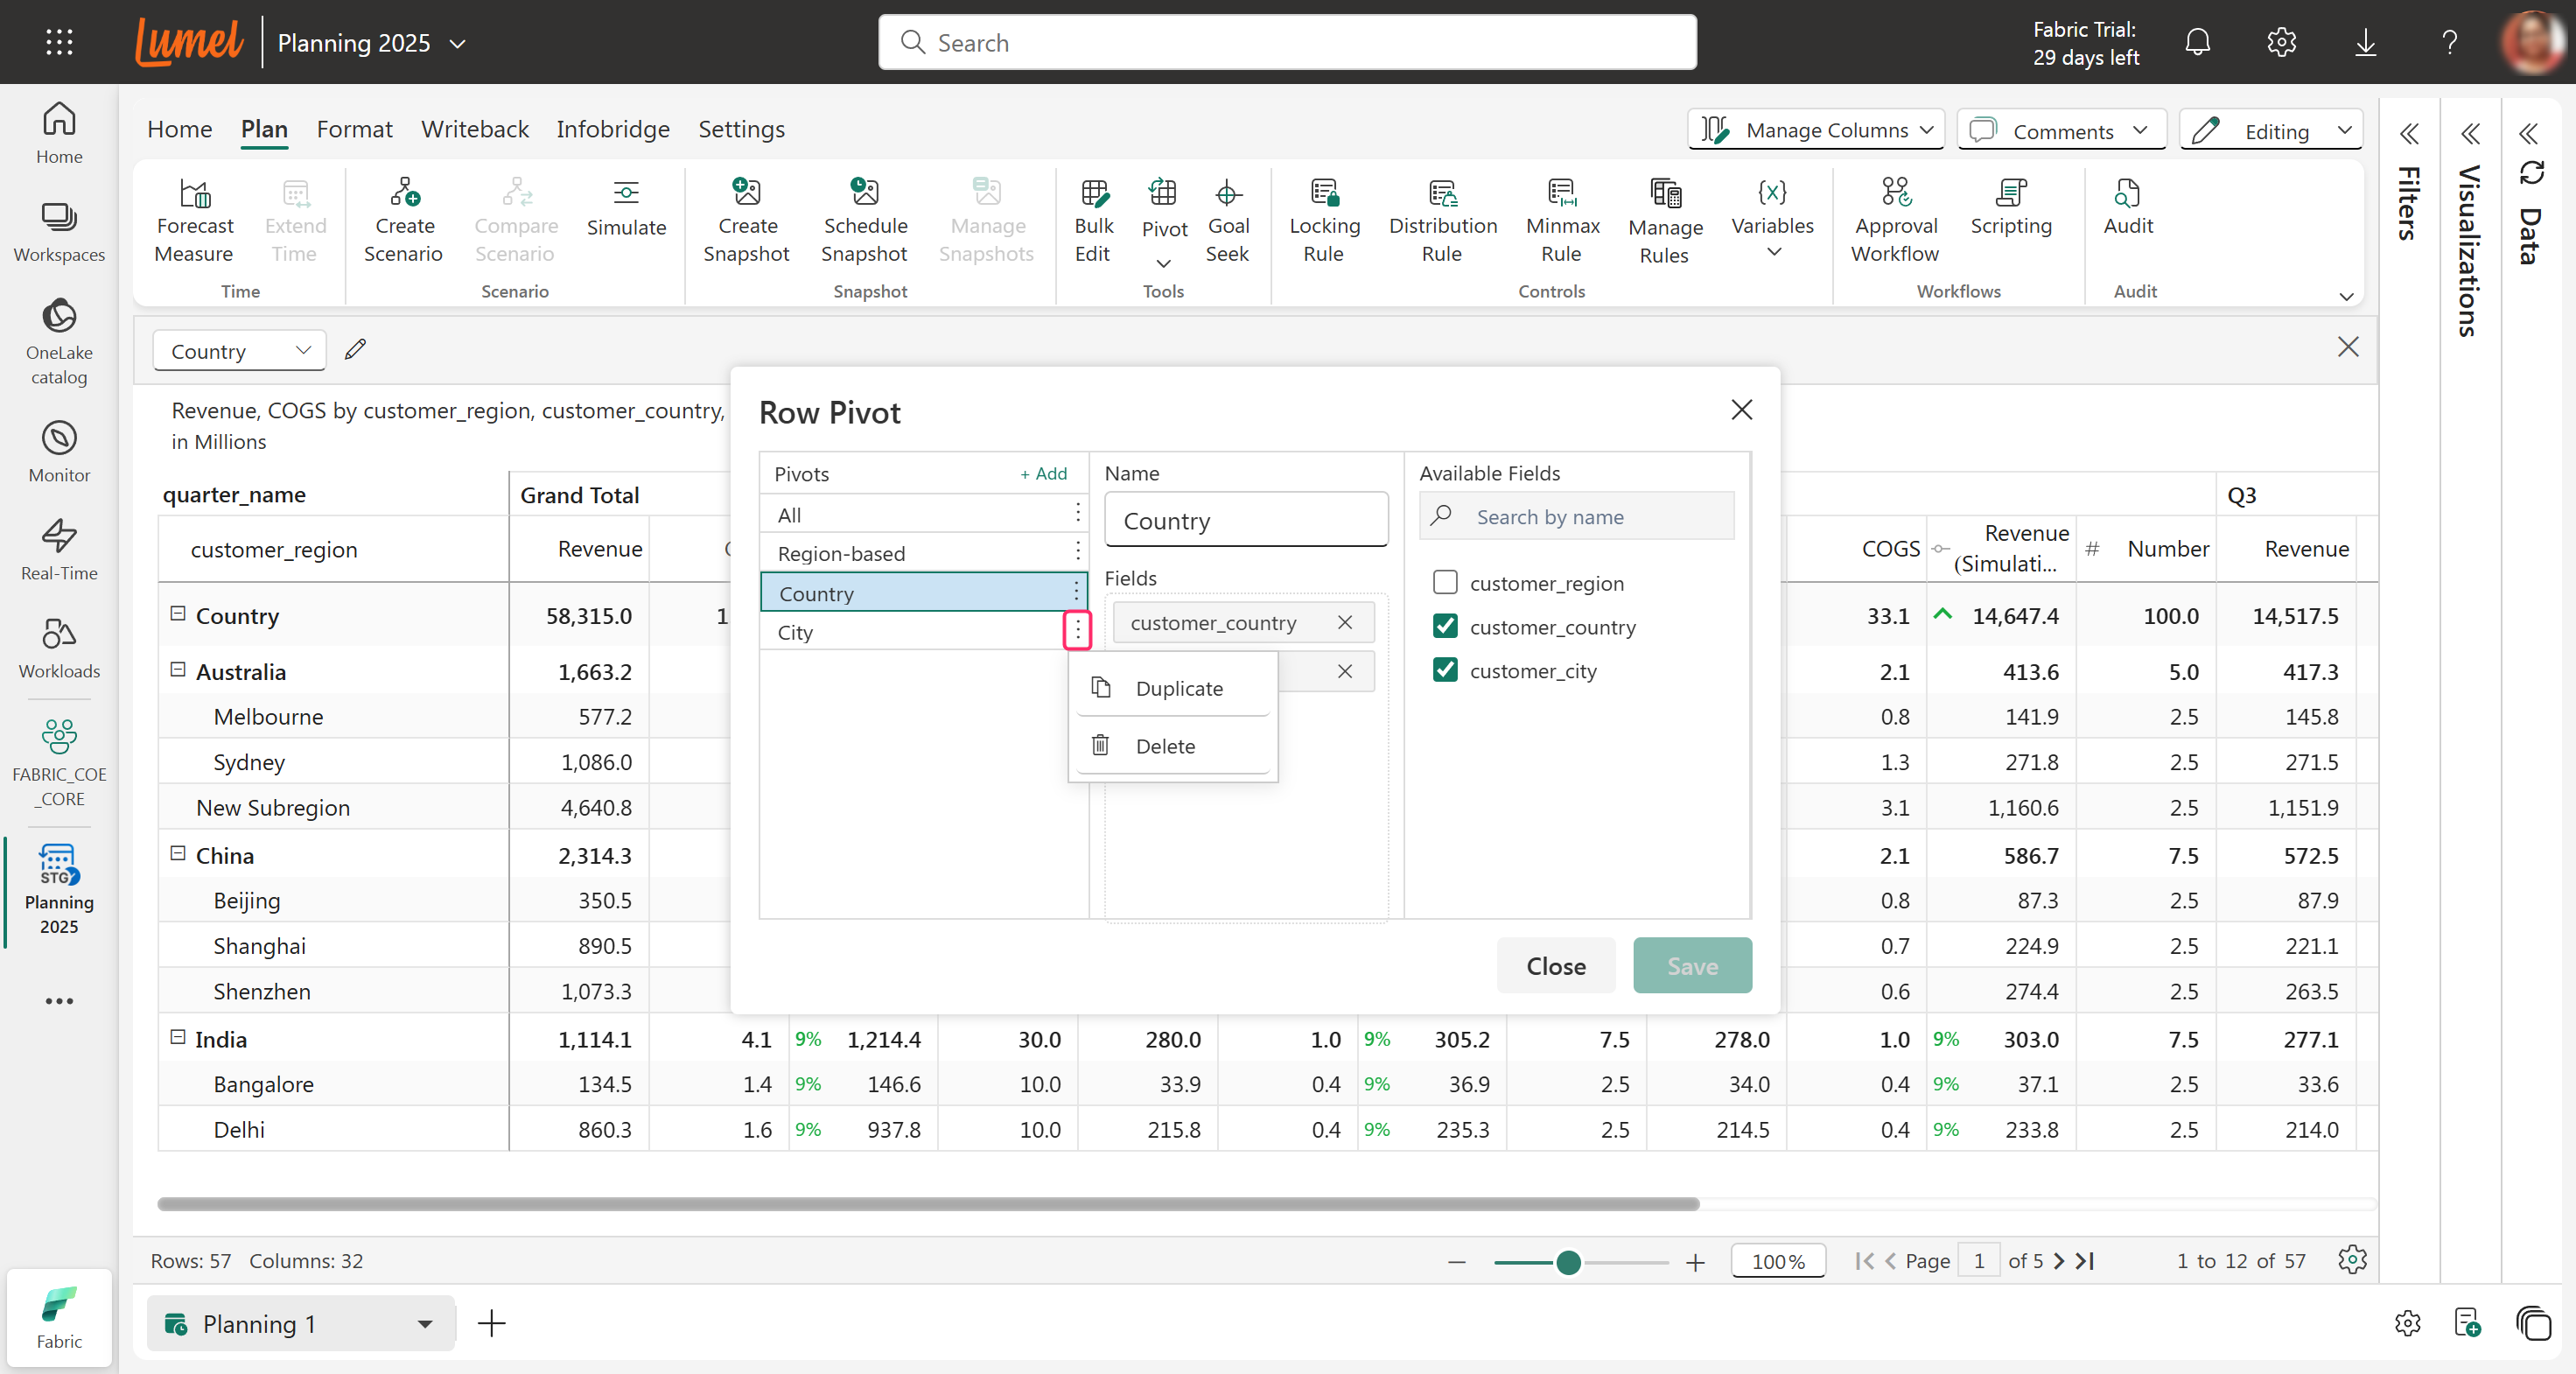
To duplicate or delete a pivot view, click on the highlighted button beside the view and then choose the required option, as below:

<figure><img src="/files/0UILZPmJBDD21BTUPLOr" alt=""><figcaption><p>Duplicate or delete a view</p></figcaption></figure>

Even within each pivot view, you can create data inputs, forecasts, formulas, snapshots, and scenarios corresponding to each combination of dimensions available. The pivot view/table you create also lets you enter numbers at the higher level and allocate them proportionally to all the relevant sub-levels.

Notice how the single select (Status) and formula (GrossProfit) values appropriately change based on the pivot selection.

<figure><img src="/files/apIlsyMKciCab7H6kLXL" alt=""><figcaption><p>Switching between pivot views</p></figcaption></figure>

{% hint style="info" %}
[Infobridge](/infobridge.md) offers the ability to [pivot data](/infobridge/9.-data-transformations/pivot-table.md) by interchanging or reassigning fields in rows and measures. You need to [import your planning sheets to a bridge](/infobridge/how-tos/2.-add-source-to-bridge.md) for generating different pivot views.
{% endhint %}


---

# Agent Instructions: Querying This Documentation

If you need additional information that is not directly available in this page, you can query the documentation dynamically by asking a question.

Perform an HTTP GET request on the current page URL with the `ask` query parameter:

```
GET https://docs.fabricplan.com/planning-sheets/how-tos/adding-business-logic-and-formulae/pivot-data.md?ask=<question>
```

The question should be specific, self-contained, and written in natural language.
The response will contain a direct answer to the question and relevant excerpts and sources from the documentation.

Use this mechanism when the answer is not explicitly present in the current page, you need clarification or additional context, or you want to retrieve related documentation sections.