# Retain report data with Writeback
## Retain report data with Writeback
Write back tabular reports to a data platform of choice, including file destinations, data warehouses, and data lake storage. For example, your actuals reporting may be tied to SQL Server, but you can use Writeback to export your plans and forecasts to data platforms like SnowFlake, Fabric, or Databricks.
Once the report data is written back, it can be queried and joined with other enterprise data. With writeback, static reports can be transformed into analytical data.
#### Create and manage writeback destinations
Configure the database and table where the report data will be saved during writeback.
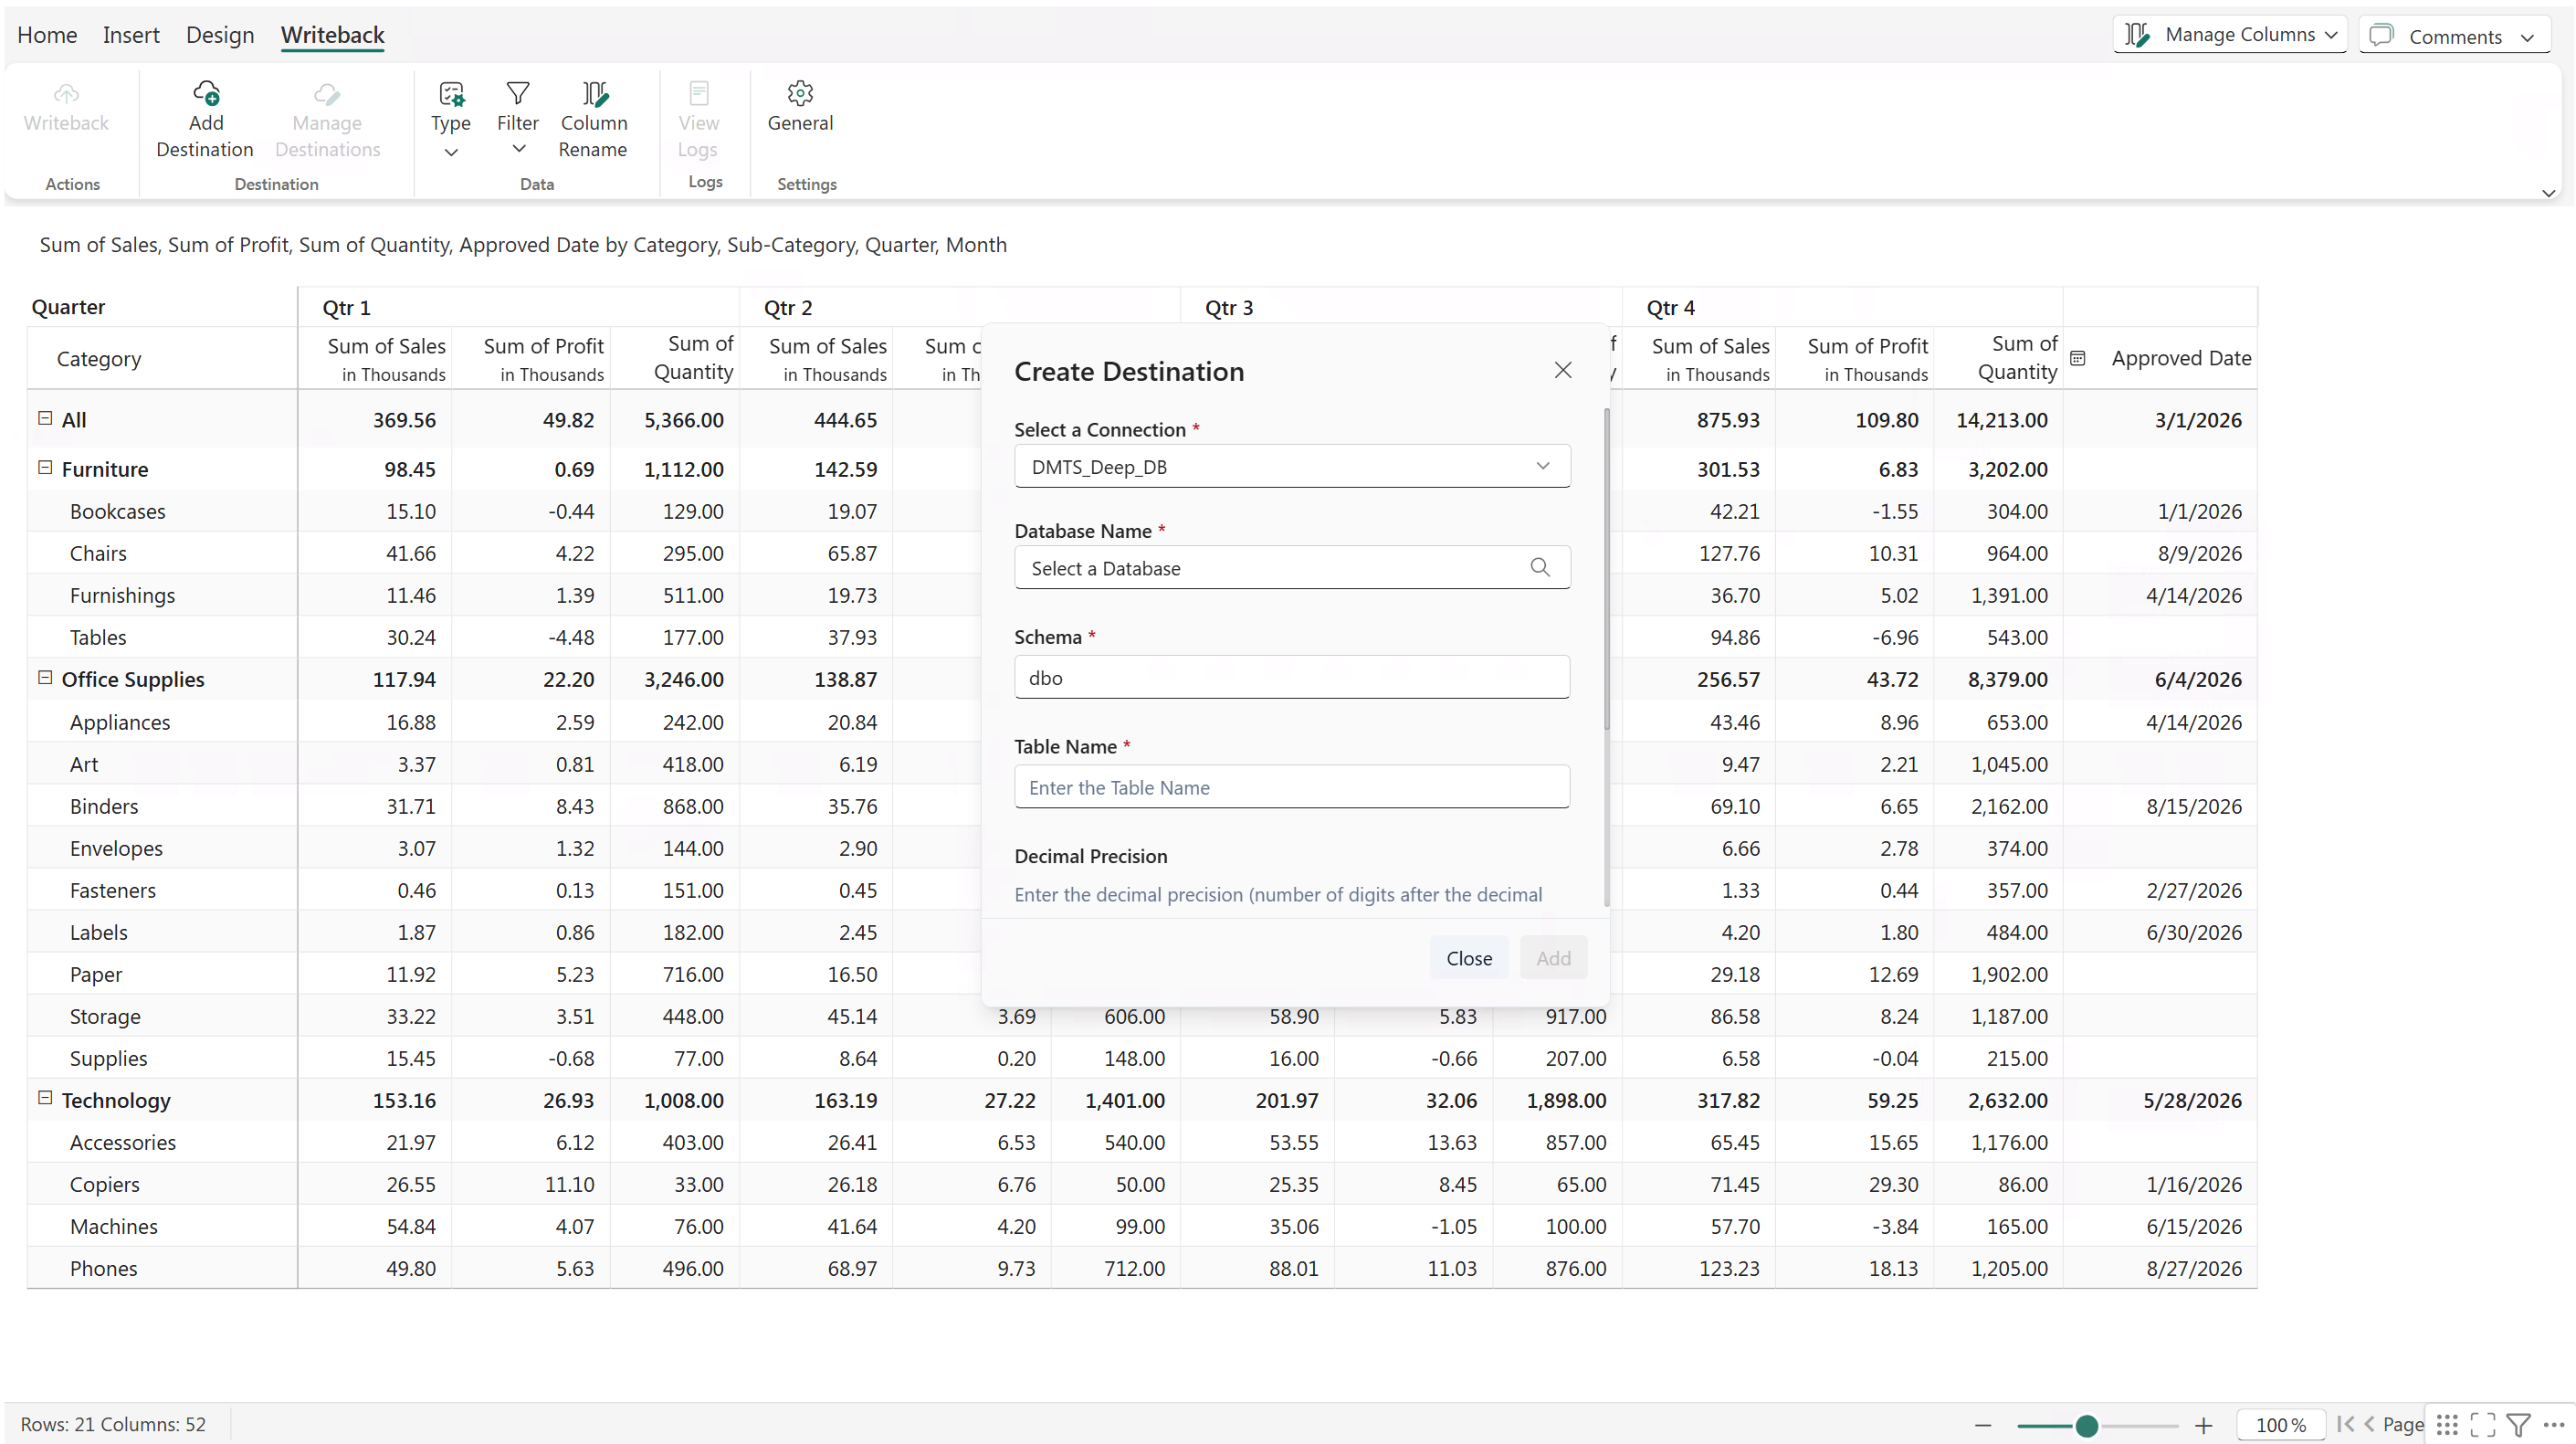
1. Click **Writeback** > **Add Destination**.
2. Select an existing connection or create a new connection to the database. For more information, see [Create a database connection](https://inforiver.gitbook.io/fabric-plan-mslearn/planning-sheets/how-tos/get-started-with-planning-sheets#create-a-database-connection).
3. Select the database where the writeback destination table will be created.
4. Select the schema and table name. The table will be created during the first writeback instance.
5. Specify the decimal precision for numeric data. All numeric values, including percentages, will be rounded off to the specified number of decimal points.
6. Specify the text length - you can restrict text fields to 512 characters or allow writeback up to the maximum limit supported by the backend.
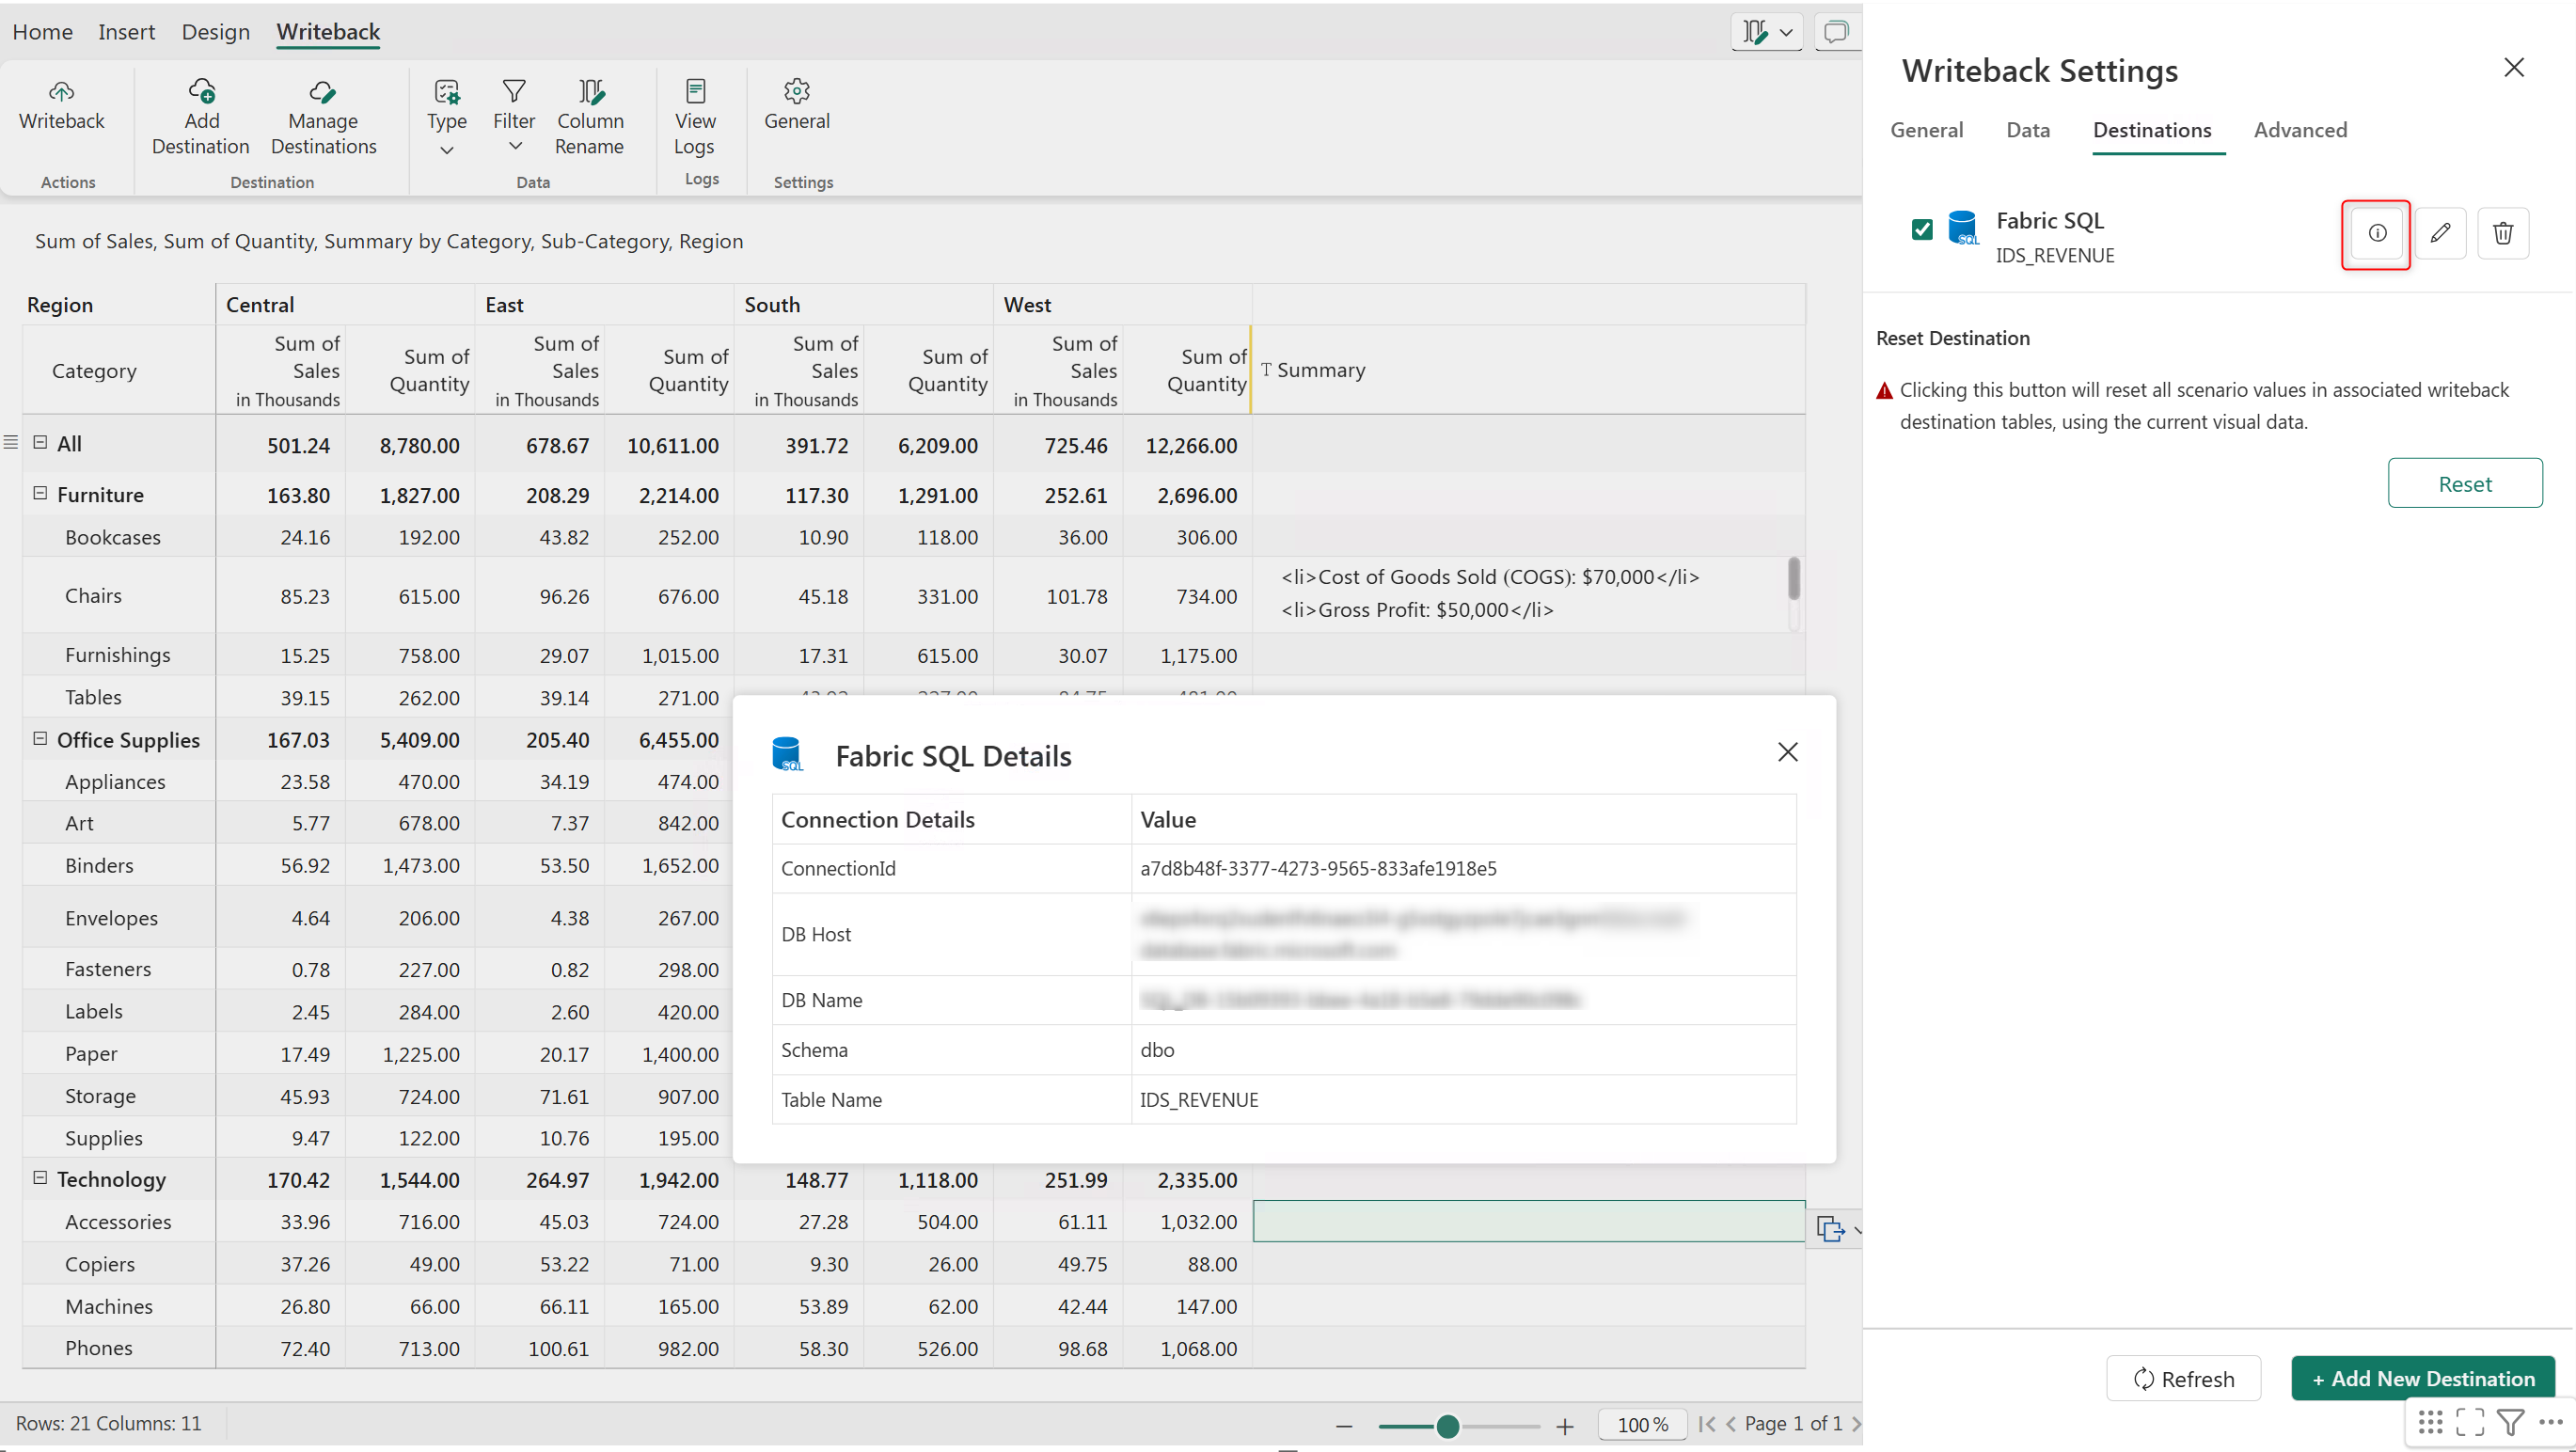
7. After the destination is created, click the information icon in **Writeback Settings > Destinations**. to view the connection details, schema, and table name. You can also edit or delete a destination.
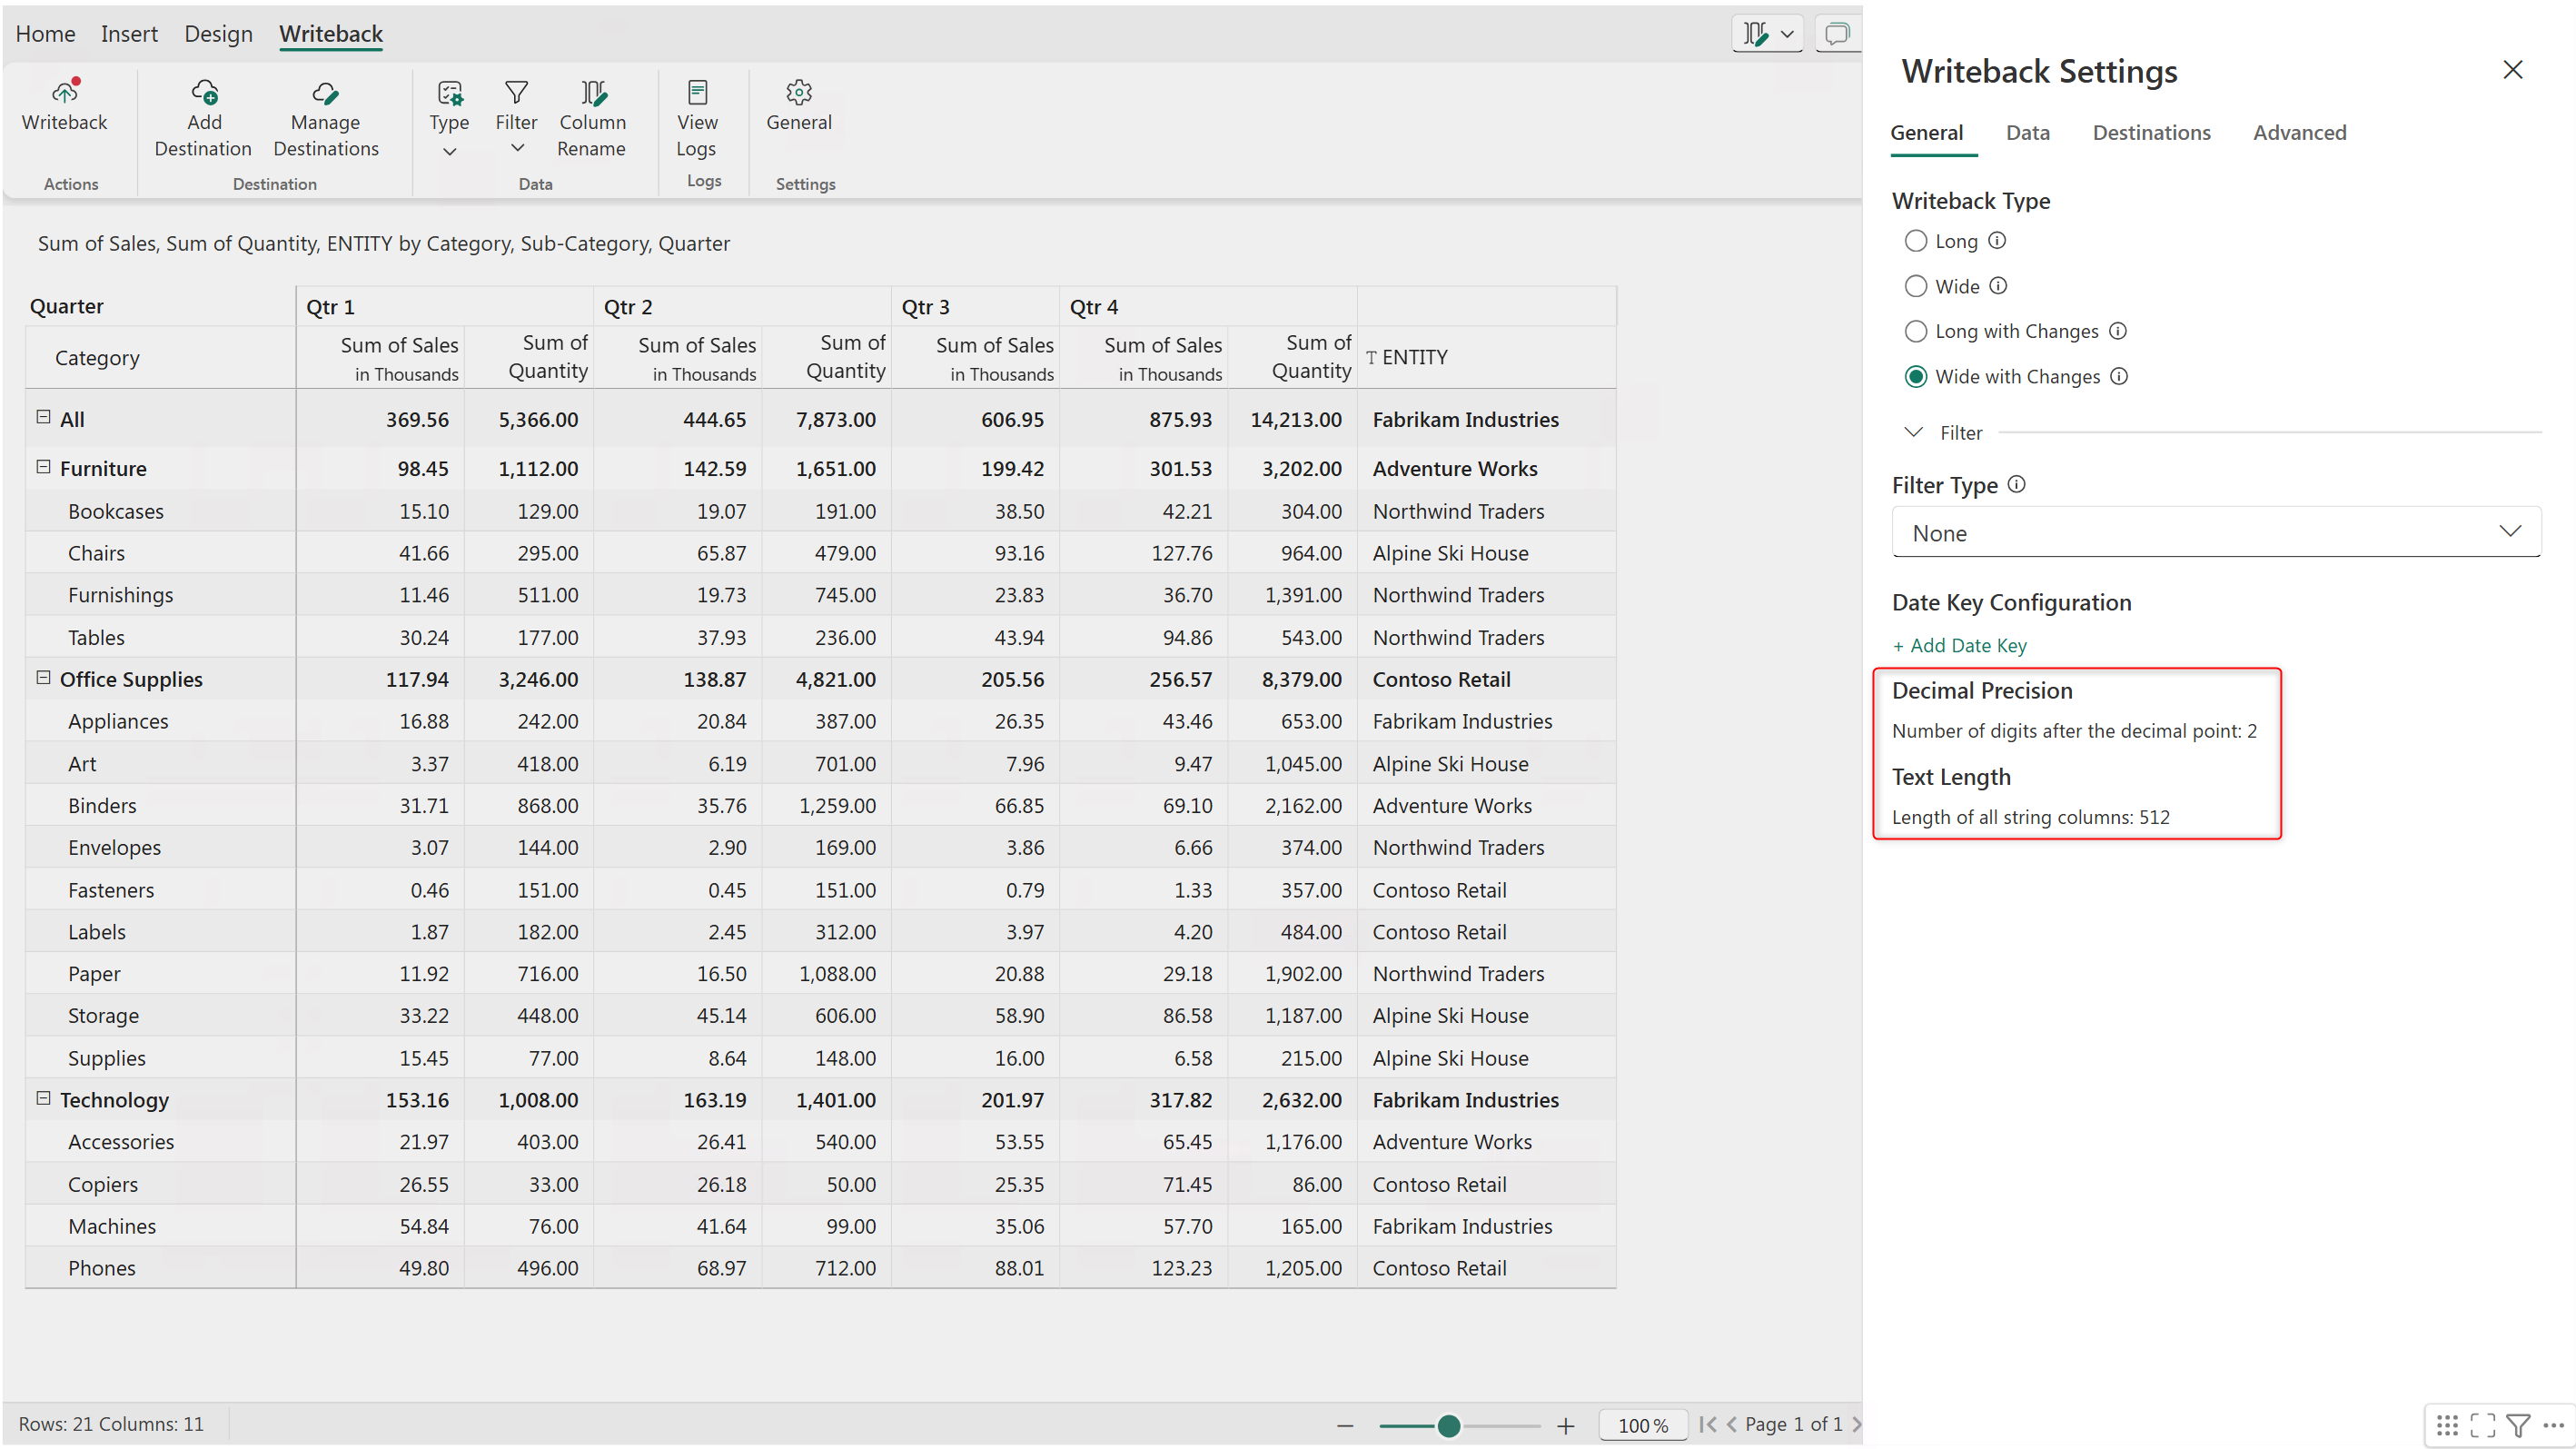
8. Review the decimal precision and maximum text length configurations in **Writeback Settings > General.**
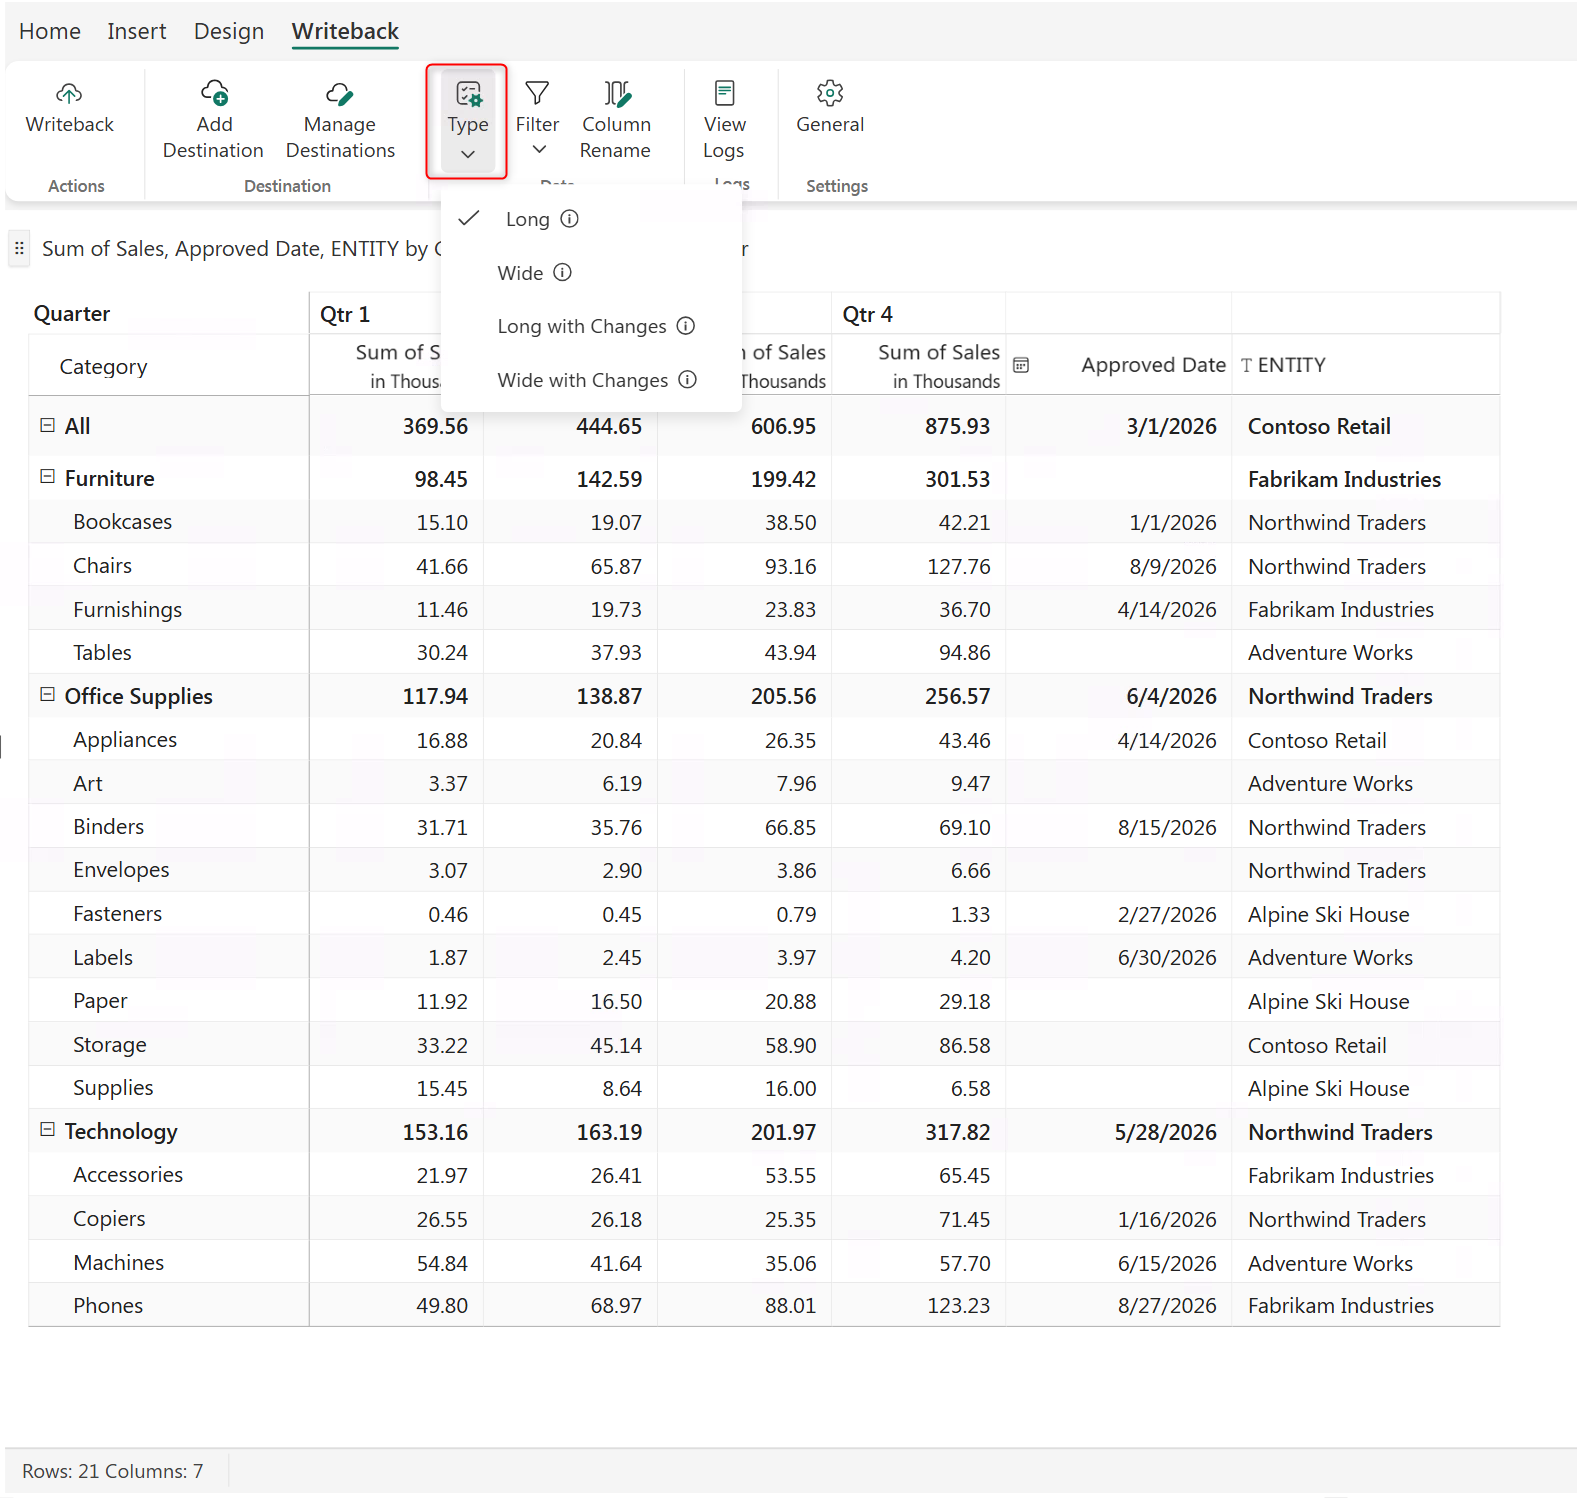
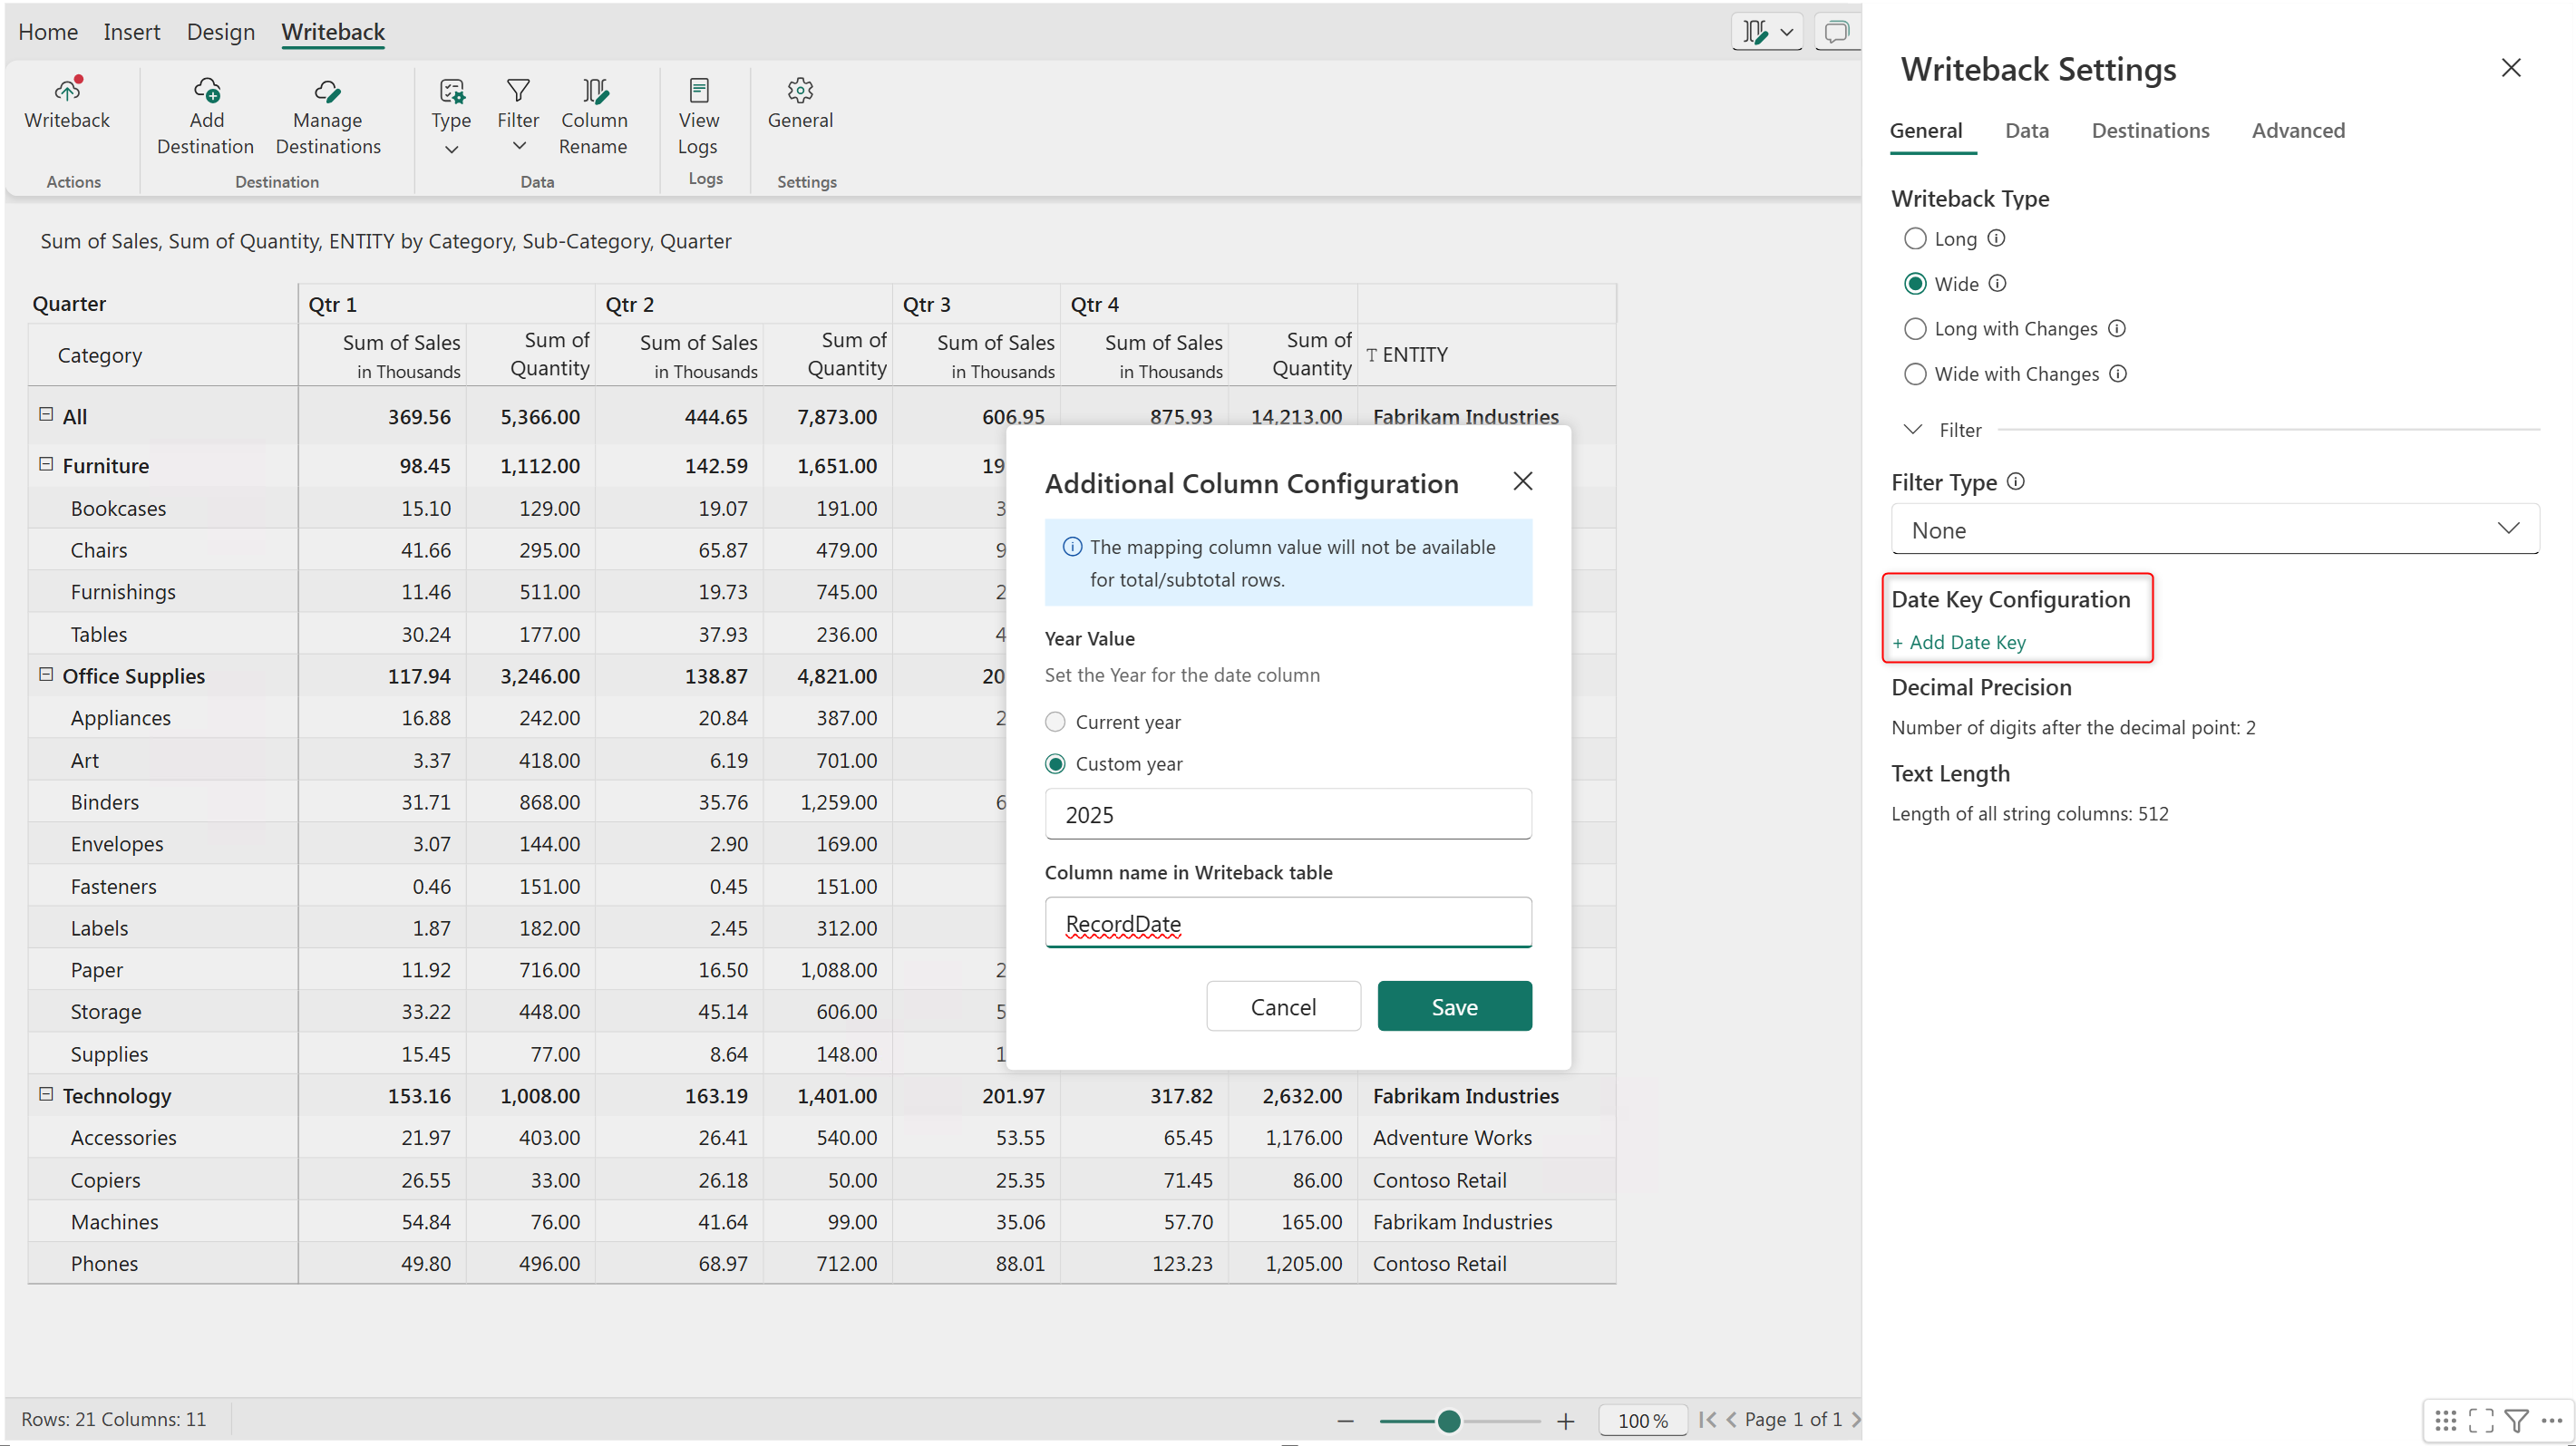
#### Set the writeback type
Choose the writeback table structure. Click on the information icon to see a preview of how the data in your report will be written back.
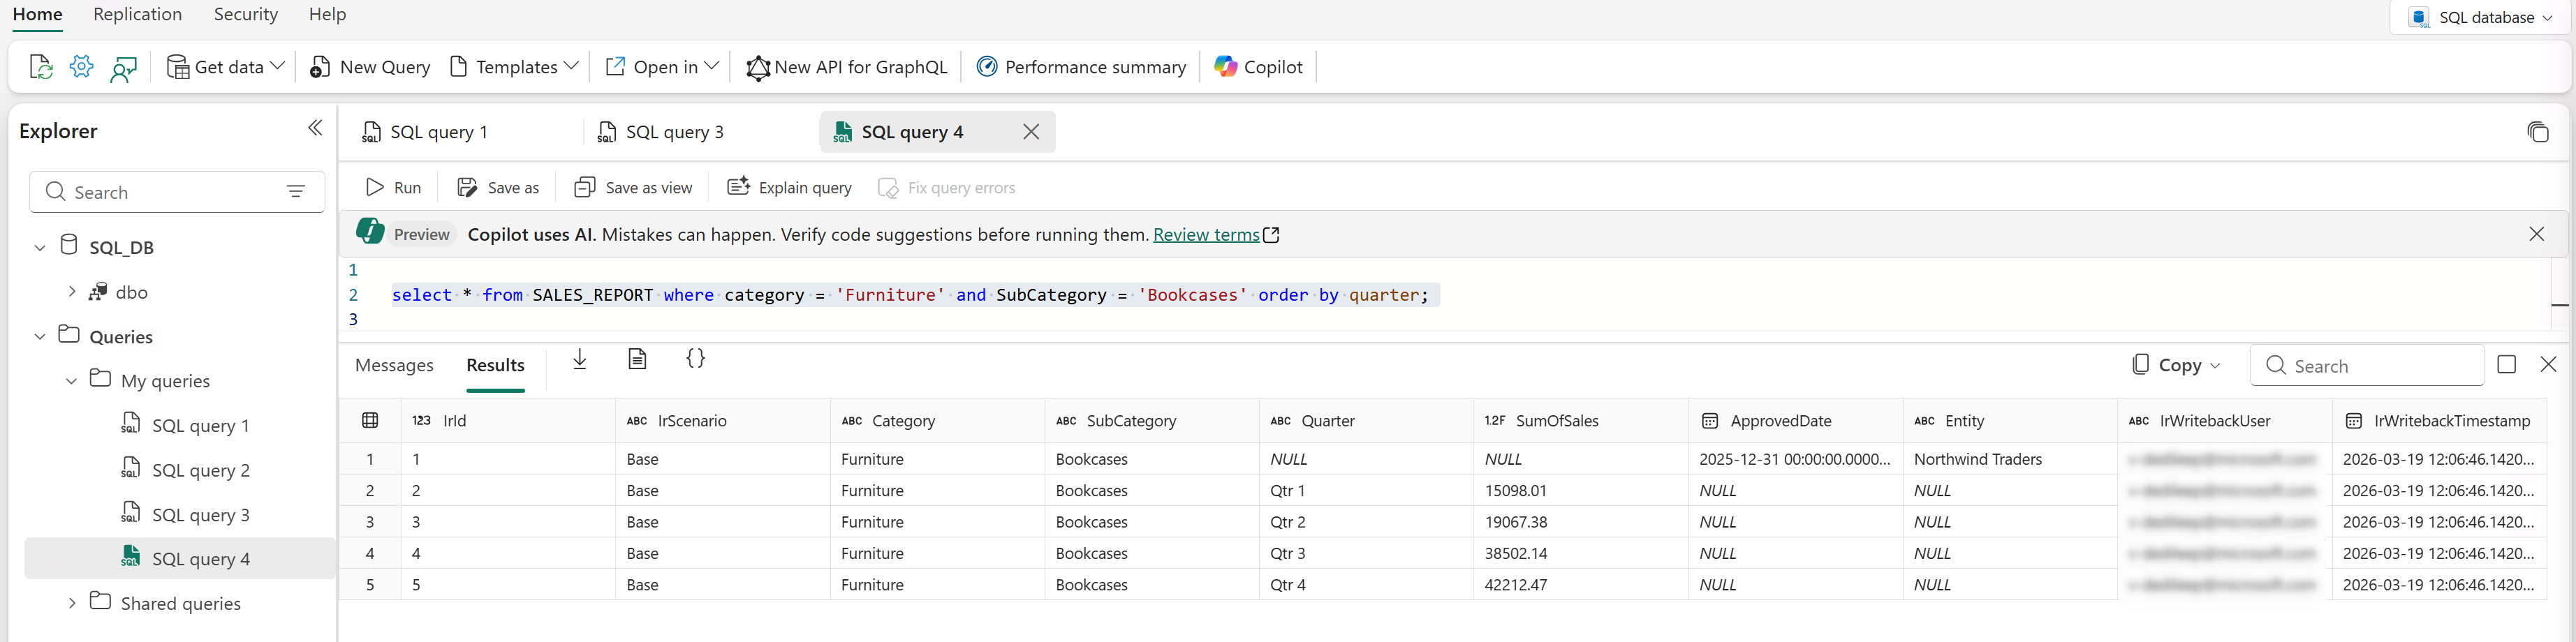
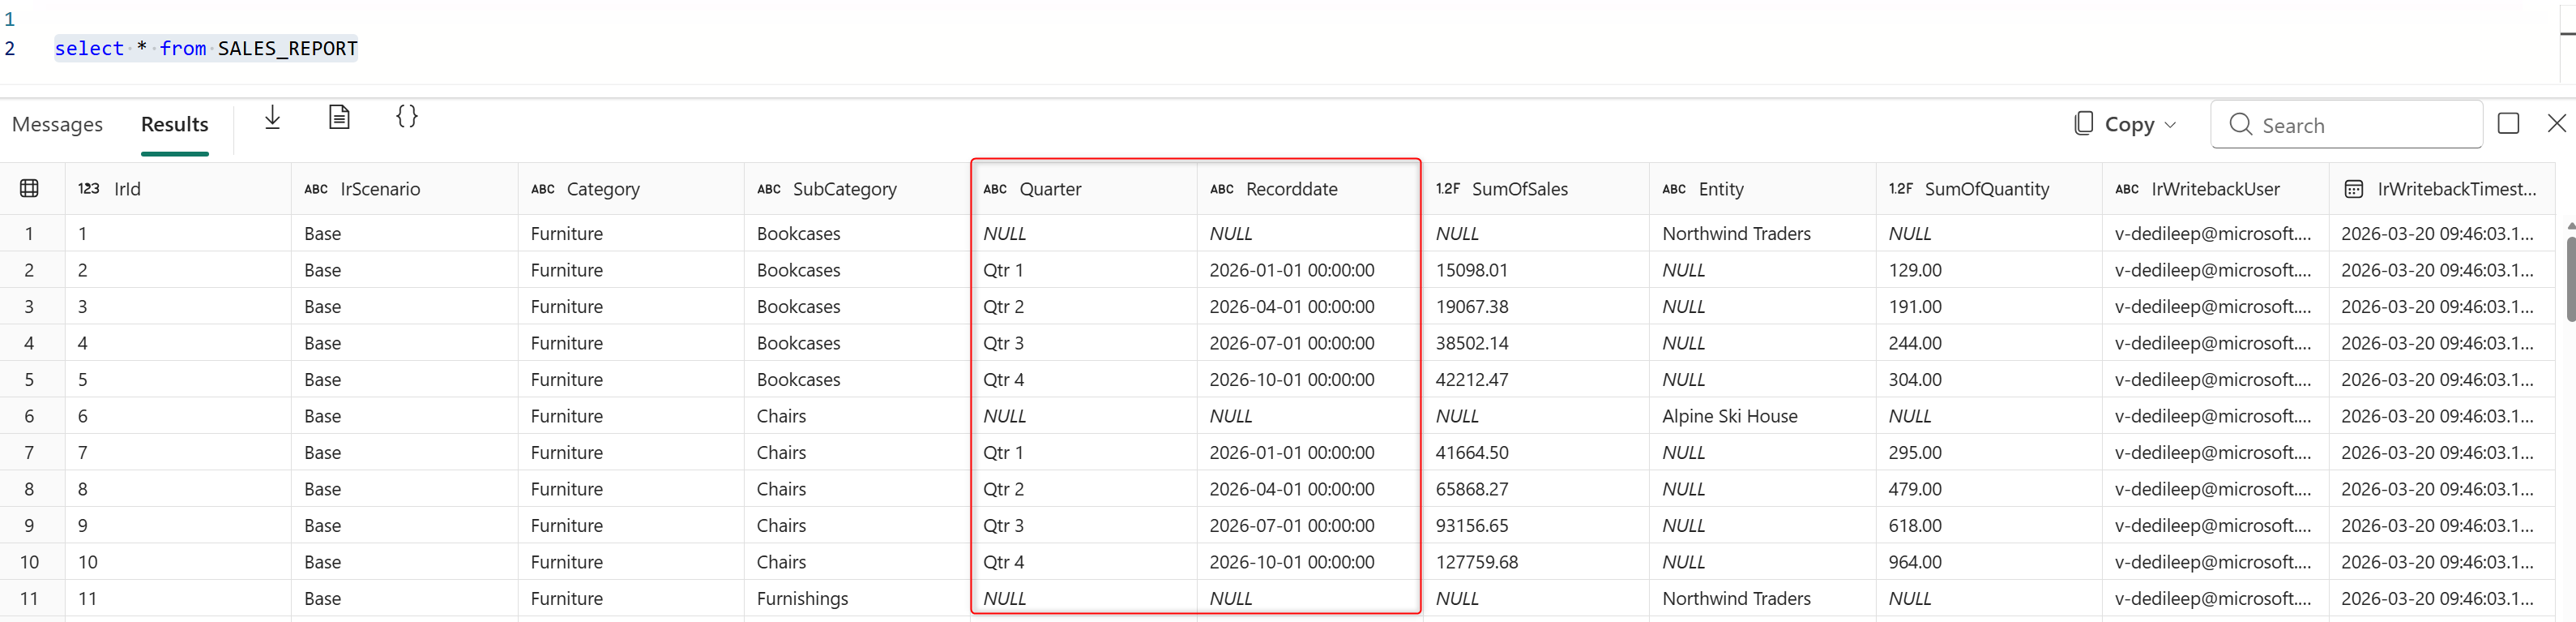
* **Long:** The measures and associated values are stored as key-vaue pairs in the destination. The ValueColumn field contains the measure name and the Value field contains the associated value.
* **Wide:** Measure sare stored as columns. As more measures are added, a proportional number of columns will be added to the writeback table.
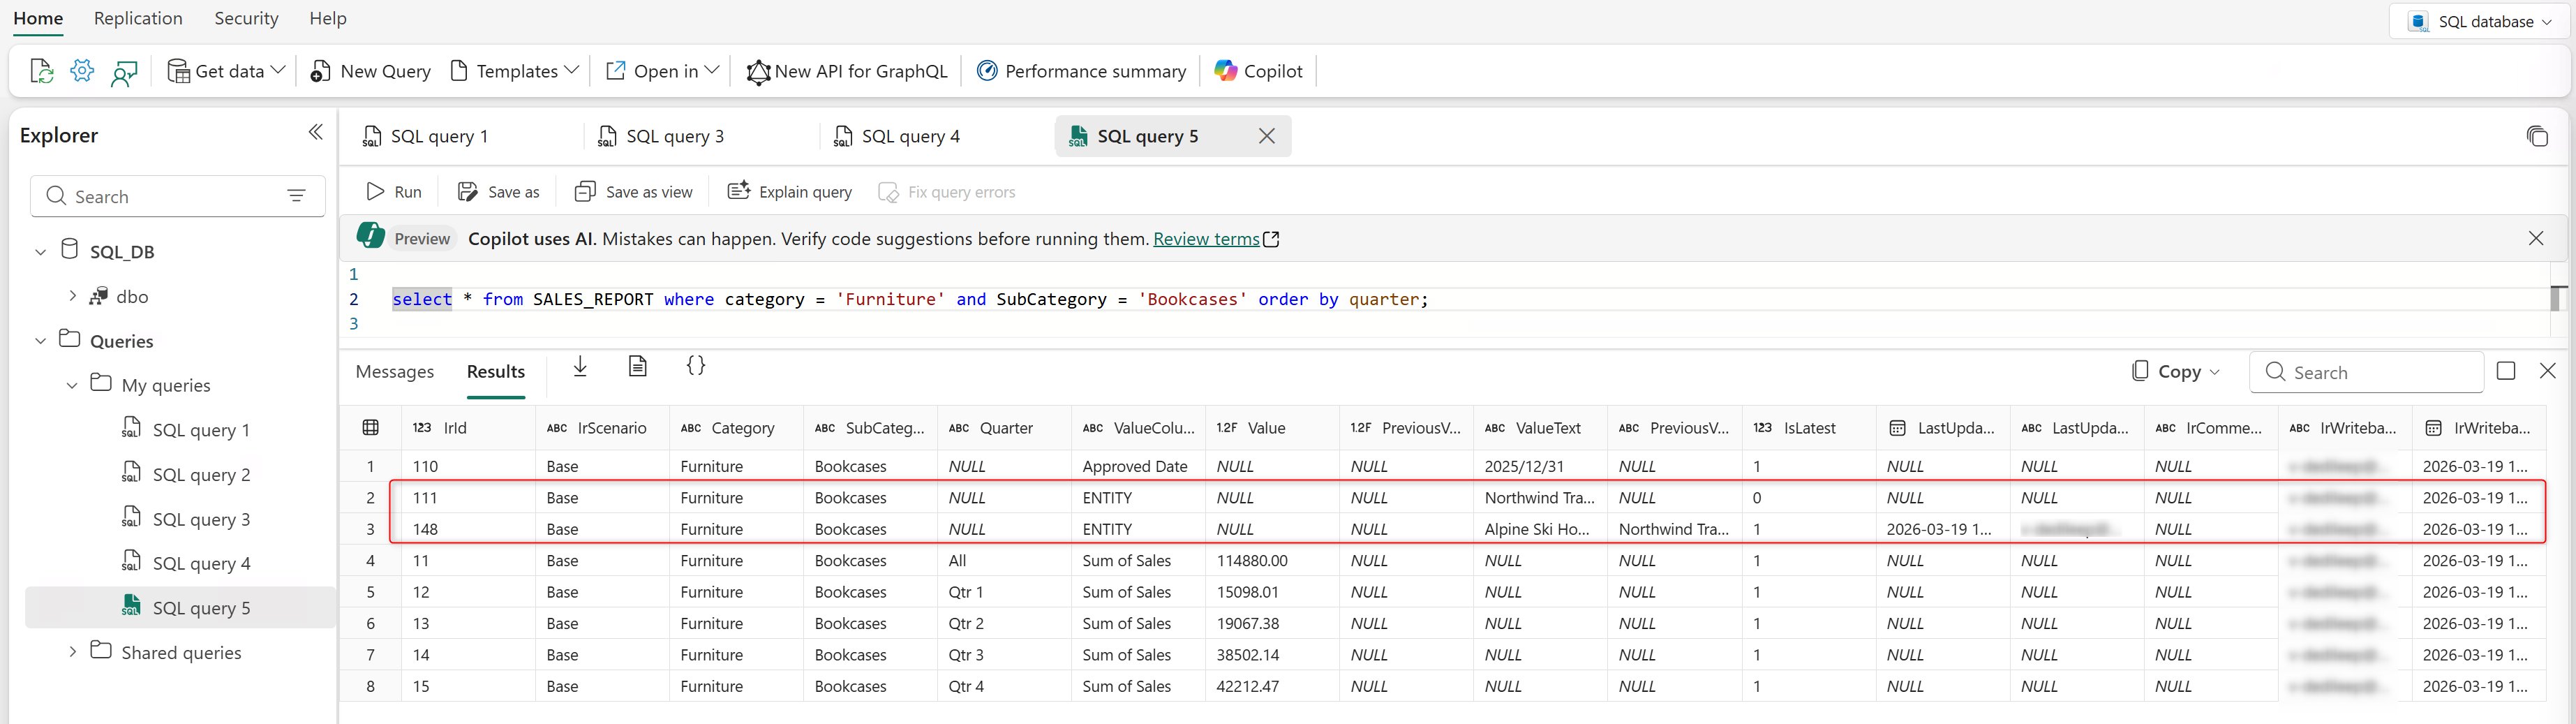
* **Long with changes**: Only the changed records are written back. When new data comes into the database, the old data is moved to a *PreviousValue* column, and the new data takes its place under the *Value* column. The IsLatest column is set to 1 to indicate the latest row.
The highlighted rows show how changed data is saved to the destination table.
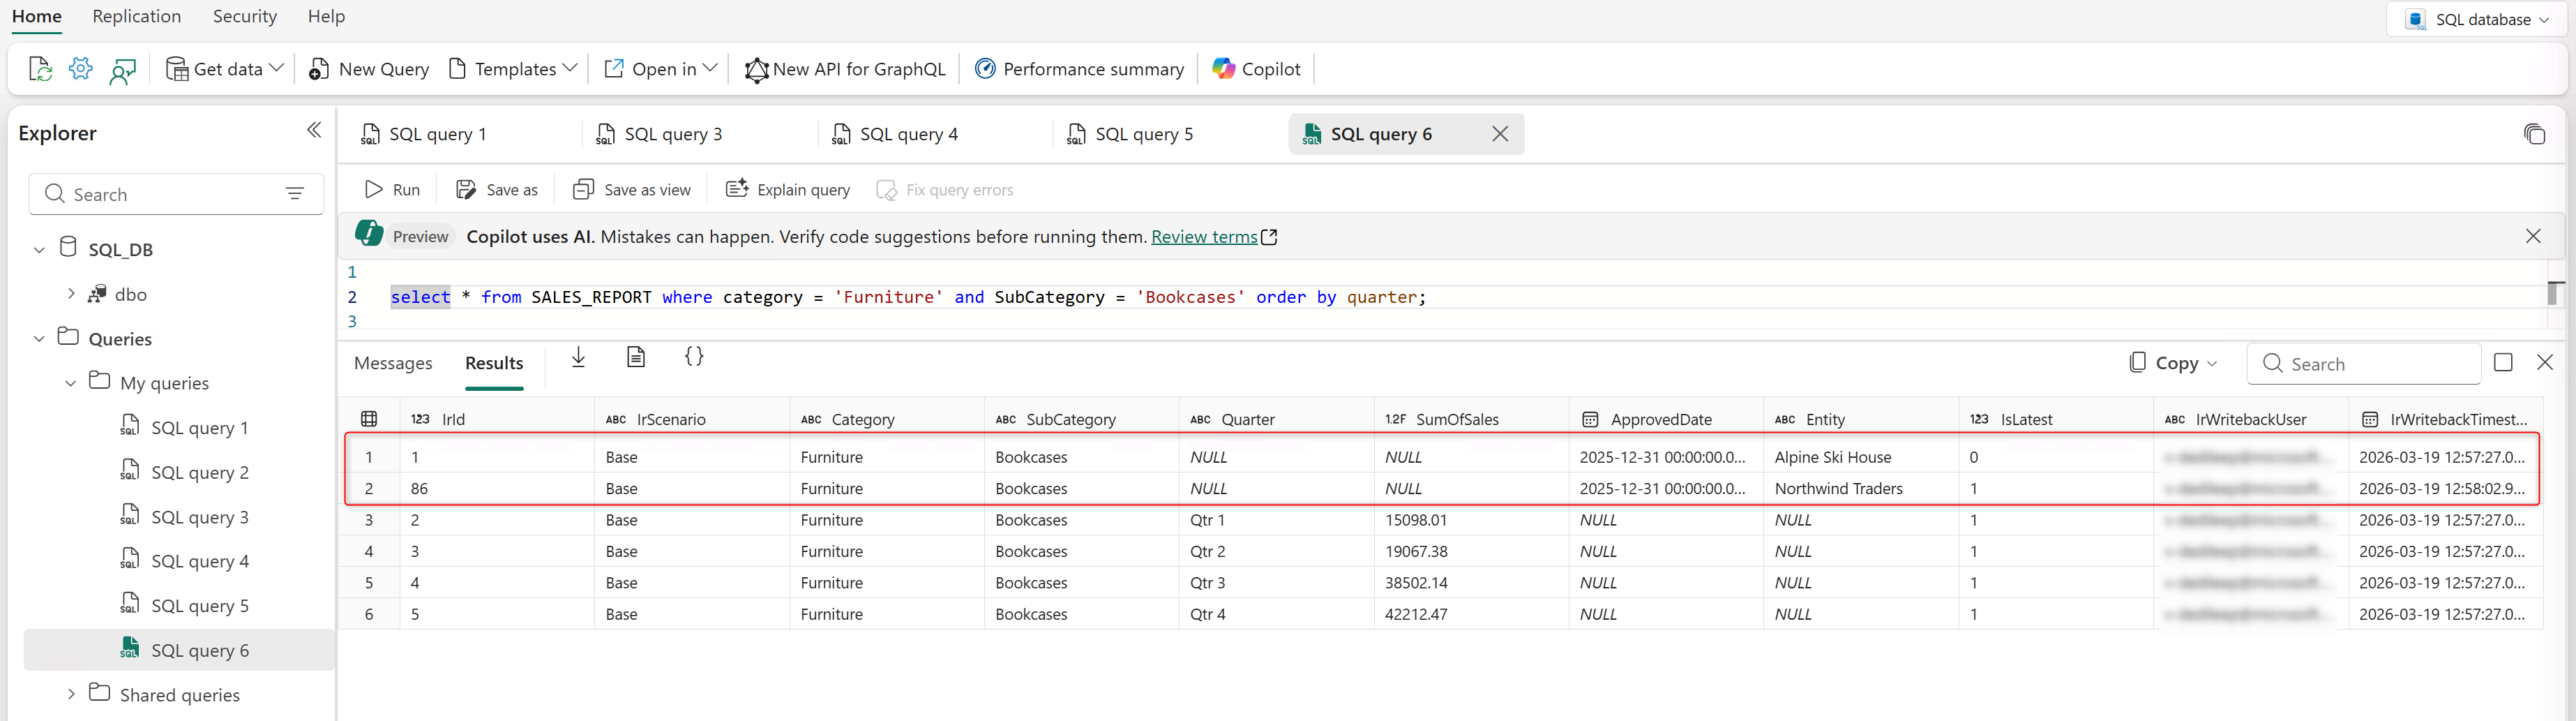
* **Wide with changes:** This writeback type also performs a delta writeback - only changed records are written back. In this format, each measure is stored as a separate column in the database. Change history is maintained, and the active record can be identified using the IsLatest column.
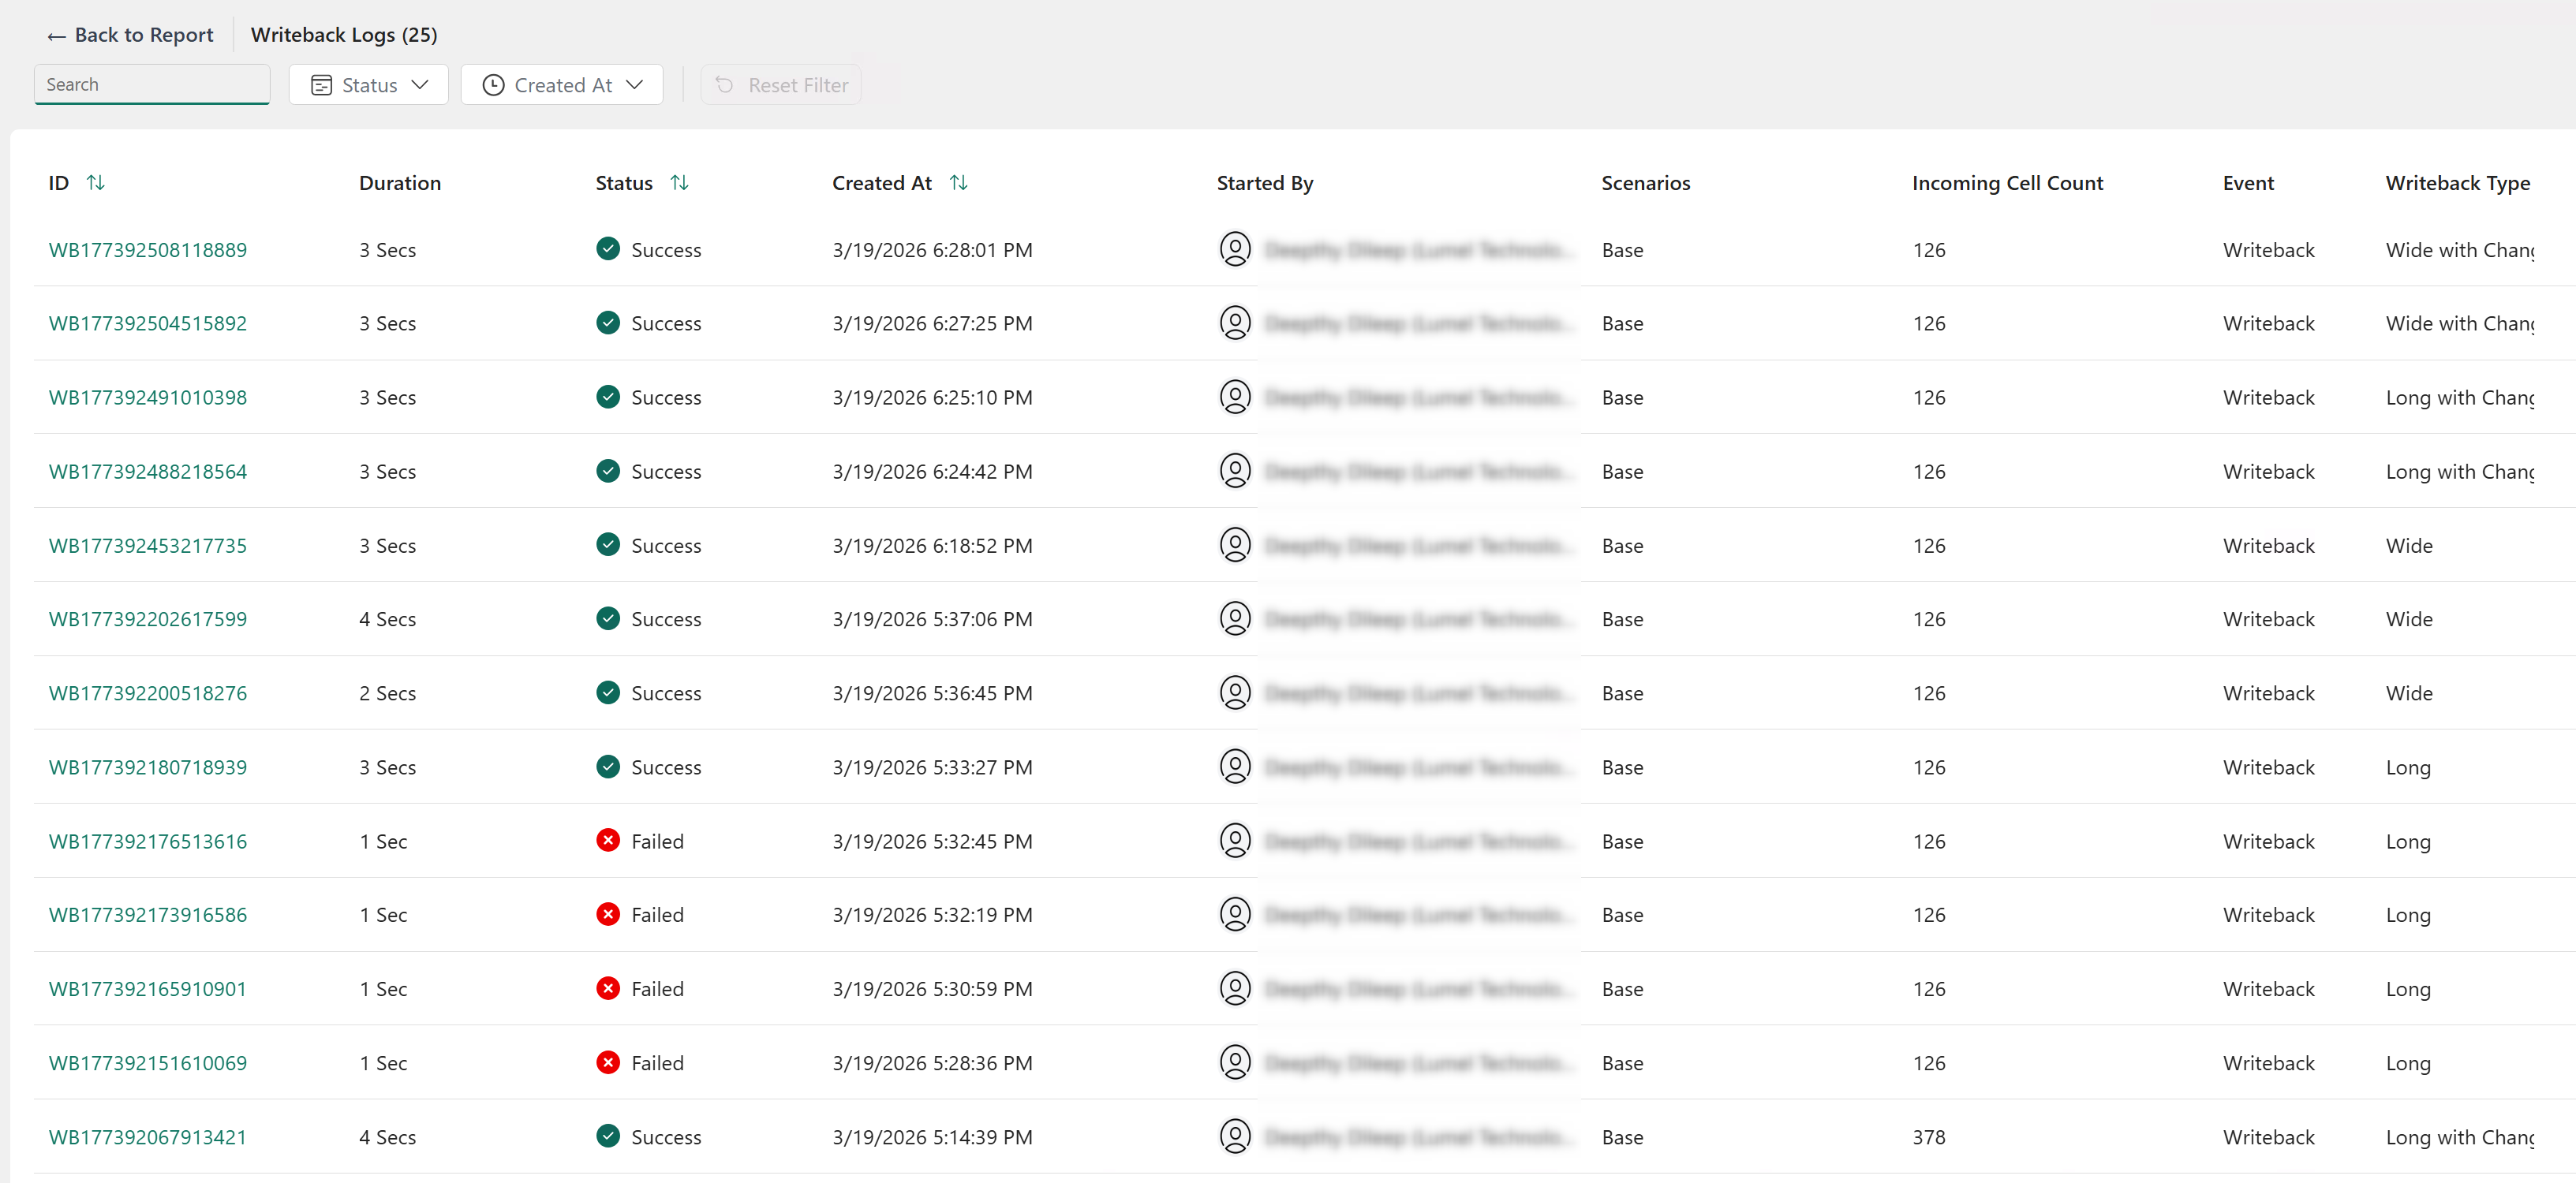
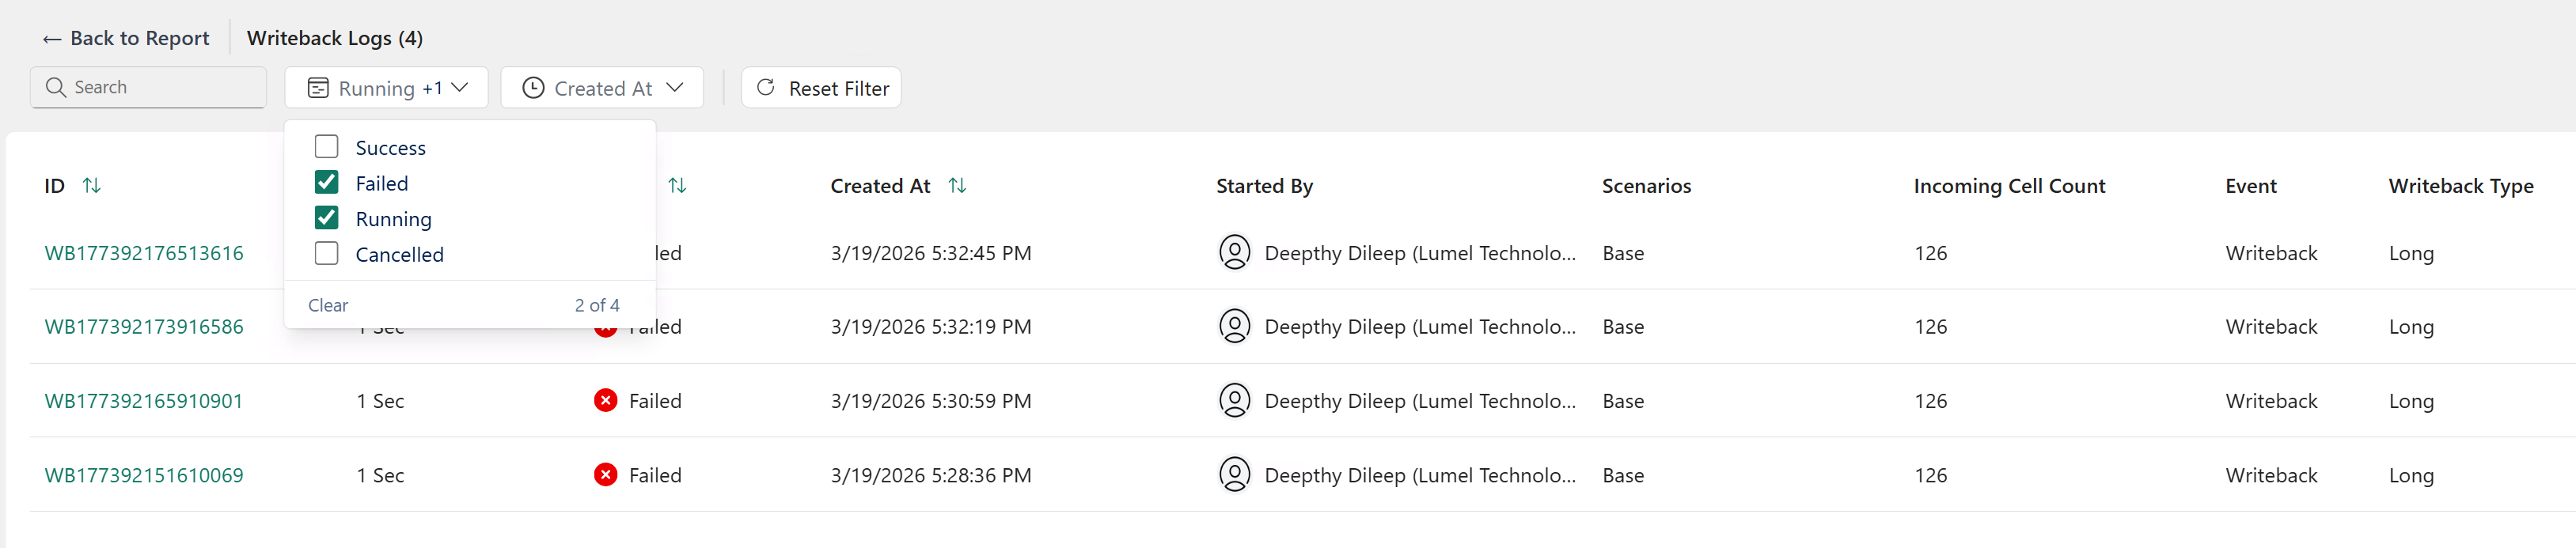
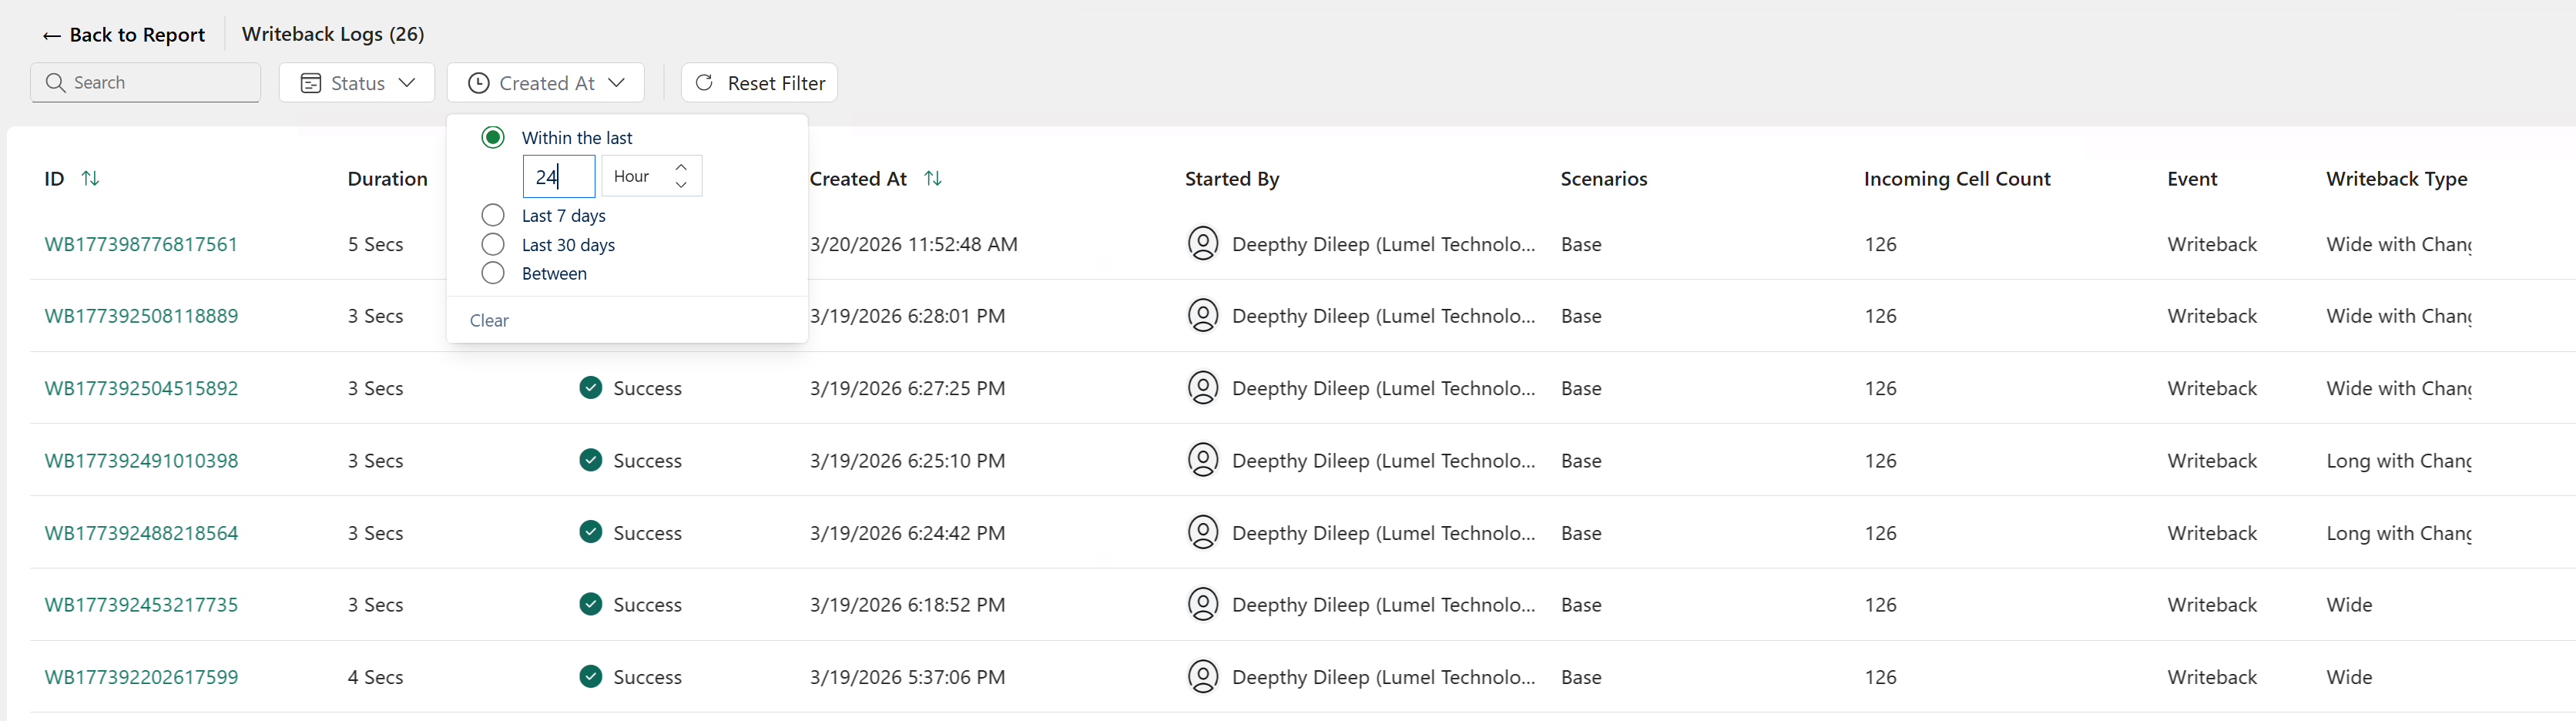
#### Monitor writeback history and logs
1. Click **View Logs** to view details such as writeback status, duration, type, and initiator.
2\. Click **Status** to filter writeback logs based on the run status.
3. Select **Created at** to filter writeback logs based on when they were triggered.
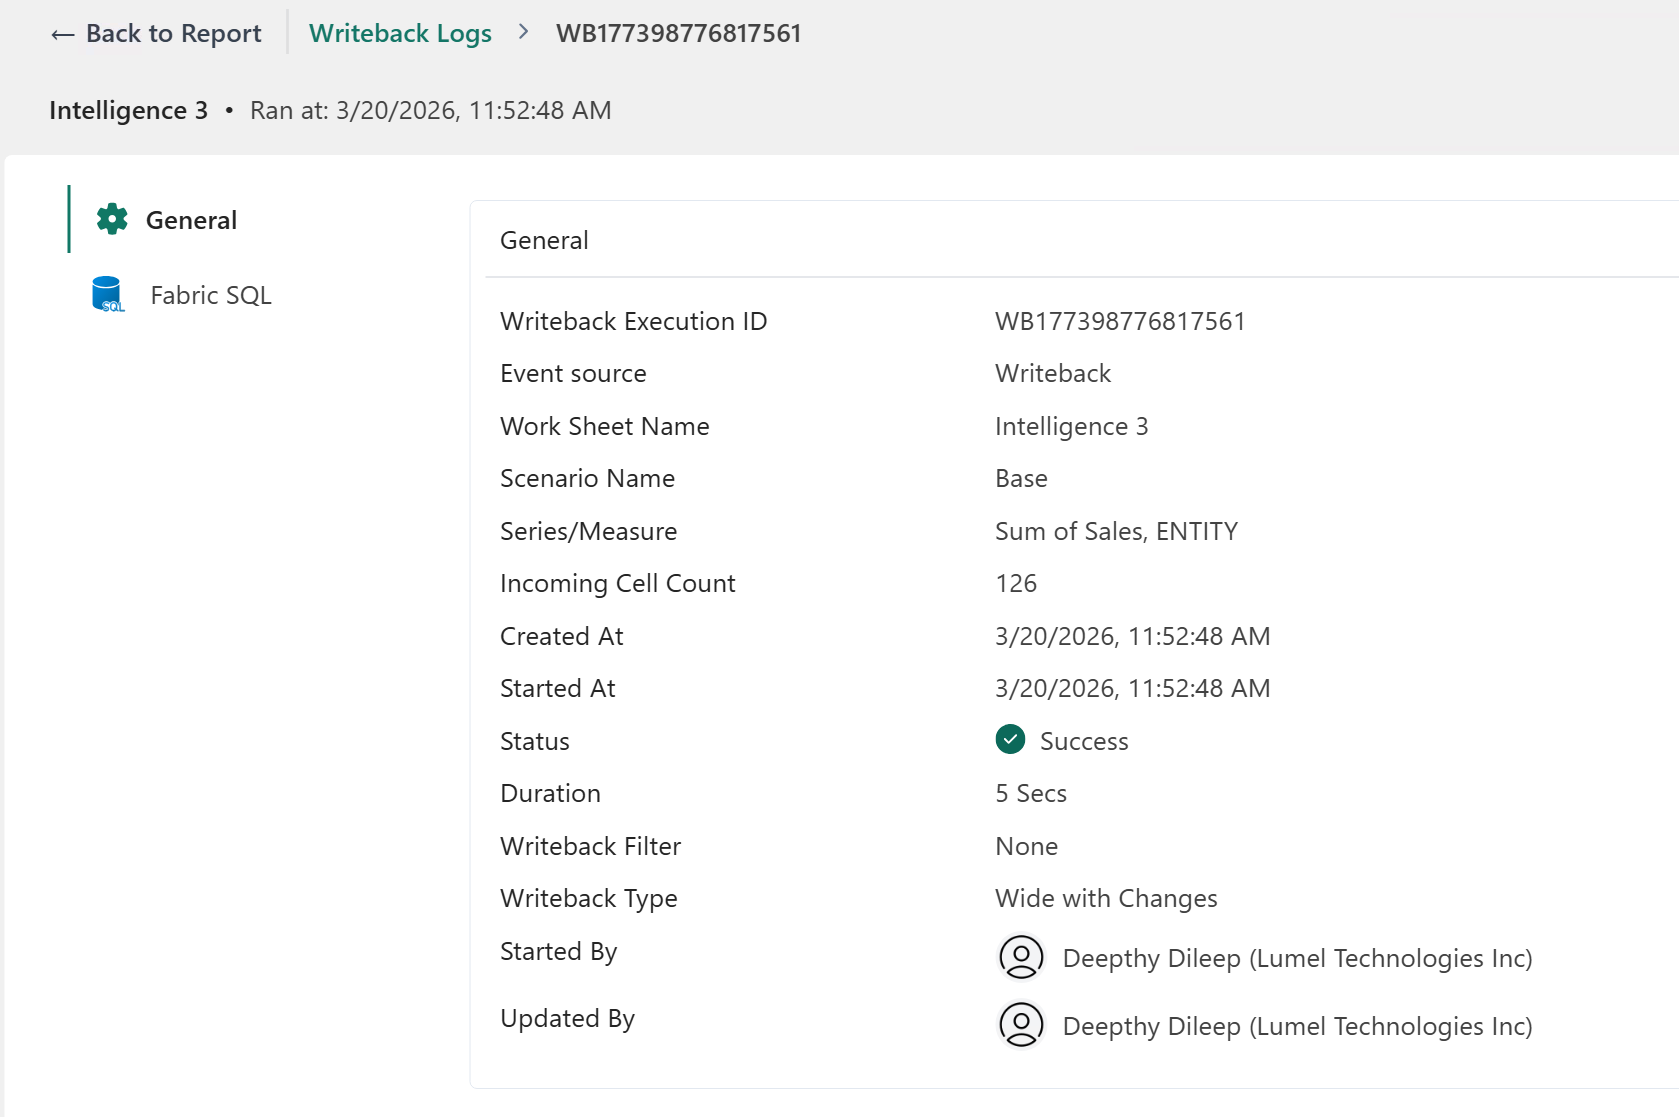
4. Click the writeback ID to view details about a specific run instance.
#### Create a date key field in the destination table
Reports are often used for high-level aggregations, such as revenue by year-month or quarter. In these cases, the **Add date key** feature adds a Date Key column to the destination table. Date values are populated by appending the first day of the corresponding period to the aggregated date.
For example, if the report is at the year–month level, the product writes **01-01-2023** for Jan 2023 or if the report is at quarter level, the date key field will contain the first date of each quarter.
1. Navigate to **Writeback Settings** > **General** tab > **Date Key Configuration** and click **Add Date Key.**
2. Select **Current year** or enter the year to be used in the date key.
3. Enter the column name for the date key field that will be added to the destination table.
4. As the report is at quarter level, the date key is added for each quarter.
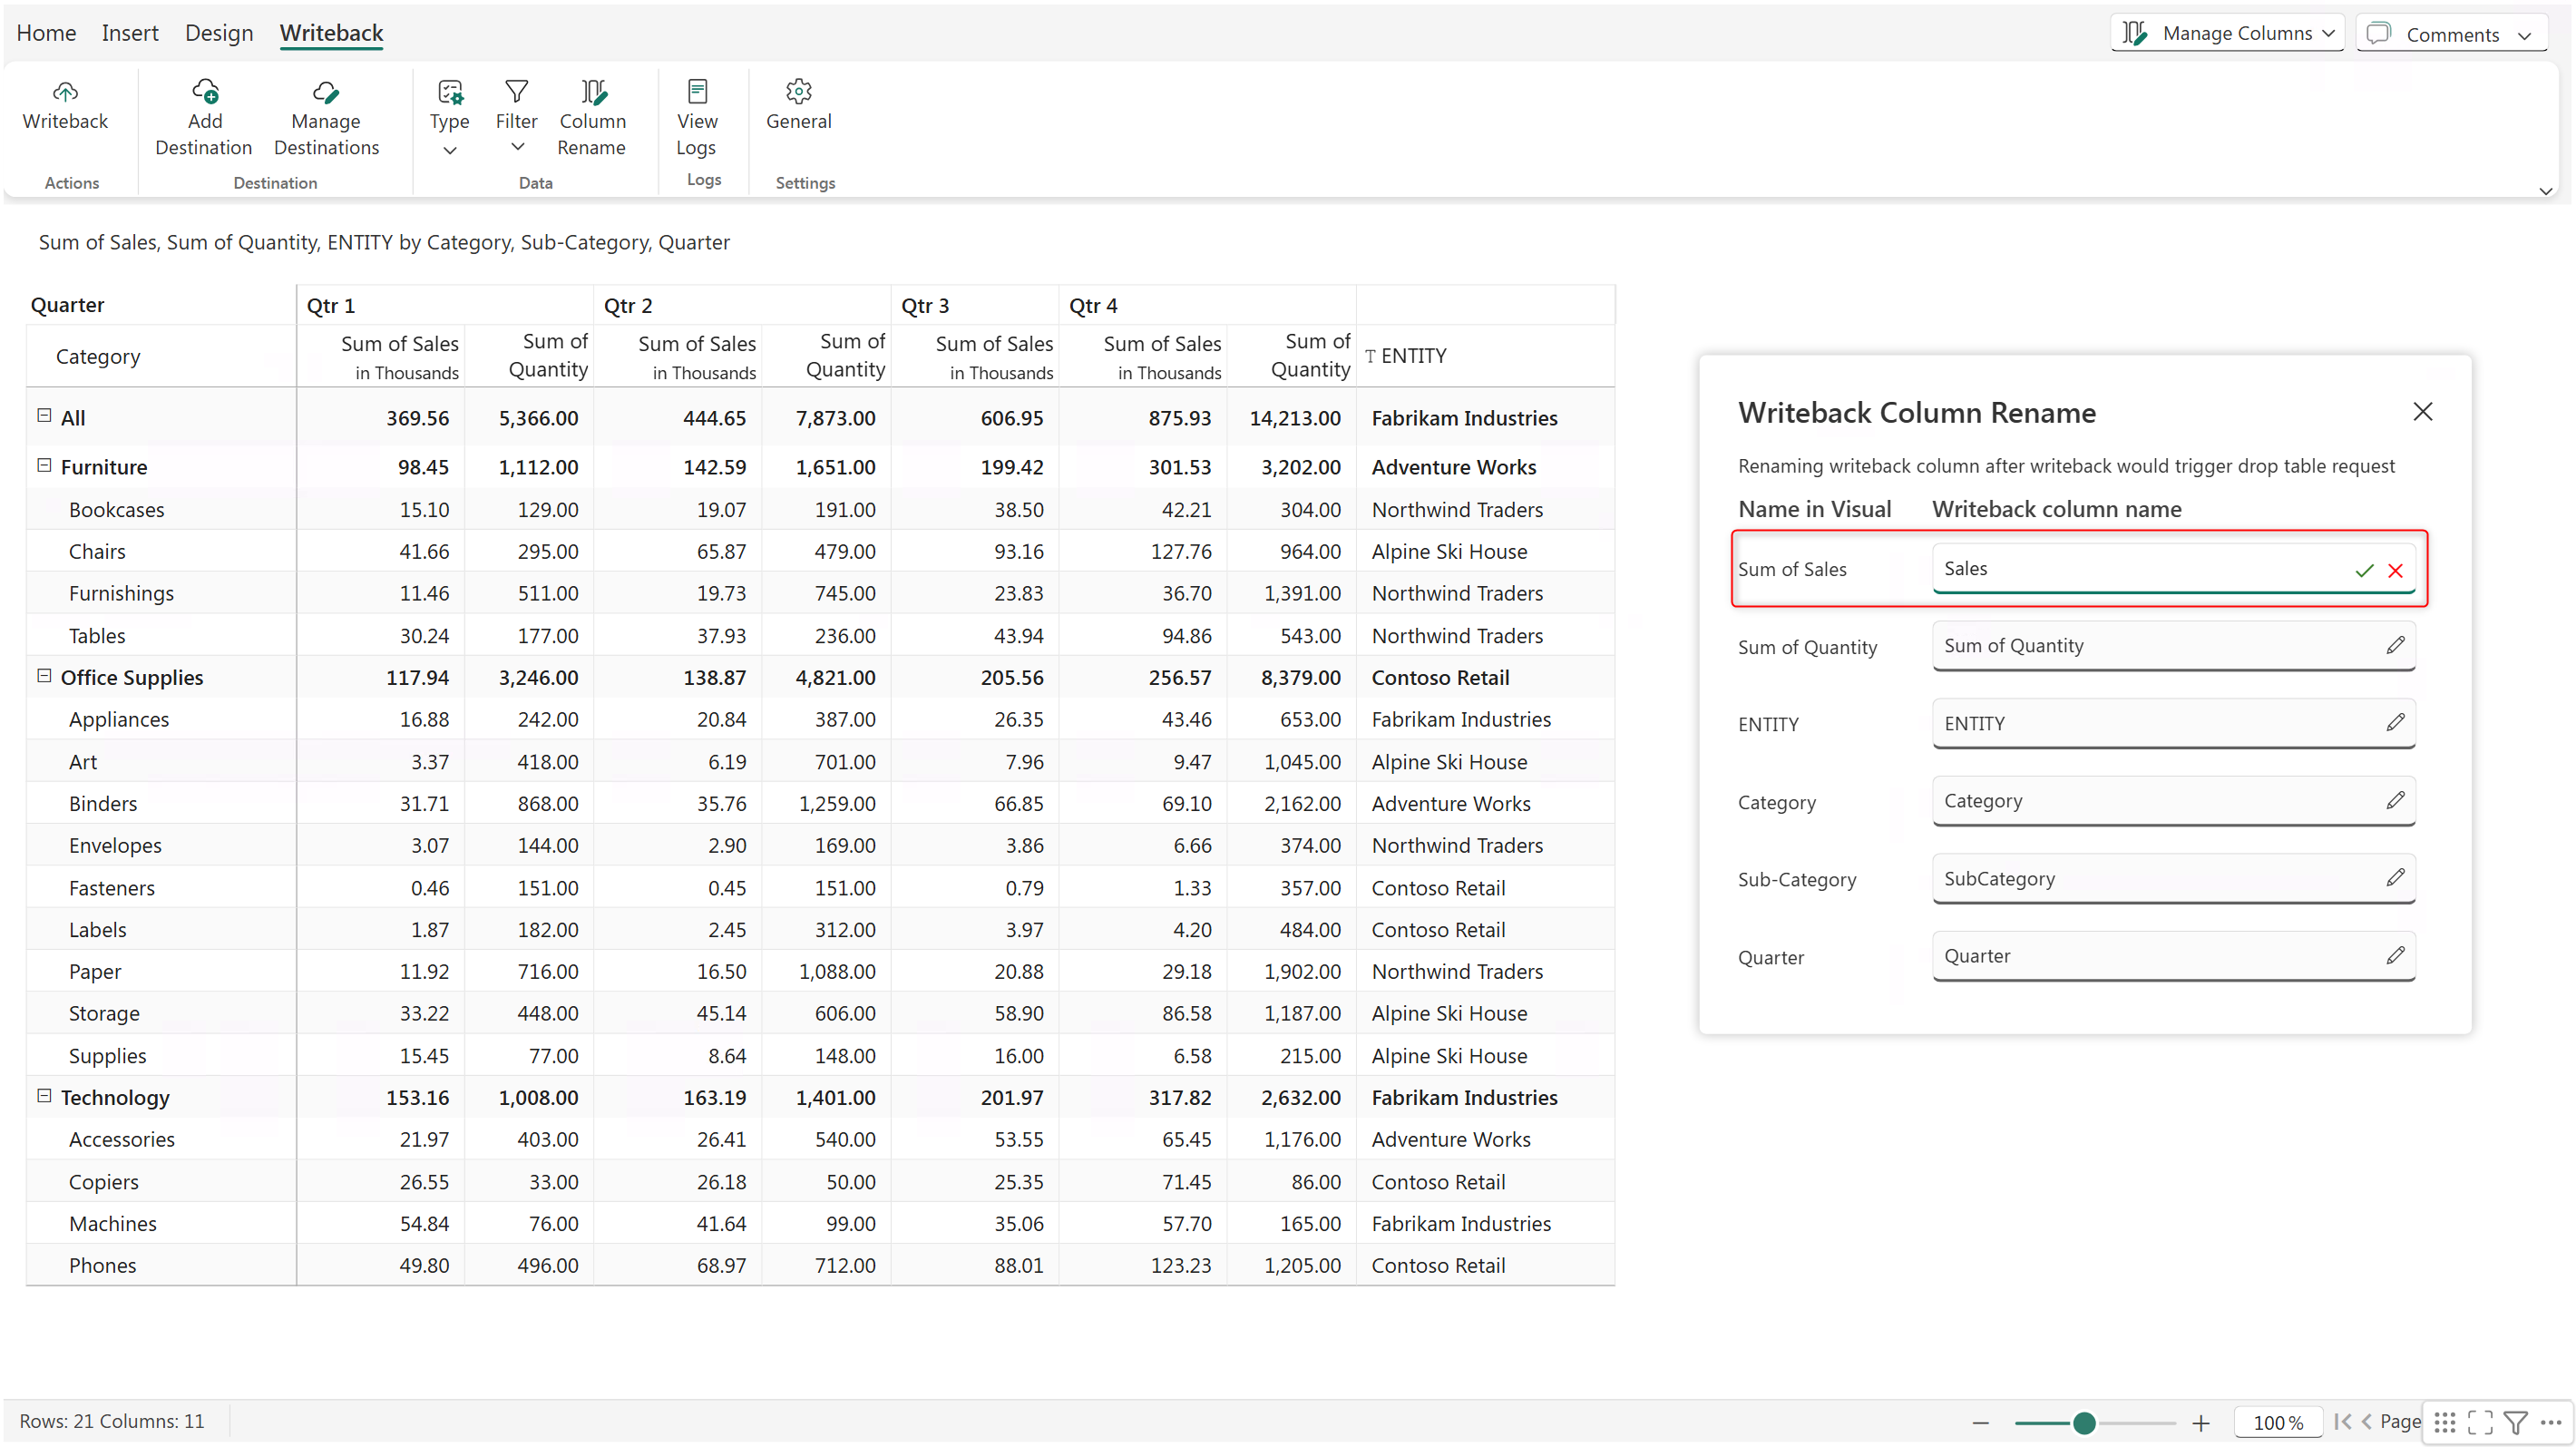
#### Configure columns in the destination
The column names in the writeback table can be different from the measure or dimension name in the data source. To rename a field:
1. Click **Column Rename.**
2. Click the edit icon and enter the new name.
3. Click the green tick symbol to apply the change.
{% hint style="info" %}
You can also change column names from **Writeback Settings** > **Advanced** > **Writeback column rename**.
{% endhint %}
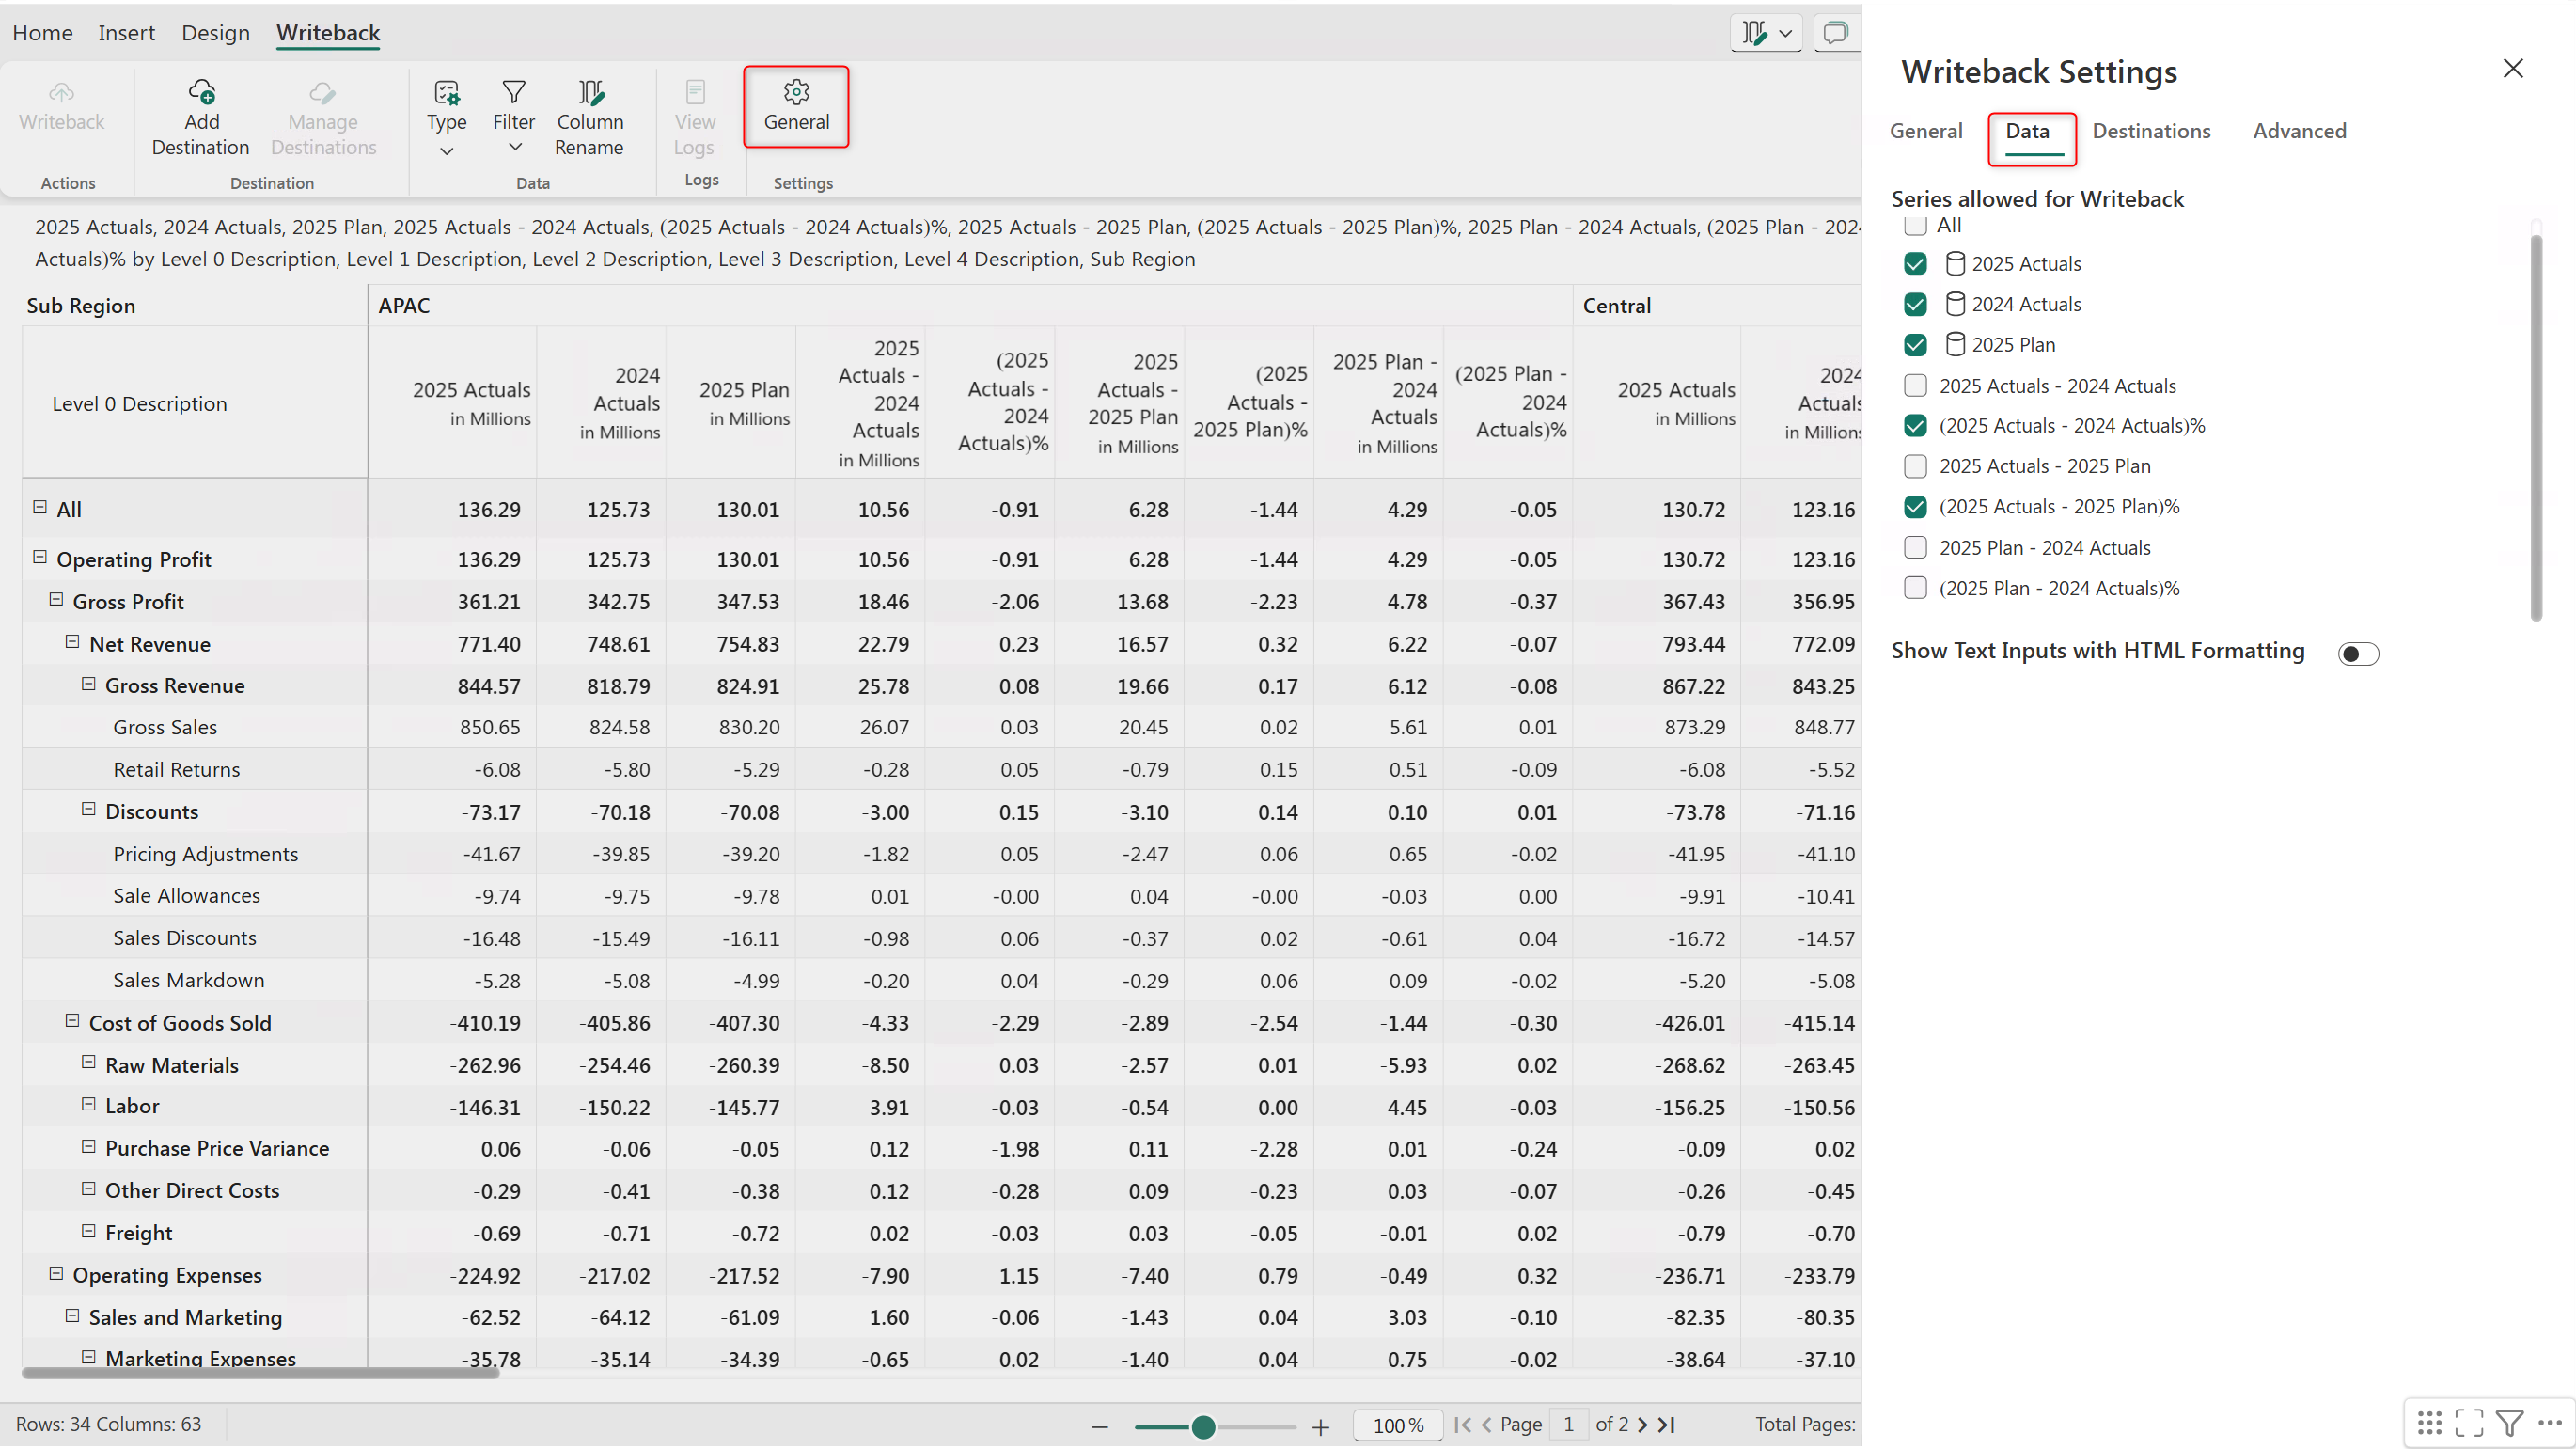
You can select the measures in your report that should be saved to the writeback table.
1. Open **Writeback Settings** > **Data** tab.
2. Select the measures to writeback.
---
# Agent Instructions: Querying This Documentation
If you need additional information that is not directly available in this page, you can query the documentation dynamically by asking a question.
Perform an HTTP GET request on the current page URL with the `ask` query parameter:
```
GET https://docs.fabricplan.com/intelligence-sheets/how-tos/retain-report-data-with-writeback.md?ask=
```
The question should be specific, self-contained, and written in natural language.
The response will contain a direct answer to the question and relevant excerpts and sources from the documentation.
Use this mechanism when the answer is not explicitly present in the current page, you need clarification or additional context, or you want to retrieve related documentation sections.